> For the complete documentation index, see [llms.txt](https://nx.docs.scailable.net/llms.txt). Markdown versions of documentation pages are available by appending `.md` to page URLs; this page is available as [Markdown](https://nx.docs.scailable.net/ai-manager-v6.1.4/ai-manager-plugin/configure-the-plugin/plugin-settings/input-masks-and-roi/inclusive-masks.md).
# Inclusive Masks
Limit inference to inside a drawn polygon.
Inclusive input masks ignore objects that are fully outside the drawn mask area. Create these masks on the video frame inside the AI Manager's Model Settings, in the **Input Masks** section.
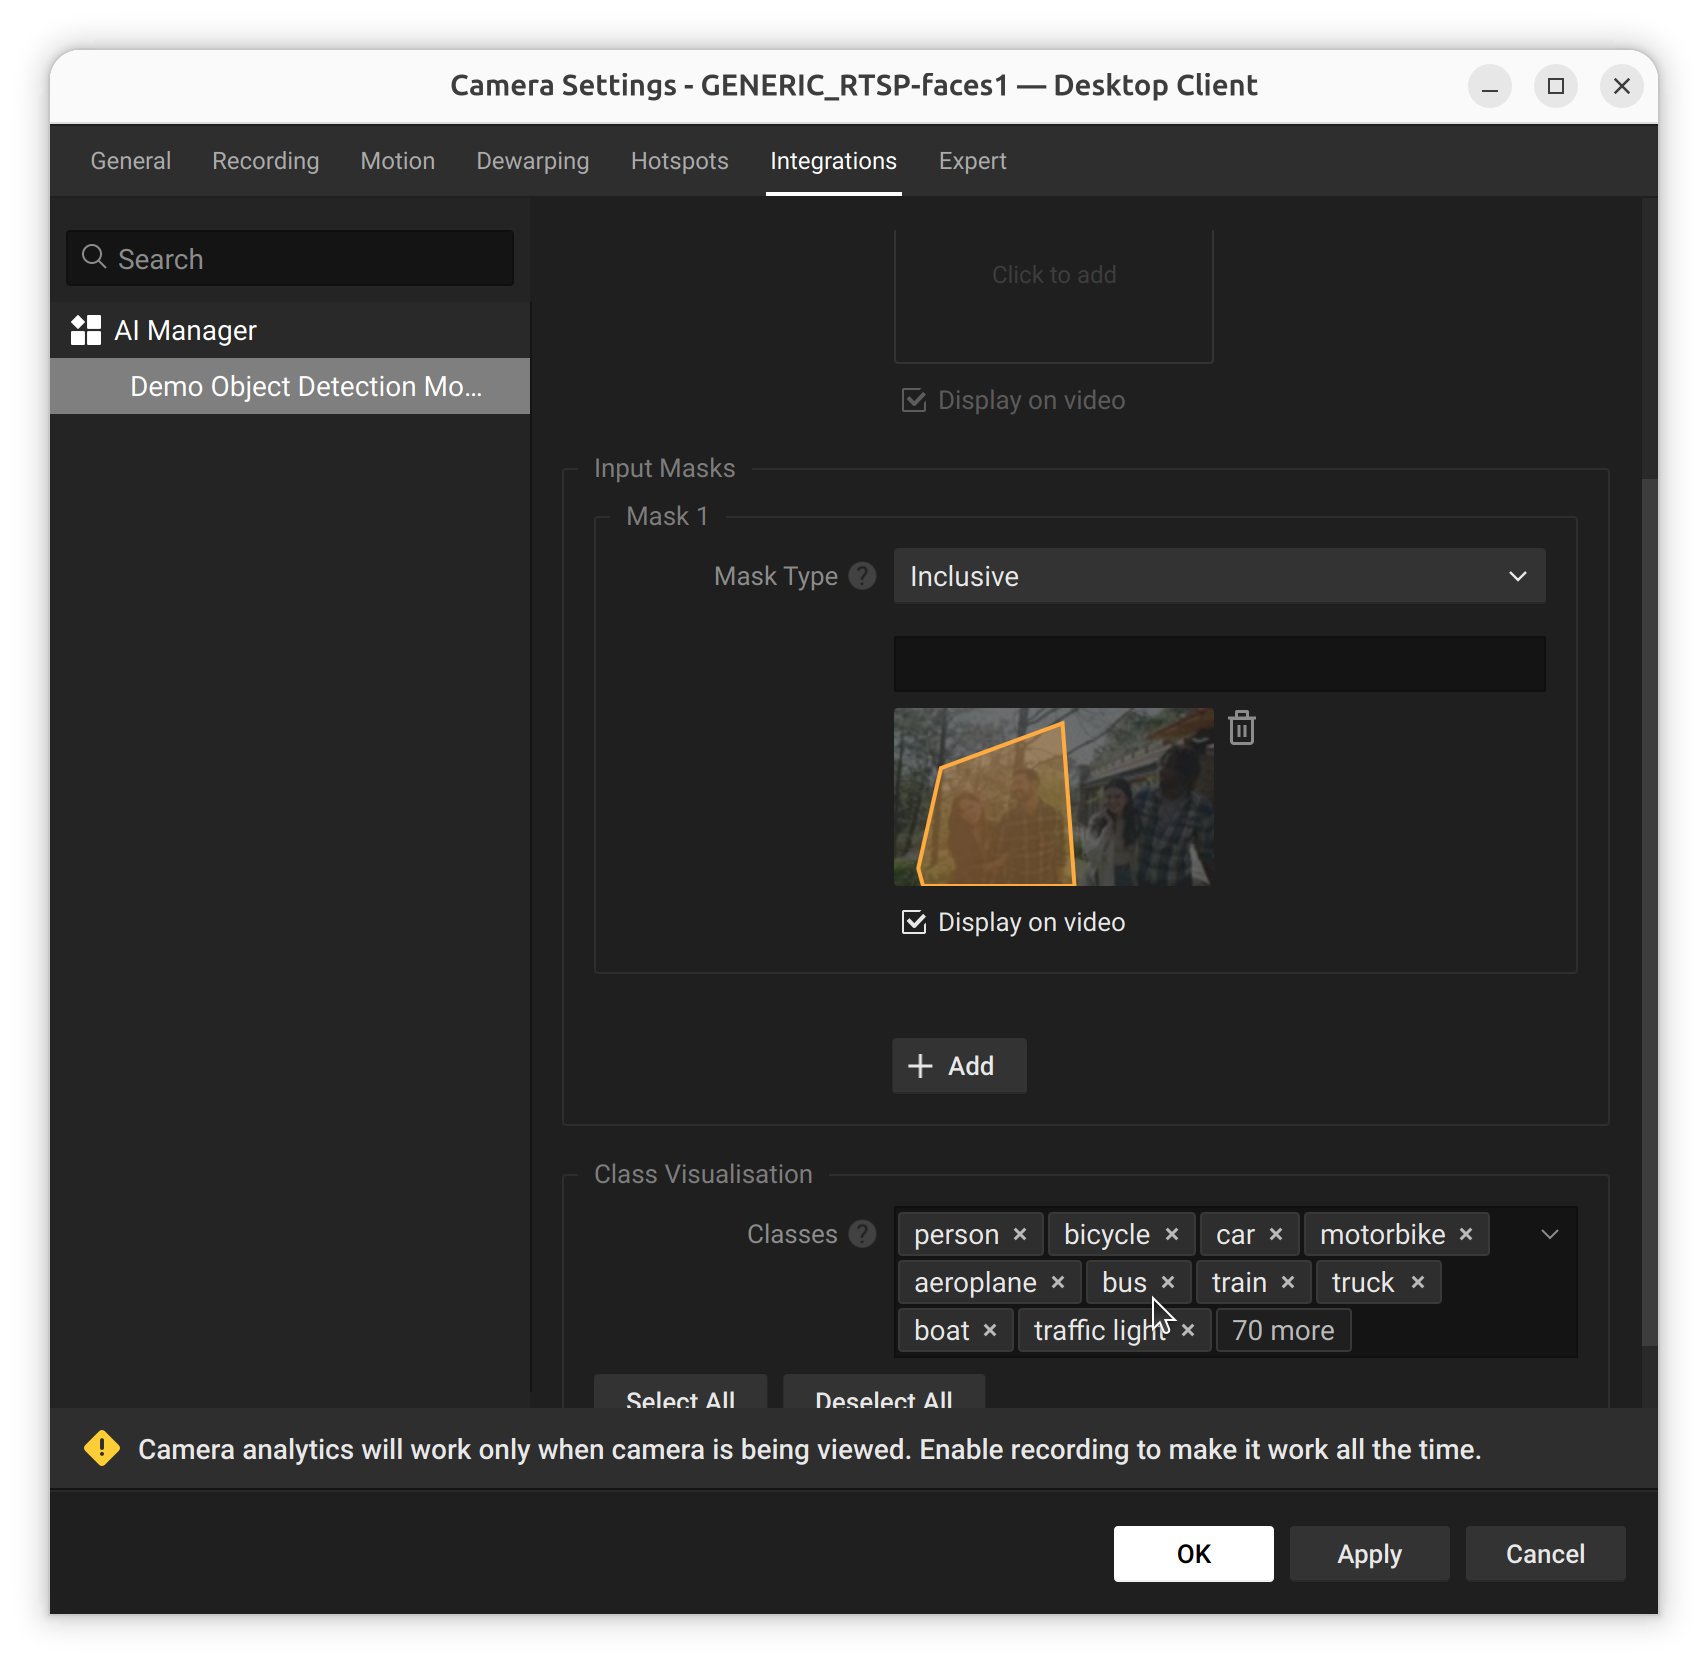
Select **Inclusive** from the **Mask Type** dropdown:
Choosing the Inclusive mask type
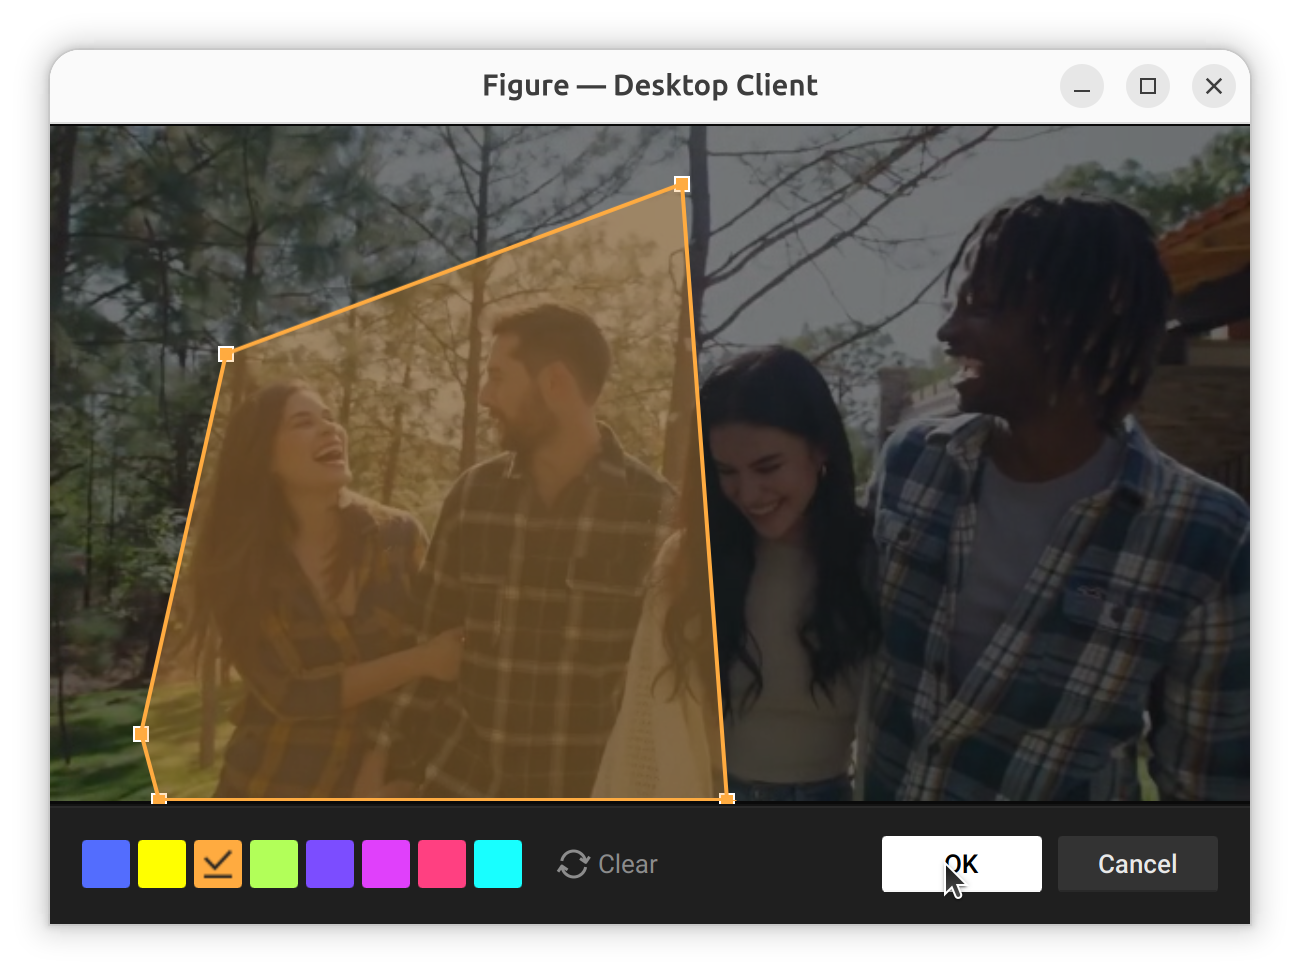
Click inside the mask's shape field to open the figure editor and draw the mask over the frame:
Drawing an inclusive mask shape in the figure editor
Click **OK** to save the shape. A thumbnail preview appears in the mask's shape field, with a **Display on video** checkbox to show the mask as an overlay in Live View. Add more masks with the **Add** button.
Input Masks setting with an inclusive input mask
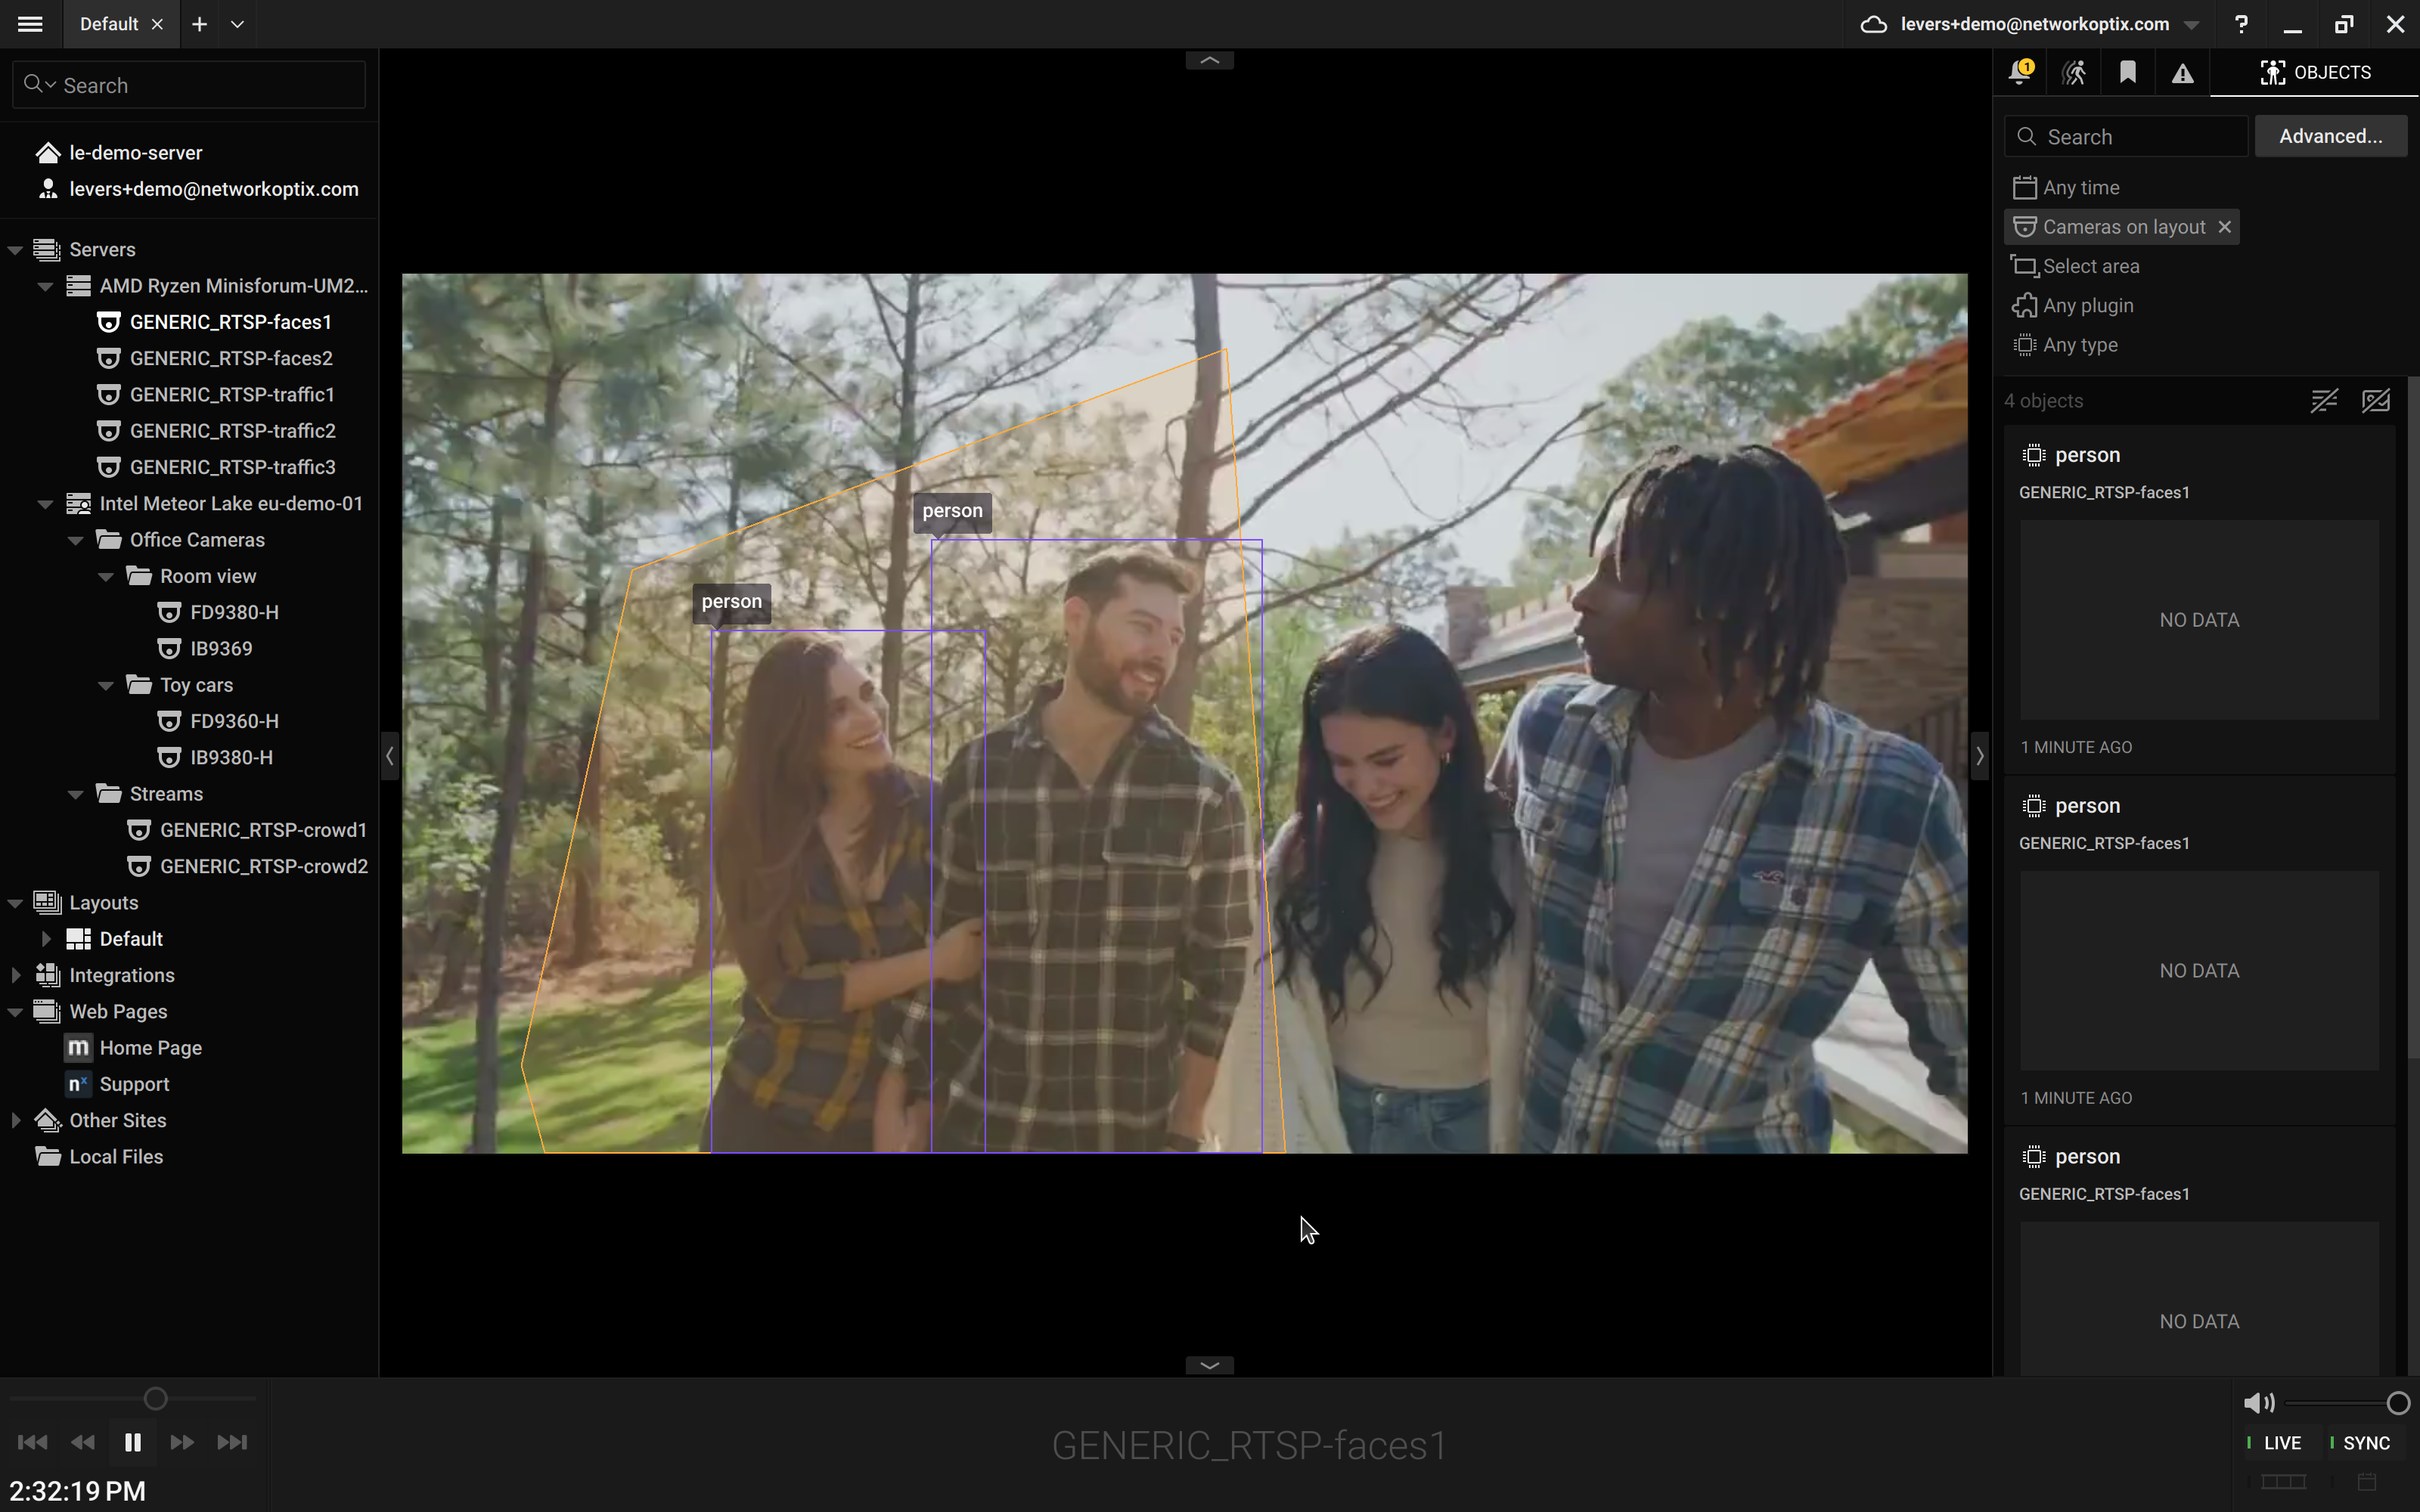
Confirm it in Live View: only detections inside the polygon are returned.
Inclusive mask overlay in Live View
In practice, results overlap the polygon borders slightly because the anchor location for a detected object is the middle of the bottom of the detection box.
{% hint style="info" %}
The center of the bottom of the bounding box is chosen for the anchor location because that is usually a good indication for where a person or object is standing on the ground. In a line-crossing scenario for example, this would make it easier to detect if a person crosses a certain line.
{% endhint %}
{% hint style="warning" %}
Using an input mask and a region of interest at the same time is not supported.
{% endhint %}
Click **Apply** for changes to take effect.