# Nx AI Manager plugin v4.x

The Nx AI Manager plugin is a tool that enables you to create and manage large-scale Edge AI solutions using [Network Optix Meta](https://meta.nxvms.com/) and the [Network Optix toolkit](https://www.networkoptix.com/developers/nx-toolkit). With this plugin, you can turn any compatible edge device, like a router, gateway, or IPC, into a "smart" device that can run advanced Artificial Intelligence (AI) and Machine Learning (ML) models on input data. Using AI and ML models, you can analyze a video stream and gain valuable insights, such as counting the number of cars passing by in the video stream.

The documentation here offers detailed instructions on setting up and configuring your edge AI solutions on Linux-based Nx Meta-supported edge hardware.

## The high-level Nx AI Manager plugin Architecture.

The Nx AI Manager plugin is the starting point for creating AI solutions within the Nx Meta framework. It can run within any Linux-based Nx Meta Server on any supported edge device (such as a smart camera, gateway, and PC) and allows you to configure the solution you want to create by selecting an AI model and configuring the device settings.&#x20;

The Nx AI Manager plugin currently mainly focuses on video input (a stream of images from a camera).

You can use the Nx Cloud Platform to remotely configure your solution and manage it at scale: i.e., if you have hundreds of devices, you can manage them in one go.&#x20;

The core "magic" that goes into creating edge AI solutions is the **AI model**; the model effectively transforms the input (images) to the desired output (a count of the number of people in front of the camera, an "OK" / "NG" output for product inspection, the license plate of a car in front of the camera, or whether or not a person in front of the camera is wearing a helmet). We have some of off-the-shelf models in our model library, allowing users to configure new solutions. However, if you are a data scientist, you can create models and upload them to our platform for your custom needs.

## Often used terms

Here, we provide a short list of terms that pop up repeatedly in these docs and are good to know:

* **The Nx AI Manager plugin**: Nx plugin that runs on an edge device, enabling you to configure your edge AI solution. Also just called **the plugin**.
* **The Nx AI Manager**: is the component of the Nx toolkit responsible for running AI models on AI accelerators.
* **Nx AI Manager Cloud:** The Nx cloud environment (found at <https://admin.sclbl.nxvms.com/>) allows you to \
  a) manage your devices and AI models and \
  b) add your models to your personal AI model collections.&#x20;
* **The Network Optix Toolkit**: All development tools, libraries, applications, and utilities that enable integration with Network Optix in your own application are available, including the AI Manager plugin and the [Nx Meta API](https://meta.nxvms.com/doc/developers/api-tool/main).
* **EVOS**: Network Optix's Enterprise Video Operating System, which includes all of Network Optix's open tools, enables developers to manage numerous video streams across multiple locations, deploy on-site AI models (at the edge), visualize videos, establish business rules, and deliver meaningful applications to end users.
* **Nx Meta:** The version of EVOS that is mostly used for development with the Nx AI Manager
* **An AI/ML model:** We use this term somewhat loosely for any model definition that describes the transformation of input (streams of images) to output (bounding boxes, license plate, "OK"/"NG" etc.). This model can be a Deep Neural Network (AI), a simple classification model (ML), or a traditional Vision pipeline. Ultimately, the logic running on the device does the "magic".&#x20;
* **Edge device:** We loosely refer to any device (camera, gateway, IPC, etc.) that runs the Nx AI manager.&#x20;


# Get started with the NX AI Manager plugin

{% hint style="info" %}
If you are getting error messages or not seeing any bounding boxes in your Nx Client, check out the [troubleshooting](/nx-ai-manager-v4.x/support-and-troubleshooting/troubleshooting) or the [how to get support](/nx-ai-manager-v4.x/support-and-troubleshooting/how-to-get-support) page.
{% endhint %}

## Requirements

{% hint style="info" %}
**Minimum Hardware Requirements**

* **x86\_64 Systems**: Intel i5 (10th Gen quad-core equivalent) or higher, with at least 4 GB of RAM\
  *Note: The processor must support AVX2 instructions. Check* [*here*](https://avx2checker.com/processors) *if you are in doubt.*
* **ARM Systems**: Raspberry Pi 4B equivalent or higher (AARCH64), with at least 4 GB of RAM

**OS Requirements**\
*Ubuntu Linux LTS version 20.04 or higher*\
\
**Software Requirements**\
*Nx Meta Client 6.0+                                      \[X86\_64, Arm32, Arm64]*\
*Nx Meta Server 6.0+                                      \[X86\_64, Arm32, Arm64]*
{% endhint %}

## Performance recommendations

{% hint style="info" %}
**Note:** The recommendations below are based on the assumption that the computer being used is dedicated to the Nx Meta Server application with the default settings and one Nx AI Plugin and is not used to run additional applications concurrently as this may impact the performance and stability of your System.
{% endhint %}

For example, a system with one camera, no saved layouts, few rules, and a single user on the minimal required hardware will work just fine. A System with multiple models, many cameras per server, dozens or hundreds of layouts, numerous rules, and hundreds of concurrently connected users would require much more substantial hardware.

### AI input resolution and secondary stream recommendation

Enabling the plugin for a camera secondary stream with a resolution of 512x512 or slightly higher, e.g. 720p, and a minimum frame rate of 6 frames per second (FPS) is recommended. Please refer to your camera's documentation to configure the camera's secondary stream accordingly.

While enabling the Nx AI Manager plugin for a camera primary stream is possible, that is not recommended. Running the plugin on a primary stream will require the Nx server to decode the high-resolution stream and scale it down. This primary stream decoding and scaling imposes a high load on the CPU and will significantly increase memory consumption. Running AI plugins on the primary stream will not improve the accuracy of the AI detections and will reduce the number of AI detections per second on your Nx server.

### AI detections per second

For accurate AI detection in security or surveillance use cases, a minimum of 6 detections per second is typically sufficient. By default, the Nx AI Manager plugin will perform as many detections per second as possible. The number of detections per second is limited by the number of frames per second in the video stream and the AI processing power of the device it runs on.

On an Intel i5 12th gen device with 8GB of memory, using 720p resolution secondary camera streams, the following performance can be expected:

Single 720p RTSP H264 secondary stream at 24 fps stream performance with Detection plugin:

* Up to 23.2 FPS for the large people detection model.

Four 720p RTSP H264 secondary streams at 24 fps stream performance with Detection plugin:

* Up to 9.0 FPS per stream for the large people detection model

These numbers can serve as a reference point for estimating the system's performance, but remember that the actual performance may vary based on specific configurations, hardware variations, and other factors.

### Hardware recommendations

When AI is enabled on one or multiple cameras of an Nx server, that server's CPU/GPU load and memory consumption will increase. This is because the Nx server needs to decode the camera streams for which AI is enabled, and the Nx AI Manager plugin requires resources to perform the AI inference.&#x20;

The following recommendations assume that the device is dedicated to Nx with Nx AI Manager plugin with default settings and that the AI plugin is enabled on 720p secondary camera streams.

#### Memory requirement

It is recommended to add 512 MB in RAM capacity per stream for which the AI plugin is enabled

#### CPU/GPU requirement

Up to 6 cameras with AI detection: Intel i5 10th gen or AMD Ryzen 5 3000 Quad-Core.

Up to 12 cameras with AI detection: Intel i7 12th gen or AMD Ryzen 7 3000 Quad-Core.

#### Other hardware

For other hardware architectures such as ARM, Nvidia Jetson Orin, Hailo, etc, please contact <info@networkoptix.com>

## Get started with Network Optix and the Nx AI Manager plugin

To get started with Nx and the Nx AI Manager plugin, follow the steps outlined below:

{% stepper %}
{% step %}

### [Install a Network Optix client and server](/nx-ai-manager-v4.x/nx-ai-manager/1.-install-network-optix)&#x20;

{% endstep %}

{% step %}

### [Install the Nx AI Plugin](/nx-ai-manager-v4.x/nx-ai-manager/2.-install-nx-ai-manager-plugin)

{% endstep %}

{% step %}

### [Configure the Nx AI Manager Plugin](/nx-ai-manager-v4.x/nx-ai-manager/3.-configure-the-nx-ai-manager-plugin)

{% endstep %}

{% step %}

### [Other Network Optix Plugin Settings](/nx-ai-manager-v4.x/nx-ai-manager/4.-other-network-optix-plugin-settings)

{% endstep %}

{% step %}

### [Manual Plugin Installation](/nx-ai-manager-v4.x/nx-ai-manager/5.-manual-plugin-installation)

{% endstep %}

{% step %}

### [Advanced Configuration](/nx-ai-manager-v4.x/nx-ai-manager/7.-advanced-configuration)

{% endstep %}

{% step %}

### [Troubleshooting](/nx-ai-manager-v4.x/support-and-troubleshooting/troubleshooting)

{% endstep %}
{% endstepper %}


# 1. Install Network Optix

## Getting Started with Network Optix

### Create a Network Optix (Nx) account

Sign up for a Free account at the Nx Meta Developer Portal.

*\* If you have an existing cloud account for a Powered-by-Nx solution, you can log in with your existing cloud credentials.*

* Head to [meta.nxvms.com](https://meta.nxvms.com/)
* Click on [Create Account](https://meta.nxvms.com/register)
* Verify your email address and sign in.

### Download and install a Nx Meta client.&#x20;

A basic Nx Meta platform comprises one or more Nx Meta servers administered through an Nx Meta Meta client. To get started with the Nx AI Manager, we advise you to install a client first on your favorite desktop environment.&#x20;

{% hint style="warning" %}
Ensure you download Nx Meta version 6.0 or later to be able to use the Nx AI Plugin.
{% endhint %}

If the computer you want to run the client fits the above requirements, you can download and install a Nx Meta client by following the steps below:

* [Download an Nx Meta client by going to this page](https://meta.nxvms.com/download/releases/linux), then continue with the next step.
* A suggested operating system will automatically appear.
* Select your target OS if you want to install the client on an OS different from the autoselected one.
* Download the client package that is most relevant to you.
* Run the installer and follow the installation process.

### Download and install the Nx Meta server on an Ubuntu server

If your Ubuntu device conforms to our requirements, download and set up your first Nx Meta X64 Ubuntu **server** by following the steps below:

* From a terminal or console window, run the following commands to make sure all dependent packages are installed:<br>

  ```
  sudo apt update
  sudo apt upgrade -y
  sudo apt-get install -y libgomp1 gdebi wget
  ```

* Download the [x64 Ubuntu Nx Meta server](https://meta.nxvms.com/download/linux) installer (metavms-server-6.x.x.x-linux\_x64.deb). \
  OR \
  Download the [ARM64 Ubuntu Nx Meta](https://meta.nxvms.com/download/releases/arm) server installer (metavms-server-x.x.x.x-linux\_arm64.deb).
  * You can use wget or curl in an SSH session to download the installer files directly to the server:<br>

    ```sh
    # For example the the 6.0.5.41290 version for x64 architectures
    wget https://updates.networkoptix.com/metavms/41290/linux/metavms-server-6.0.5.41290-linux_x64.deb

    # Or the 6.0.5.41290 version for ARM64 architectures
    wget https://updates.networkoptix.com/metavms/41290/arm/metavms-server-6.0.5.41290-linux_arm64.deb
    ```

* Go to the directory where you downloaded the Nx Meta server package and install it:

  ```
  sudo apt install -y ./metavms-server*.deb
  ```

* Next, set up the server by accessing the NX Meta Server web interface at port `:7001` for instance, at `https://localhost:7001/` or use the IP address for localhost `https://127.0.0.1:7001/`  or use your external IP address with the same port. \
  \
  The web interface will have two buttons. Click the button "Setup New System", enter a System Name, click next. Choose a password. Click next again.\
  \
  ![](/files/HHlxxsjGLQU4bKQMEtf1)

* You can now connect your system to the Nx Cloud - or choose to do so later when you have added your system to the Nx Meta Client. If you do it now, just click "connect to cloud" in the Web Admin interface, and follow the prompts:

<figure><img src="/files/Sj3goAJPkl2JxBFZetPO" alt=""><figcaption></figcaption></figure>

* Next step will be to connect your Nx Meta system to be added to your Nx Meta client.&#x20;

### Connect to your Nx Meta server with your Nx Meta client

Now that you have an Nx Meta **System with one Server** running, go to the desktop machine where you installed your Nx Meta **client** and use the launcher icon to start the client.

<div align="left"><figure><img src="/files/iooQzKM7N6GpbMWZAATC" alt="" width="242"><figcaption></figcaption></figure></div>

When the client application has started, you can add the Meta Server installed in the previous step by clicking the "Connect to Server" rectangular button. Or your server has already been discovered, and you can click on the rectangular button with the detected server.&#x20;

In either case, enter the IP address, admin name (default "admin"), and the password you set for the admin user and click next.

<div align="left"><figure><img src="/files/mdrqaBKTxCObYzWcceOr" alt="" width="375"><figcaption></figcaption></figure></div>

Your Nx Meta server and Nx Meta client are now connected

### Connect your Nx Meta system with your Nx Cloud account

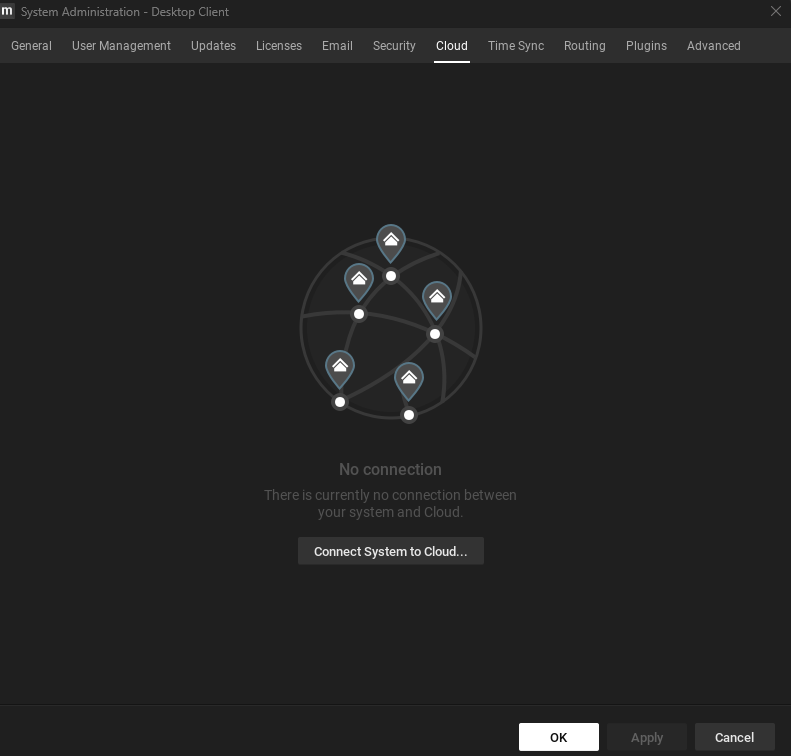
While the Nx Server and Nx Client can be used offline, to use the NXAI Plugin, your server needs to be connected to an Nx Cloud account. You can do this through the Nx Client, if you have not done so when  setting up the server at port :7001 earlier.

If you want to connect your system now, go to System Administration by right-clicking your system in the left-hand pane of the Nx Client and selecting 'System Administration', then navigate to the 'Cloud' tab.

<figure><img src="/files/gbB90Z0DjCVXJx6hix0G" alt=""><figcaption><p>System Administration Cloud Tab</p></figcaption></figure>

Here you can connect your system to your cloud account, which should enable you to use the NXAI Plugin.

### Registering an Nx Meta server through the Nx Meta client

Next, register the server by going to System Administration:

<div align="left"><figure><img src="/files/JSDqhsX5F301eRfelyvQ" alt="" width="375"><figcaption></figcaption></figure></div>

.. and then to licenses:

<div align="left"><figure><img src="/files/PNUeTVrlZadY1AsiMyZc" alt="" width="375"><figcaption></figcaption></figure></div>

Here, you can add your trial or full license.


# 2. Install Nx AI Manager Plugin

This page provides instructions on how to install the NXAI Plugin

After your installation of the Nx Mediaserver which currently does not come packaged with the Nx AI Plugin, you can always install it yourself.

{% hint style="info" %}
Installing the Nx AI Plugin will restart the Nx Mediaserver. This should take a couple of seconds, and the client will reconnect automatically.
{% endhint %}

Open a terminal window on the device where you installed the Nx Mediaserver and execute the following command to install the Nx AI Manager plugin:

```bash
sudo bash -c "$(wget -q -O - https://artifactory.nxvms.dev/artifactory/nxai_open/NXAIPlugin/install.sh)"
```

This script will download the latest plugin and place it in the appropriate plugin folder.&#x20;

### Re-installation or Updates

If you want to update or re-install the Nx AI Plugin you can safely re-run the same command.&#x20;

The old version of the plugin will be removed by the install script before the new version is installed.

Your settings will be stored and reused. You will still need to check the settings, because in some cases new options are available that require some changes. An example might be a new runtime that is available for your hardware.


# 3. Configure the Nx AI Manager plugin

This page gives instructions on how to configure basic operations of the Nx AI Manager plugin

Configure Nx Meta

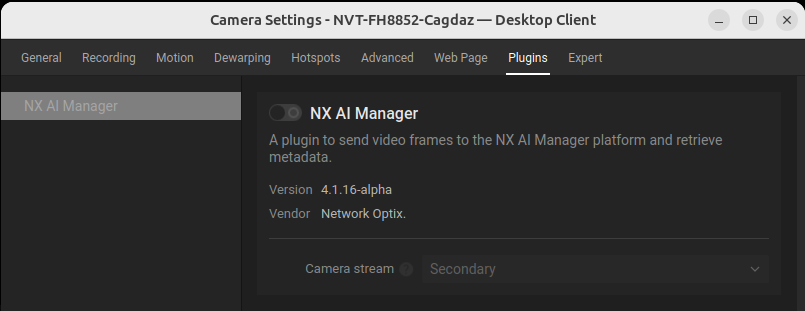
After successful installation of Nx Server and Client, a 'Plugins' tab should be visible when opening a camera's settings:

<figure><img src="/files/QA1zUH5cka5YwYrqA6No" alt=""><figcaption><p>Camera Settings Navigation</p></figcaption></figure>

The plugin can be enabled/disabled per device on the Plugins tab:

<figure><img src="/files/TtkjZaJHszChAZmJGI30" alt="" width="375"><figcaption><p>Nx AI Manager Plugin Tab</p></figcaption></figure>

Once the plugin is activated you can change the settings and choose a different model than the default.

&#x20;

<figure><img src="/files/A0ivX8GBGsuIOYmrRSGw" alt="" width="375"><figcaption><p>The Nx Plugin Settings Tab with the Manage Device button</p></figcaption></figure>

To change a model, click the "Manage Device" button, which will open a Device Client popup with the Nx AI Manager open at the device details page where the model library can be used to select another model.

<figure><img src="/files/YW4Ihg1MiA9n2ZW6Mkpu" alt=""><figcaption><p>The Nx Client Popup where models can be managed for a device.</p></figcaption></figure>

For specific settings see the [next section about the configuration](/nx-ai-manager-v4.x/nx-ai-manager/3.-configure-the-nx-ai-manager-plugin/model-settings).

#### Visualizing Bounding Boxes

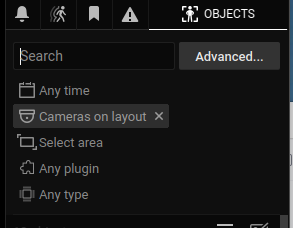
If a model that outputs compatible bounding boxes is selected and running the Edge AI Manager, bounding boxes can be visualized by visiting the *Objects* tab on the right pane in the Nx Meta Client:

<figure><img src="/files/N9SXd5tbY6HomX9Njron" alt=""><figcaption><p>Visible Bounding Boxes in Nx Meta Client</p></figcaption></figure>

#### Adding Event Rules

The Nx AI Manager plugin can generate several different types of events. Network Optix gives the user control over what these events should do, from sending an email to showing a notification. In this example, we will show a text overlay on the video.

Rules can be added by navigating to the Camera Rules menu:

<figure><img src="/files/6HjskXxtscDnaFaAXnhN" alt="" width="563"><figcaption></figcaption></figure>

On the Event Rules window, click the **Add** button to add a new rule.&#x20;

From here, several options are available. First, on the left side, select **Analytics Event** from the **When** context menu. This is the type of event the Nx AI Manager plugin generates.&#x20;

Select any, or multiple, camera(s) in the **At** context menu.&#x20;

Under the **Event Type** context menu, you will find a number of event types the Nx AI Manager plugin can generate, from alarms to counting objects. In this example, we will select the *Objects Counted* type.&#x20;

On the right side, it can be configured what should be done when one of these events is triggered. Here you could set up an email or notification trigger. In this example, we will select the Show text overlay option in the **Do** context menu **at** the source camera

<figure><img src="/files/M8FlOyTXtfBDJJo1gi0M" alt=""><figcaption><p>Example Settings for Objects Counted Rule</p></figcaption></figure>

If set up correctly, and a model generating counts is selected and running, we should see an overlay on the camera feed showing us the object counts:

<figure><img src="/files/XVSa9r5LjIG5RvTwFW2i" alt=""><figcaption><p>Example of Objects Counted text overlay</p></figcaption></figure>


# 3.1 Model Settings

<figure><img src="/files/hJZPkoNARG5H2qVQX2T2" alt=""><figcaption><p>A device is one model pipeline with a single model</p></figcaption></figure>

A model that is active on a device can have multiple settings These settings depend on the capabilities of the model or the server.

When you change one of these settings, the pipeline form will change to indicate that the settings need to be saved manually.

<figure><img src="/files/59vOWvACGdJcg7ZtVxoQ" alt=""><figcaption><p>A model pipeline form with changed settings that are not saved yet</p></figcaption></figure>

To save the settings, click the "Save pipelines" button. If you do not want to save the settings, refreshing the page will reset the form. Navigating away from the device details page will also reset the form without saving the settings.

### Model NMS Threshold

The NMS Threshold (Non Max Suppression) sets the cut off for when models should not return detections with a probability score below the current threshold value.

This is a setting that is model dependent, so not all models have this option.

### Preprocessor

If the server that the device is connected to has any preprocessors available, they can be selected here.

This is a setting that is server dependent, so moving a device to another server may change the available options.

### Postprocessor

If the server that the device is connected to has any postprocessors available, they can be selected here.

This is a setting that is server dependent, so moving a device to another server may change the available options.


# 3.2 Model pipeline selection and configuration

The device detail page is the central place to manage the model pipelines that the device should run.

Pipelines are chains of one or more models that can run with the given video input from the device.

Usually a device has a default pipeline configured after the plugin is enabled for the device.

### Add a new pipeline

When no pipelines are set, the only available option is to add a new pipeline:

<figure><img src="/files/7ADUPHhShAF3F9N76o78" alt=""><figcaption><p>A device detail page without any pipelines</p></figcaption></figure>

Clicking the "Add a pipeline" button redirects you to the model catalogue.

### Selecting a model

In the model catalogue you can select a model to use in the new (or current) pipeline.

The top of the page will show a message that you are "Currently assigning...".

If you have uploaded custom models, they will be available here.

<figure><img src="/files/EQ8ZIyTapwXxoTqzaS16" alt=""><figcaption><p>The model catalogue with the assignment message and the option to select a model for the current pipeline</p></figcaption></figure>

When a model is selected it will be assigned and downloaded to the server that the client is connected to.

<figure><img src="/files/MqyHkHDHrYqwjyeLLaQ9" alt=""><figcaption><p>Message that the model will be added to the server</p></figcaption></figure>

You will be redirected to the device details page again, with the newly assigned model.

<figure><img src="/files/MeVEA8mtmwQVUDrxCNIF" alt=""><figcaption><p>The device detail page with a single pipeline containing one model</p></figcaption></figure>

### Add a chained model

Chained models are models that use the input of a parent model instead of processing the video from the device directly.

You add a chained model by clicking the chain icon <img src="/files/w9OYnQ7DlAQOu0SSGHZi" alt="" data-size="line"> next to the parent model name. You will be redirected to the model catalogue to select a chained model.

<figure><img src="/files/ujKF4F4Kudh3S0EyiYO0" alt=""><figcaption><p>Model pipeline with settings and buttons to manage models in the pipeline</p></figcaption></figure>

The way a chained model will use the input can be selected, currently there are three modes:

* Direct - the chained model gets the output from the parent model as input
* Conditional - the chained model will only run if a field with a given name outputs "`true`"
* Feature extraction - the chained model will get the contents of the bounding boxes that have a certain label

<figure><img src="/files/fqrlFW3wBV2ECawa8IPs" alt=""><figcaption><p>A model pipeline with chaining options</p></figcaption></figure>

Choose the appropriate method, and when you have entered new data the pipeline form will change to indicate that settings need to be saved.

<figure><img src="/files/BSF5sMThMeZakU8nqOgS" alt=""><figcaption><p>A model pipeline with changes that need to be saved</p></figcaption></figure>

The settings will be applied to the device when you click the "Save pipelines" button.

### Change a model in a pipeline

A parent model or a chained model can be replaced by clicking the left-right arrow button next to the chained model title <img src="/files/vwpfoLShwQGgsOGLjE0Q" alt="" data-size="line">. This will redirect you to the normal model selection process where you can select a replacement model.&#x20;

The rest of the settings in the model pipeline are not affected, unless they are directly related to the model.

### Remove a chained model from a chain

Removing a model from a chain can be done by clicking the delete button next to a chained model <img src="/files/zw4SZDLScXjbypPZoDKF" alt="" data-size="line"> and the model will be removed directly.

Undoing is not possible, to undo this you can select the same model again.

### Remove a chain

Removing a chain with all the models and settings can be done by clicking the delete button next to a parent model in a chain <img src="/files/NyZ74jNDvBnG9LgIz7SS" alt="" data-size="line"> and the full model chain with all associated settings and chained models will be removed.

Undoing is not possible, to restore the settings the same model chain must be rebuilt completely.


# 3.3 Model pipelines on multiple devices

Multiple devices can be managed at the same time, but this feature is limited at the moment. You can create a new model pipeline for multiple devices, but the [chained models](/nx-ai-manager-v4.x/nx-ai-manager/3.-configure-the-nx-ai-manager-plugin/model-pipeline-configuration) inside a pipeline as well as the [model settings](/nx-ai-manager-v4.x/nx-ai-manager/3.-configure-the-nx-ai-manager-plugin/model-settings) must be set per device.

Setting multiple pipelines can only be done for a single site at a time.

## Creating a new pipeline on multiple devices

Start at the site page, where you can see all the available devices on the available servers.

<figure><img src="/files/uN5jK0fwlMwcXtpToYgh" alt=""><figcaption><p>The site details page with the list of available devices</p></figcaption></figure>

The highlighted "here" link starts the process and enables the checkboxes next to the available devices. Devices on servers are marked with a chain icon next to the version number support model pipelines.

<figure><img src="/files/tCaDam6NnDUb9niJ1jRM" alt=""><figcaption><p>The site details page with checkboxes for the available devices</p></figcaption></figure>

Only devices that are enabled can be selected.

<figure><img src="/files/szQYf4OU3KIn8sWemN21" alt=""><figcaption><p>The site details page with selected devices</p></figcaption></figure>

When one or more devices are selected the "Assign a new pipeline" button is enabled and can be clicked. This will redirect you to the models page where you will see the message "Currently assigning..." that is indicating the amount of devices that will receive the new pipeline.

<figure><img src="/files/MUoMgberNMHBO1tJYVMf" alt=""><figcaption><p>The model catalogue with the assignment message and the option to select a model for the current pipeline</p></figcaption></figure>

<figure><img src="/files/GvyCu3TogacKaoTfy7Uv" alt=""><figcaption><p>The model catalogue with a highlighted button to select a model for the current pipeline</p></figcaption></figure>

When you click the "Add to pipeline..." button a confirmation dialog will appear, because the next action is irreversible. Confirm to wipe all existing model pipelines on the selected devices and replace them with the new pipeline containing the single selected model.

When you are unsure, clicking cancel will prevent the assignment, but will not change the selected devices. To also unset the selected devices for assignment click the "Cancel the assignment" button at the top of the page.

<figure><img src="/files/k7cgRaBNIsZhL1G3G5wm" alt=""><figcaption><p>The model catalogue with a dialog explaing the replacement</p></figcaption></figure>

After you've confirmed the new model pipeline will be deployed to all selected devices

<figure><img src="/files/f55fUQH1i6GxOSJ3lO1A" alt=""><figcaption><p>Message about the deployment to multiple devices</p></figcaption></figure>

You can verify the deployment of the new model pipeline by checking one or all the previously selected devices.

<figure><img src="/files/YW4Ihg1MiA9n2ZW6Mkpu" alt=""><figcaption><p>The device detail page with a single pipeline containing one model</p></figcaption></figure>

The rest of the configuration must be done per device at the moment. This includes setting NMS Thresholds per model, pre and postprocessors and chained models.


# 4. Other Network Optix Plugin Settings

The Network Optix plugin contains several settings to manage the behavior.&#x20;

Navigate to the camera settings and enable the Nx AI Manager Plugin. The following settings should appear:&#x20;

* Device active
* Manage Device
* Reselect Runtime
* Model settings
* Video settings
* Input Masks
* Class visualisation

## Device Active

If this switch is enabled, the frames from this device's video stream will be sent to the AI Manager for inference. The AI Manager runs as a separate process on the server, and is started if at least one device on the server has this setting enabled.

This setting is off by default. This allows you to configure your device, assign a model pipeline, and then enable the device for the first time.

## Manage Device

This button opens the Nx AI Manager Client popup. In the Nx AI Manager Client can add model pipelines, and manage the models and their details here.

## Reselect Runtime

An option to switch between different acceleration runtimes. For example if your device has a built in NPU and the runtime for that is not working correctly, you might switch to a CPU based runtime until the NPU runtime is fixed.

## Device Overview

A compact overview of the device's settings, including information such as which acceleration runtime is active, and an overview of the assigned pipelines.

## Video Settings

Contains settings related to how the input frames should be processed for the AI Manager.

### Resize Method

In nearly all cases, the video stream will not be the same resolution as the model's input. While the frame can easily be resized, if the aspect ratio is different there are a couple of ways to adapt the input frames to the aspect ratio the model expects:

* **Letterbox:** ( default ) The AI Manager will add black bars to the sides or the top and bottom of the frame to correct the aspect ratio for the model.
* **Stretch**: The frame will be stretched to the aspect ratio of the model. This could influence the performance of the model if the aspect ratios are significantly different.
* **Crop:** The sides or top and bottom of the frame is cut off to fit the input frame to the aspect ratio of the model. This could mean that detections on the edge of the frame will be missed.

## Postprocessors

The NX AI Manager platform provides a number of built-in standard postprocessors for convenience. It also allows advanced users to create and add their own custom postprocessors, see [7.2 External Post-processing](/nx-ai-manager-v4.x/nx-ai-manager/7.-advanced-configuration/7.1-external-post-processing)

When building a pipeline, a dropdown list is provided with all postprocessors available on that server, including the custom external postprocessors. When one of these is selected, its settings will become available in the Plugin UI.

### Loitering Detection

The NX AI Manager has the functionality to detect loitering. This is a tool to detect if a certain object is detected for longer than the desired amount of time.

It is generally recommended to use loitering detection in tandem with feature extraction, since Identity models generate vectors for their input images, it is useful to first detect objects in a frame, and then send these extracted sub-frames to the Identity model for identification.

Once it is detected that this subject is loitering, a bounding box of the type Loiterer will be generated to clearly show where this is happening.

<figure><img src="/files/1tFKH6aR3h8nfsGOLKgT" alt=""><figcaption><p>Loitering Detection Settings</p></figcaption></figure>

**Loiter Detection Time Threshold:** A subject detected for at least this amount of time, in seconds, will be considered loitering.

**Loiter Detection Forget Threshold:** When a subject has not been detected for at least this amount of time, in seconds, it will be forgotten. If the same object returns after this amount of time, it will be considered as a new detection.

### Left Behind Object Detection

Illegal dumping detection works by comparing the bounding boxes of a model to a reference. Detected objects which are not in the reference are tracked and timed. If these objects persist for longer than the threshold time they are flagged as dumped objects.&#x20;

Left behind objects are presented as standard bounding boxes with the 'dumped' type. It is therefore advised to create an event in NX to raise an alarm of a 'dumped' type object is detected.

By default, a reference image will be created from the first frame the Nx Edge AI Manager receives when starting up for the first time. This reference image will then be saved and reused in future runs. It is also possible to manually create a reference image.

When the frame is empty of temporary objects and a good representation of the background is being displayed, make use of the "Trigger Reference Run" button to set the new reference. Once the button is pressed, the following frame(s) will be used to set a new reference.

<figure><img src="/files/kgWQd3yNiEaArUYNlrQb" alt=""><figcaption><p>Left Behind Object Detection settings</p></figcaption></figure>

**Dumping Detection Class:** The class of objects to run the postprocessor on. This is useful if you have a model which detects multiple types of objects, but you only want to check for left behind objects on a specific class, for example 'backpack'.

**Dumping Detection Time Threshold:** The amount of time ( in seconds ) an object of the desired class has to be in frame and completely stationary before it is flagged as a dumped object.

**Trigger Reference Run:** A button to trigger a reference run. When clicked, the following frame(s) will be used to create a new reference, the previous reference will be discarded.

Left behind object detection is compatible with any model which generates bounding boxes.

### Line Crossing Detection

Line crossing detection can be used to detect or count objects which cross a defined line. The postprocessor works by tracking objects through the frames, and detect when this object crosses a line, and the direction.

<figure><img src="/files/oSLnYokcQoRN5f3RQeuR" alt=""><figcaption><p>Line Crossing  Detection settings</p></figcaption></figure>

Make use of the NX interface to draw a line on the video frame and click 'Apply' for changes to take effect.

When a crossing is detected, an event is generated. This event can be configured to trigger any action. See [3. Configure the Nx AI Manager plugin](/nx-ai-manager-v4.x/nx-ai-manager/3.-configure-the-nx-ai-manager-plugin#adding-event-rules) .

<figure><img src="/files/VauzHmDThPR7dCVhdXZR" alt=""><figcaption><p>Line Crossing Detection event configuration</p></figcaption></figure>

Note that the Line Crossing Detection postprocessor may have to be selected, and 'Apply' button clicked, before the event can be made.

Line Crossing Detection is compatible with any model which generates bounding boxes.

### Object Counting

The Object Counting postprocessor is useful for models which generate bounding boxes but not counts outputs, see [ONNX requirements](/nx-ai-manager-v4.x/for-data-scientists/onnx-requirements#supported-onnx-model-outputs).

This postprocessor will count all the bounding boxes per class and create a counting event.

<figure><img src="/files/6iR3onM3JVaHtVSpW8QM" alt=""><figcaption><p>Objects Counted event configuration</p></figcaption></figure>

Object Counting postprocessor is compatible with any model which generates bounding boxes.

## Input Masks

Some models accept input masks, see [ONNX requirements](/nx-ai-manager-v4.x/for-data-scientists/onnx-requirements#inputs-specification). It is possible to create these masks on the video frame inside the plugin settings.

<figure><img src="/files/wZKeD87ENEemAe4YtJ6W" alt=""><figcaption><p>Input Masks setting</p></figcaption></figure>

Click 'Apply' for changes to take effect.

## Class Visualisation

It is sometimes desired to control which types of objects get visualised, and which to ignore. This is useful if you have a model which detects many class types, but you are only interested in some of them.&#x20;

<figure><img src="/files/09qEQ2EPnGi8lj0mEq1M" alt=""><figcaption><p>Class Visualisation setting</p></figcaption></figure>

A list of checkboxes are presented. This list is generated from the named output of the assigned models. See [ONNX requirements](/nx-ai-manager-v4.x/for-data-scientists/onnx-requirements#supported-onnx-model-outputs). If a new model is assigned to the NX AI Manager, it might be necessary to click the 'Refresh' button to see the changes.

Click 'Apply' for changes to take effect.


# 5. Manual Plugin Installation

This page describes how to manually install the plugin if automatic installations do not work

The plugin can be downloaded from the following link for x86 devices:

{% embed url="<https://artifactory.nxvms.dev/artifactory/nxai_open/NXAIPlugin/release/libnxai_plugin.so>" %}
Plugin download link x86\_64
{% endembed %}

Or ARM64 devices:

{% embed url="<https://artifactory.nxvms.dev/artifactory/nxai_open/NXAIPlugin/release/libnxai_plugin_aarch64.so>" %}
Plugin download link arm64
{% endembed %}

Once downloaded, copy the plugin file to the appropriate Nx Meta plugins folder.

```
/opt/networkoptix-metavms/mediaserver/bin/plugins/nxai_plugin/libnxai_plugin.so
```

The folder and the plugin file should be named in this exact way. Rename the plugin file if necessary.

Make sure to give read and write permissions to the created directory so that the NX AI Plugin can create the files it needs by running:

```
sudo chmod -R 777 /opt/networkoptix-metavms/mediaserver/bin/plugins/nxai_plugin
```

Once installed, the Nx Meta Server must be [restarted](/nx-ai-manager-v4.x/support-and-troubleshooting/troubleshooting/controlling-the-server-and-the-plugin) before the plugin is detected.&#x20;


# 6. Removing the Nx AI Manager

## Uninstalling the Nx AI Manager

It might be desired to remove the Nx AI Manager installation, due to a corrupted install or if you want to reinstall the Nx AI Manager with a different acceleration library.

The AI Manaer can be removed by simply deleting the folder, assuming default installation:

`sudo rm -r /opt/networkoptix-metavms/mediaserver/bin/plugins/nxai_plugin/nxai_manager`

When the mediaserver is restarted, the plugin will reinstall the Nx AI Manager.

## Removing the Nx AI plugin

{% hint style="info" %}
Removing the Nx AI Plugin can lead to the Nx Mediaserver crashing if it is in use.
{% endhint %}

For added safety, disable the plugin on all devices on the server before removing. This is not full-proof, however, and could still lead to crashes. The only fully safe method of removing the plugin would be to first stop the mediaserver:

```bash
sudo systemctl stop networkoptix-metavms-mediaserver.service
```

To remove the Nx AI plugin from your Nx Meta server, log in to the server console and execute the following command:

```bash
sudo rm -r /opt/networkoptix-metavms/mediaserver/bin/plugins/nxai_plugin
```

If you stopped the mediaserver, it is now safe to restart it:

```bash
sudo systemctl start networkoptix-metavms-mediaserver.service
```

## Restarting the Nx Meta mediaserver

After uninstalling the Nx AI Manager Plugin and Nx AI Manager, [restart](/nx-ai-manager-v4.x/support-and-troubleshooting/troubleshooting/controlling-the-server-and-the-plugin) the Nx mediaserver for these changes to take effect.

Please refer to Nx documentation for Nx Meta mediaserver uninstallation instructions


# 7. Advanced configuration

The NX AI Manager platform allows further integration for advanced users to add custom behaviour or processing.


# 7.1 Nx AI Manager Manual Installation

This page describes how to install the NX AI Manager manually if automatic installations do not work or customisation is desired

The Nx AI Manager Plugin will automatically detect if the Nx AI Manager is installed, and install it in the plugin folder. The installation will detect some features of the device and select the appropriate settings for installation. This should be sufficient for most users and devices, however it could be the case that some customisation is desired, or that the automatic installation did not go well. In that case, you can manually install the Nx AI Manager.

To manually install the Nx AI Manager on your device, execute the following command:

```sh
sudo bash -c "$(wget -q -O - https://artifactory.nxvms.dev/artifactory/nxai_open/NXAIManager/install.sh)" --installpath /opt/networkoptix-metavms/mediaserver/bin/plugins/nxai_plugin/
```

The install path can be customised for testing purposes and manually started to see output. However, the Nx AI Manager Plugin expects the Nx AI Manager to be installed in the same folder, and the Stop/Start commands from the Nx AI Manager Plugin UI will not work if the Nx AI Manager is installed somewhere else.

Finally, give read, write and execute permissions to the newly installed folder. This will allow the Nx AI Manager Plugin to create the files it needs, and start/stop the Nx AI Manager runtime.

```
sudo chmod -R 777 /opt/networkoptix-metavms/mediaserver/bin/plugins/nxai_plugin
```

It might be necessary to restart the Nx Mediaserver to finish initialising the Nx installation:

```
sudo systemctl restart networkoptix-metavms-mediaserver.service
```


# 7.2 External Post-processing

This page describes how to implement an external postprocessor to integrate with the Nx AI Manager

It is sometimes desired to add custom or proprietary processing to the inference pipeline. It is therefore possible to add a custom application which receives information from the Nx AI Manager and returns optionally altered information.

Examples are provided in how to create these applications in both C and Python. However these applications can be created using any programming language, as long as the device can execute this program, send it messages over a Unix socket, and receive a response.

A high-level overview of the inference pipeline is as follows:

<figure><img src="/files/CVoUQ65NjNOFXPJgCjKd" alt=""><figcaption><p>A high-level overview of the inference pipeline </p></figcaption></figure>

The postprocessor can therefore receive the inference results from the model, optionally alter these results, and return them. The changes added by the postprocessor will then be sent to the Network Optix platform, where it can be used to generate bounding boxes or events.

Through the settings, instructions can be provided to the Nx AI Manager on how to start the application. The Nx AI Manager will automatically start the applications once necessary, and terminate them once execution is finished.

### External Postprocessor

A postprocessor receives the inference results as a MessagePack encoded buffer. This message is equivalent to what will be sent to the output. The postprocessor can alter this message and return it. The altered message will then be sent to the Network Optix platform. The returned message should have the same structure as the input message, otherwise the Network Optix platform might be unable to parse it. Examples are provided to show how this structure can be parsed, altered, and written.

<figure><img src="/files/JuPRpoLYtZ4ibKPIXDSG" alt=""><figcaption><p>External Postprocessor data flow</p></figcaption></figure>

### External Tensor Postprocessor

A setting is provided in which the user can indicate that a postprocessor should receive access to the input tensor which the inference results were generated from. This can be useful for many applications, such as investigating the input tensor within the generated bounding boxes, or even create sub-images.&#x20;

When this setting is enabled, the Nx AI Manager platform will write the input tensor to shared memory, where all external postprocessor can access it. It will then send an additional message to the external postprocessor containing information which can be used to access this shared memory.

The image header message is sent after the inference results message. It is therefore required for the external postprocessor to expect to receive two separate messages before responding with its own message. The image header is also a MessagePack encoded message.

<figure><img src="/files/GoDAuMKnrv8RXBP441vc" alt=""><figcaption><p>Tensor Postprocessor data flow</p></figcaption></figure>

The postprocessor can do additional analysis on the tensor data.


# 7.3 External Pre-processing

This page describes how to implement an external preprocessor to integrate with the Nx AI Manager

It is sometimes desired to add custom or proprietary pre-processing to the inference pipeline. It is therefore possible to add a custom application which receives the input frame to the Nx AI Manager and has the opportunity to alter or analyse the input frame.

Examples are provided in how to create these applications. These applications can be created using any programming language, as long as the device can execute this program, send it messages over a Unix socket, and receive a response.

Through the settings, instructions can be provided to the Nx AI Manager on how to start the application. The Nx AI Manager will automatically start the applications on startup, and terminate it when the Nx AI Manager terminates.

The external pre-processor runs as a completely independent application. The Nx AI Manager puts no restrictions on which hardware, API's or tools this application uses. As long as this application can receive and respond to messages over a Unix socket, it will be compatible.

<figure><img src="/files/WrwEb0XjbKaKVynkHR2N" alt=""><figcaption><p>External Preprocessor data flow</p></figcaption></figure>

The external pre-processing step happens before any other pre-processing is done on the frame. This means that the external pre-processor receives the original, full resolution image as it was sent to the Nx AI Manager.&#x20;

The external pre-processor will receive a header message over Unix socket which describes the input frame, as well as provide details on how to connect to the shared memory segment where the input frame is stored. The external pre-processor can then connect to this shared memory, alter the data, or write back a completely new image with new dimensions. The altered data will then be used in the rest of the pipeline.

The Nx AI Manager will wait until the external pre-processor responds with a header message, containing information on the new ( or same ) image dimensions and new ( or same ) shared memory segment containing image data. After this message is received, the Nx AI Manager will copy the data from the shared memory segment and use it for the rest of the inference pipeline.


# 7.4 Training Loop

Create a loop with the Edge Impulse training platform and the Nx AI Manager.

## General preparation

This tutorial assumes you have the following things already set up:

* Nx Cloud account.
* Nx Meta system installed.
  * System connected to Nx Cloud account.
  * Client installed.
  * Device added to configuration.
  * Nx AI plugin installed.
* Install the [sclbl-integration-sdk repository](https://github.com/scailable/sclbl-integration-sdk).
  * `git clone https://github.com/scailable/sclbl-integration-sdk.git`
  * Followed the ‘Get started’ instructions.

## Edge Impulse preparation

When building a loop with Edge Impulse there are a couple of requirements.

1. Project with a model configured.
2. API key:
   1. From the main dashboard page find the tab ‘Keys’ and select it.
   2. If there are no keys press ‘Add new API key’.
   3. Enter a name and select the role ‘Admin’.
3. Project ID:
   1. The project ID is shown in a box on the project info page.

      <figure><img src="/files/qEgAMoR5A1kdnXKf1M3u" alt=""><figcaption></figcaption></figure>
   2. The project ID is also located in the URL of the page. For instance in\
      <https://studio.edgeimpulse.com/studio/1234> the project-id is 1234.<br>

## Steps

We will describe the loop in 6 steps.

1. Add model to the Nx AI Cloud
2. Update postprocessor
3. Configure model and postprocessor
4. Run the model
5. Check the data
6. Update the model in the cloud
7. Update model in the system

### Step 1: Add model to Nx AI Cloud

We will add the model of the training platform to the Nx AI Cloud.

#### For Edge Impulse

1. Log in the Nx AI Cloud and click ‘Add a model’.&#x20;
2. Select ‘Edge Impulse’, enter the API key and project ID.&#x20;
3. Click ‘Link model’.

Now the model will be downloaded from Edge Impulse and will be prepared for use.<br>

### Step 2: Update postprocessor

We will take an example postprocessor from the sclbl-integration-sdk and modify it with a specific condition to filter only specific images to send.

#### For Edge Impulse

1. Open the sclbl-integration-sdk into your favourite editor.
2. Open the following Python script: postprocessor-python-edgeimpulse-example/postprocessor-python-edgeimpulse-example.py
3. Find the location where the API is set and replace it with the API-key from your project. Look for the line: `edgeimpulse.API_KEY`
4. Find the line `upload_sample = False` and modify the code below that to suit your condition.
5. Compile and install the postprocessor using the instructions in the README.md of the project.

### Step 3: Configure model and postprocessor

We will select the model and postprocessor.

1. In the Nx client go to the device, right click and select ‘Camera settings’.
2. Go to the tab ‘Plugins’ and select the ‘Nx AI Manager’.
3. Click ‘Manage server’ and click the icon with left-right arrows called ‘Replace model’ or ‘Assign a new model’ if a model was not already assigned.
4. Choose the model from step 1 and click ‘Ok’.
5. Under the heading ‘Assigned Models’, select ‘Post Processor’ and select your post processor from step 2. If you didn’t rename it from the README it is called ‘Example-Postprocessor’.
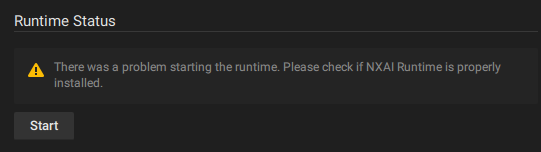
6. Under the heading ‘Runtime Status’, click ‘Start’ and wait for the status to be ‘Runtime is running’.
7. Click ‘Ok’ at the bottom.<br>

### Step 4: Run the model

To run the model the device must be visible in the layout.

1. Double click your device to make it visible.
2. On the top right click the left icon ‘Object search’ if the model contains bounding boxes to see them.<br>

### Step 5: Check the data

Now we are going to check the incoming data, label it and then retrain.

#### Edge Impulse

See also the section on [importing models from Edge Impulse](/nx-ai-manager-v4.x/for-data-scientists/importing-models/from-edge-impulse).

1. Go to the project page.
2. Select ‘Data acquisition’.
3. Training and Test should contain data coming from the server.
4. Label the data.
5. Select ‘Retrain model’ and then ‘Train model’.

### Step 6: Update the model in the cloud

We are going to update the model in the Nx AI Cloud.

1. Two ways to update the model
   1. Go back to the ‘Manage server’ in the Nx Client / AI plugin and click the name of the model.
   2. Log into the AI Cloud and go to the model.
2. Click the button ‘Update from \<TrainingPlatform>’

<br>

### Step 7: Update model in the system (WorkInProgress)

We are going to update the models in the system.

1. (option not available yet) In the Nx Client / AI plugin click the button ‘Update models’.
2. Manually delete the model cache. Follow these instructions:
   1. On the cmdline:
      1. `cd /opt/networkoptix-metavms/mediaserver/bin/plugins/nxai_plugin/nxai_manager/cache`
      2. `rm *`
   2. In the Nx Client / AI plugin stop and start the plugin


# 7.5 Enable ini settings

Advanced controls can be enabled through an ini file. By default the ini file does not exist. If you create this file and it is empty, the Network Optix Mediaserver will populate it with all available settings, their defaults, and some documentation.

Create an empty file by running:

```bash
sudo mkdir -p /home/networkoptix-metavms/.config/nx_ini 
sudo touch /home/networkoptix-metavms/.config/nx_ini/nxai_plugin.ini 
sudo chmod 666 /home/networkoptix-metavms/.config/nx_ini/nxai_plugin.ini
```

Then restart the mediaserver. Once the mediaserver is restarted the ini file should be filled with defaults.


# Introduction

In this section of our documentation, we describe the Nx AI Cloud platform. The Nx AI Cloud platform effectively allows for the following:

* The Nx AI Cloud platform allows you to manage all the AI models that are available to you. Thus, you can see which AI models you can access, for which devices, and you can manage the version(s) of your user-generated models.
  * For [data scientists](/nx-ai-manager-v4.x/for-data-scientists/introduction), the Nx AI Cloud platform allows for the conversion of your own models.
* The Nx AI Cloud platform allows you to (mass) deploy models to target edge devices. Effectively, you can "swap" the models that run on an edge device (configured using the [NX AI manager](/nx-ai-manager-v4.x/nx-ai-manager/get-started-with-the-nx-ai-manager-plugin)) remotely and change the device configuration.
  * The latter can be done at a large scale: you can flexibly group devices and deploy models to groups of devices.

The following diagram shows some of the functions of the Nx AI Cloud platform and the relationships between the edge device(s) and model training platforms.

{% @mermaid/diagram content="flowchart LR
I1\[TFlite]-->A
I2\[PyTorch]-->A
I4\[...]-->A
I3\[EdgeImpulse]-->A
subgraph Platform
A\[Model Conversion]-->B\[Model Library]-->C\[Model management]
end
C<-->E
subgraph Edge
D\[Pre-processing]-->E\[Model]-->F\[Post-processing]
end
H\[Input]-->D
F-->G\[Output]" %}

In the next sections, we detail each functionality. However, first, we describe how you can register for the platform.


# Registration and log-in

First, make sure you have created a [Network Optix account](https://nx.docs.scailable.net/nx-ai-manager/get-started-with-the-nx-ai-manager-plugin/1.-install-network-optix).&#x20;

Next, go to <https://admin.sclbl.nxvms.com/> and use your Nx credentials to login:

<div align="left"><figure><img src="/files/n5kL3bPNgjbtUcCzm29j" alt=""><figcaption><p>Login form</p></figcaption></figure></div>


# Deployment and device management

How do we use the platform for model deployment.

The Nx AI Cloud platform allows you to (mass) deploy model pipelines to target devices. Effectively, you can "swap" the models that run on a device (configured using the [AI manager](/nx-ai-manager-v4.x/nx-ai-manager/get-started-with-the-nx-ai-manager-plugin)) remotely and change the device configuration. The latter you can do at a large scale: you can deploy models to all the devices on a server.

## An overview of your sites and devices

The Sites tab on the Nx AI Cloud platform shows all systems registered to your cloud account.&#x20;

If the system is on-online the name of the system and the Details button are available.

<figure><img src="/files/lZPlPTYnoXW84ExIIGXp" alt=""><figcaption><p>overview of sites with one on-line system</p></figcaption></figure>

If the site is off-line you cannot continue until the system comes on-line.

<figure><img src="/files/WgVJNtLHKCSyC2If4vWR" alt=""><figcaption><p>listing of one site that is off-line</p></figcaption></figure>

## Overview of a single site

If you select an on-line site you are directed to the site details page.

<figure><img src="/files/ccFADMinolzj9WIMuUuC" alt=""><figcaption><p>overview of a single on-line system</p></figcaption></figure>

The page shows the servers in the site and lists all the devices and their groups.

The same page when the site is off-line. You cannot do anything now.

<figure><img src="/files/dvaO0xjgkg71oc75Q0Ld" alt=""><figcaption><p>overview of a single off-line system</p></figcaption></figure>

## AI model pipeline deployment and management

You can assign or replace a model pipeline on a single device or you can select multiple devices and assign a single model pipeline to all the selected devices.

### Assign or replace a model pipeline on a single device

To assign or replace a model on a single device you need to click on the 'Details' button on the system or server page. You will be directed to the device page.

<figure><img src="/files/3ny4Bvho2UANZMNBuiXP" alt=""><figcaption><p>Overview of a single device in the system</p></figcaption></figure>

To assign an additional model pipeline to the device you can press 'Add a new pipeline' or the 'add' button. To replace a model pipeline press the button with the left-right arrow in it.

You will be directed to the 'Models listing'.

On the top you get a new notification bar that shows you are currently in assigning mode. You can use that to go back to the models listing page, back to the device or cancel the whole assignment process.

Once you have found the model you want to assign or replace use the button 'Add to \[x] pipeline'.&#x20;

<figure><img src="/files/LANYwNPDA0x2TP7id4gB" alt=""><figcaption><p>models listing</p></figcaption></figure>

Now, the model pipeline will be deployed and if all is well you will see the following notice and you are redirected to the device page.

<figure><img src="/files/vjxVLzooEb2Nkj0hcFsr" alt=""><figcaption></figcaption></figure>

### Assign a single model pipeline to all the selected devices

To start you need to be on the site or server page, which shows you all the servers and all devices in the site.

Just below the 'Devices' header on this page there is a link called 'here' which starts the process of selecting devices to assign a model pipeline to.

<figure><img src="/files/Zajpo3i8drDp643m7c7o" alt=""><figcaption></figcaption></figure>

Once pressed, a new column with checkboxes will be added to the devices and you can use them to select the devices you want to assign a new model pipeline to.

<figure><img src="/files/DHr2tyJ8SaJCp7x9wssv" alt=""><figcaption><p>multiple server selection activated</p></figcaption></figure>

If you select one or more servers the 'Assign a new pipeline' will activate. Pressing this button will start the model assignment just like updating a model for a single device.

Note: assigning a model pipeline to multiple devices will always remove all other pipelines and replace them with the new pipeline you selected.


# Upload your model

After you have [created your model](/nx-ai-manager-v4.x/for-data-scientists/custom-model-creation) and made sure it [conforms to the Nx ONNX requirements](/nx-ai-manager-v4.x/for-data-scientists/onnx-requirements), you can easily upload it to make it available in Nx Cloud and, thereby, to all your Nx Servers. First, click on the "Add a model" button, top left:

<figure><img src="/files/uioN03TB7TUIofj8GDhw" alt=""><figcaption></figcaption></figure>

Next, choose (in the case of an ONNX model)  the "ONNX" upload button:&#x20;

<figure><img src="/files/jL5PQCLA6FqkXxy6XIkV" alt=""><figcaption></figcaption></figure>

Drag and drop your ONNX model into the drag and drop area, choose a name for your model, add some documentation, and, potentially, set its [normalisation values](/nx-ai-manager-v4.x/nx-ai-cloud/upload-your-model/normalization):

<figure><img src="/files/IKMmwDAWt9as9vG1onze" alt=""><figcaption></figcaption></figure>

After the model is uploaded, a series of conversions will be run to generate optimized model files for each supported target [AI accelerator](/nx-ai-manager-v4.x/ai-accelerators-support/supported-ai-accelerators).

When this is completed you will get an email and the model is [ready to be used](/nx-ai-manager-v4.x/nx-ai-cloud/use-your-model) on your devices.


# Normalization

Think of a digital image as a big grid filled with tiny colored dots, which we call "pixels." Each pixel contains colors—usually a mix of red, green, and blue. These colors have values that range from 0 to 255. A value of 0 means there is none of that color in the pixel (it's totally off), and a value of 255 means that color is shining as brightly as possible.

Now, suppose we want to make it easier for a computer to analyze and compare different images. One way to do this is by "normalizing" the color values in the image. Normalization is just a fancy term for adjusting these values so they fit within a new, consistent range, which helps in comparing images more fairly.

Here's how the normalization formula works:&#x20;

* **normalized\_color\_value = (original\_color\_value - mean) / scale;**

In this formula:

* **original\_color\_value** is the initial value of the color (anywhere from 0 to 255).
* **mean** is the average of all the color values. Subtracting this mean helps center our color values around zero.
* **scale** is a number we divide by to keep the values within a new, smaller range. This could be something like the largest color difference or another predefined number.

For example:

* If the average (mean) color value is 100, and our scale is 50:
  * For a pixel with a red color value of 150:
    * We subtract the mean: $$150−100=50$$
    * Then we divide by the scale: $$50 / 50​=1$$
  * So, the normalized red value would be 1.

This process transforms the original color values to a new scale that's easier for the computer to work with, typically ranging between -1 and 1 or 0 and 1. It's like changing the measurements of something from a variety of units (inches, centimeters, yards) all into meters so that they are easier to compare.

In the NX AI Cloud, you can set the normalization values as an integer array. For instance, for an RGB image, you might use \[123,234,242] for means and \[100,232,33] for scales. If you do not want to transform the **original\_color\_value**, just use 0 for mean, and 1 for scale— that is, \[0,0,0] and \[1,1,1] for an RGB input.


# Use your model

After the model is uploaded the model is ready to be used on your devices. To use a model on your device follow the steps below.

* Open the device settings in the NX Meta Client by right clicking on a device label and selecting the last option.

<figure><img src="/files/JetAw5bv3BzdlYw6LW6c" alt=""><figcaption></figcaption></figure>

* Navigate to the plugin tab with the NX AI Manager plugin.
* Activate the plugin and then the device if necessary.
* You may need to click apply and refresh the tab.
* By default a model will be active.

<figure><img src="/files/SFsfkmuMGVXz268L1e5q" alt=""><figcaption></figcaption></figure>

* A popup window with the NX AI Manager Client will open on the device details page.
* On this page you can switch the model by clicking the switch model button <img src="/files/Wyfmd9H35XnLArtAEI41" alt="" data-size="line">.

<figure><img src="/files/0GDb3hKsdYtymA6Vuubc" alt=""><figcaption></figcaption></figure>

* You can then browse through the model library and select the uploaded model. (In this example a face locator model is used).

<figure><img src="/files/EQ8ZIyTapwXxoTqzaS16" alt=""><figcaption></figcaption></figure>

* The model will then be assigned and automatically downloaded to the server with the device.

<div><figure><img src="/files/ioQD9qsP1KwD2QdaZNgH" alt="" width="375"><figcaption></figcaption></figure> <figure><img src="/files/30BfEJWC6VpGXxA0ROip" alt="" width="375"><figcaption></figcaption></figure></div>

* After which the model is also visible on the plugin tab in the NX Meta Application (you might need to click refresh again for the updates to become visible).

<figure><img src="/files/qvUSKvHZ2Csak4Oxzjcr" alt=""><figcaption></figcaption></figure>


# API Documentation

To find the API documentation for Network Optix AI Cloud, visit the provided URLs, each pointing to a different aspect of the API documentation.

1. **Scailable Authorisation API**: This API authenticates users, organizes users into organizations, and manages licensing.
   * Documentation: [Scailable Authorisation API](https://api.sclbl.nxvms.com/auth/openapi.html)
2. **Scailable Computation API**: This API handles computational tasks and operations within the AI Cloud.
   * Documentation: [Scailable Computation API](https://api.sclbl.nxvms.com/cpt/openapi.html)
3. **Scailable Device API**: This API manages Edge Devices.
   * Documentation: [Scailable Device API](https://api.sclbl.nxvms.com/dev/openapi.html)


# How to get support

To get support for the Nx AI Manager, check the following resources

The support pages and community forums

* <https://support.networkoptix.com/>
* <https://support.networkoptix.com/hc/en-us/community/topics>

And check the steps in the troubleshooting section below.

## Contacting us

If your problem is not solved by the steps in the troubleshooting section you can contact us through the Network Optix support. Please make sure to prepare your question by collecting all relevant logs and system information beforehand.

Logs can be gathered by running the following shell script on the relevant machine:

<details>

<summary>Shell script to gather logs and system information</summary>

```bash
#!/bin/bash
# This script is used to gather information about the HW and SW of the system, in addition to information about the Nx AI Manager.
# The information is stored in a directory located in ~/nxai_troubleshooting and then compressed into a file named ~/nxai_troubleshooting.tgz.
# To get support, please attach the compressed file to your support request.
# NOTE: No sensitive information is collected, only the basic system information and the Nx AI Manager information.
# Enable debug mode
# set -x

# Create directory where the information will be stored
current_dir=$(pwd)
info_dir=~/nxai_troubleshooting
rm -rf $info_dir >/dev/null 2>&1
rm -rf $info_dir.tgz >/dev/null 2>&1
mkdir -p $info_dir

# Redirect all output and error streams to a log file
log_file="$info_dir/nxai_troubleshooting.log"
exec > >(tee -a "$log_file") 2>&1

############################### Basic System Information
lsb_release -a >$info_dir/lsb_release.txt
uname -a >$info_dir/uname.txt
lscpu >$info_dir/lscpu.txt
lspci >$info_dir/lspci.txt
df -h >$info_dir/df.txt
ldd --version >$info_dir/ldd_version.txt
timedatectl >$info_dir/timedatectl.tx

############################### Check if the mediaserver is installed
plugins_dir=""
if [ -d /opt/networkoptix-metavms/mediaserver/bin/plugins/ ]; then
    plugins_dir="/opt/networkoptix-metavms/mediaserver/bin/plugins/"
elif [ -d /opt/networkoptix/mediaserver/bin/plugins/ ]; then
    plugins_dir="/opt/networkoptix/mediaserver/bin/plugins/"
    echo "This is not a Meta installation"
else
    echo "Mediaserver is not installed."
fi
# get Mediaserver installed version
cat $plugins_dir/../../build_info.txt >$info_dir/mediaserver_info.txt

############################### Check if AI Plugin is installed
if [ -f $plugins_dir/nxai_plugin/libnxai_plugin.so ]; then
    echo "AI Plugin is installed."
else
    echo "AI Plugin is not installed."
fi
libnxai_plugin_dir=$plugins_dir/nxai_plugin/

# Check file permissions
ls -lR $libnxai_plugin_dir/ >"$info_dir/nxai_plugin_permissions.txt"

# Check if tree is installed
if command -v tree >/dev/null 2>&1; then
    echo "Using tree to list files in the AI Plugin directory"
    tree -h --du "$libnxai_plugin_dir/" >"$info_dir/nxai_plugin_tree.txt"
else
    echo "Using du to list file sizes in the AI Plugin directory"
    du -ah "$libnxai_plugin_dir/" >"$info_dir/nxai_plugin_du.txt"
fi

# Gather all log files in the AI Plugin directory
find $libnxai_plugin_dir -name "*.log" -exec cp {} $info_dir/ \;
find $libnxai_plugin_dir -name "*.log.*" -exec cp {} $info_dir/ \;

############################### Check if AI Manager is installed
if [ -d $libnxai_plugin_dir/nxai_manager/bin ]; then
    echo "AI Manager is installed."
else
    echo "AI Manager is not installed."
fi
nxai_manager_dir=$libnxai_plugin_dir/nxai_manager/
bin_dir=$nxai_manager_dir/bin/

############################### Check AI Manager configuration
if [ -f $bin_dir/installed_runtime.txt ]; then
    echo "Runtime might be installed."
else
    echo "Runtime not installed."
fi
# Get the installed runtime information
cp $bin_dir/installed_runtime.txt $info_dir/installed_runtime.txt
# Get all settings files
find $libnxai_plugin_dir -name "*.json" -exec cp {} $info_dir/ \;

############################### Check if AI Manager is running
# get running processes
ps aux | grep nxai >>$info_dir/nxai_manager_ps_aux.txt

############################### Check connectivity to the Nx AI Cloud
# Check if curl or wget is available
echo "Downloading test files from the Nx AI Cloud to measure download speed..."
if command -v curl >/dev/null 2>&1; then
    echo "Using curl"
    # check if Nx AI Cloud is reachable
    curl -s https://api.sclbl.nxvms.com/dev/ >$info_dir/nxai_cloud_connectivity.txt
    # Download a file from the Nx AI Cloud to measure the download speed
    curl -s -m 20 "https://cdn.sclbl.nxvms.com/benchmark.bin?size=10" -o /dev/null -w "%{speed_download}" |
        awk '{print "Model download speed: " $1/1048576 " MB/sec"}' \
            >$info_dir/nxai_cloud_download_speed_of_model.txt
    curl -s -m 20 "https://artifactory.nxvms.dev/artifactory/nxai_open/files/23MB.bin" -o /dev/null -w "%{speed_download}" |
        awk '{print "Runtime download speed: " $1/1048576 " MB/sec"}' \
            >$info_dir/nxai_cloud_download_speed_of_runtime.txt
elif command -v wget >/dev/null 2>&1; then
    echo "Using wget"
    wget -q -O "$info_dir/nxai_cloud_connectivity.txt" https://api.sclbl.nxvms.com/dev/
    wget --timeout=20 "https://cdn.sclbl.nxvms.com/benchmark.bin?size=10" -O /dev/null >$info_dir/nxai_cloud_download_speed_of_model.txt 2>&1
    wget --timeout=20 "https://artifactory.nxvms.dev/artifactory/nxai_open/files/23MB.bin" -O /dev/null >$info_dir/nxai_cloud_download_speed_of_runtime.txt 2>&1
else
    echo "ERROR: Neither curl nor wget is installed."
fi
# Get the latency to the Nx AI Cloud
ping -c 10 api.sclbl.nxvms.com >$info_dir/nxai_cloud_ping.txt

# Get information about DEEPX if available
# Checking if dxrt-cli is installed
if command -v dxrt-cli >/dev/null 2>&1; then
    echo "dxrt-cli is installed."
    dxrt-cli -s >$info_dir/dxrt_cli_version.txt 2>&1
else
    echo "dxrt-cli is not installed."
fi

# Get information about Nvidia if available
# Checking if nvidia-smi is installed
if command -v nvidia-smi >/dev/null 2>&1; then
    echo "nvidia-smi is installed."
    nvidia-smi >$info_dir/nvidia_smi.txt 2>&1
else
    echo "nvidia-smi is not installed."
fi

############################### tar compress the information
cd $info_dir/..
tar -cvf $info_dir.tgz "$(basename $info_dir)" >/dev/null || echo "ERROR: Failed to compress the information."
rm -rf $info_dir >/dev/null 2>&1

echo "System information gathering complete."
echo "The collected information is stored in $info_dir.tgz"
echo "Please attach this archive to your support request."
cd "$current_dir"

```

</details>

This will create a file called `nxai_troubleshooting.tgz` in the home directory. Attaching this file to your support question will make it much easier for us to help you.


# Troubleshooting

Troubleshooting the Nx AI Manager

## Is it a problem in the AI manager

This troubleshooting section will only help with the Nx AI Manager and does not address other problems in the Nx Meta or Nx EVOS system.

When you are troubleshooting you need to make sure that you are trying to use AI with the AI Manager and not another function of Nx EVOS, the Nx AI Manager is different than the built in motion detection for example.


# Plugin checks

Things to check if the plugin is running correctly, and how to check it.

First make sure the [System checks](/nx-ai-manager-v4.x/support-and-troubleshooting/troubleshooting/system-checks) are all correct.

### Check the plugin installation <a href="#check-the-plugin-installation" id="check-the-plugin-installation"></a>

You can check on the device settings page if the "Nx AI Manager" plugin is present in the plugins tab. If the plugin tab is not present or if the "Nx AI Manager" is not there you need to download the plugin.

{% hint style="warning" %}
Ensure you download Nx Meta version 6.0 or later to be able to use the Nx AI Plugin.
{% endhint %}

#### Is the plugin available <a href="#is-the-plugin-available" id="is-the-plugin-available"></a>

When opening the camera settings the Plugins tab is available, and on the Plugins tab the Nx AI Manager is present

<figure><img src="https://files.gitbook.com/v0/b/gitbook-x-prod.appspot.com/o/spaces%2F4Ho7de78I0gSMd4YY72l%2Fuploads%2FsL7jLgvcm5yRruEiBLlH%2FScreenshot%20from%202024-07-03%2010-58-41.png?alt=media&#x26;token=bca10330-226d-4275-8184-e23e85daa391" alt=""><figcaption></figcaption></figure>

#### Is the plugin installed <a href="#is-the-plugin-installed" id="is-the-plugin-installed"></a>

If the plugin is not available, check if the plugin is present (and what version it is)

* You need Nx Meta version 6.0 or newer.
* The plugin version needs to be version 4.0 or higher. This document uses the plugin version 4.1 or higher.
  * It could be the case that the plugin is not properly installed. Follow the instructions at [2. Install Nx AI Manager Plugin](/nx-ai-manager-v4.x/nx-ai-manager/2.-install-nx-ai-manager-plugin), and check that the plugin file is installed at:`/opt/networkoptix-metavms/mediaserver/bin/plugins/nxai_plugin/libnxai_plugin.so`
  * If the plugin file is not there, or it exists but the server still cannot detect it, follow the instructions at [5. Manual Plugin Installation](/nx-ai-manager-v4.x/nx-ai-manager/5.-manual-plugin-installation)​

### Are the needed drivers installed <a href="#are-the-needed-drivers-installed" id="are-the-needed-drivers-installed"></a>

#### NVIDIA Orin accelerated <a href="#nvidia-orin-accelerated" id="nvidia-orin-accelerated"></a>

If you're running on NVIDIA Orin - is a current version of NVIDIA Jetpack installed?

#### Hailo Accelerated Devices <a href="#hailo-accelerated-devices" id="hailo-accelerated-devices"></a>

In order for the runtime using Hailo accelerators to work, the correct Hailo Runtime (**hailort)** needs to be installed. Currently, the Nx AI Runtime supports Hailo driver version **4.17.0**. Ensure that the correct runtime is installed.

### Is the Nx AI Runtime running <a href="#is-the-nx-ai-runtime-running" id="is-the-nx-ai-runtime-running"></a>

#### Check the Nx EVOS plugin interface <a href="#check-the-nx-evos-plugin-interface" id="check-the-nx-evos-plugin-interface"></a>

If the plugin is not running the Plugin tab will show a deactivated toggle for the device.

<figure><img src="/files/90ozPjWbmMCCFbLNuPW2" alt=""><figcaption></figcaption></figure>

You can enable the NX AI Runtime by clicking the Device active switch.

<figure><img src="/files/FxOcYMxZUTjOMIAGKF7F" alt=""><figcaption></figcaption></figure>

### Check the command line

Check the console if it is running with the following command:

```shell
ps axu | grep -E -i -w "sclbld|sclblmod"
```

The return should be something similar to if the plugin is running:

```shell
user@system:~$ ps axu | grep -E -i -w "sclbld|sclblmod"
network+  797274 43.9  0.4  44188 33404 ?        Sl   12:14   8:54 /opt/networkoptix-metavms/mediaserver/bin/plugins/nxai_plugin/nxai_manager/bin/sclblmod
network+  797295  674  1.8 740244 143308 ?       Sl   12:14 136:34 /opt/networkoptix-metavms/mediaserver/bin/plugins/nxai_plugin/nxai_manager/bin/../bin/sclbld [{"ModelPath": "/opt/networkoptix-metavms/mediaserver/bin/plugins/nxai_plugin/nxai_manager/bin/../cache/7b65bdda-39da-4259-b1bf-b0d1dbb7b162.onnx", "RuntimePath": "/opt/networkoptix-metavms/mediaserver/bin/plugins/nxai_plugin/nxai_manager/bin/../bin/libRuntimeLibrary.so"}] /opt/networkoptix-metavms/mediaserver/bin/plugins/nxai_plugin/nxai_manager/bin/../sockets/sclblmod_to_sclbld_0 /opt/networkoptix-metavms/mediaserver/bin/plugins/nxai_plugin/nxai_manager/bin/../sockets/sclbld_to_sclblmod_0 1 64
```

If none of these lines are present, the AI Manager is not running.

## Is it a model problem?

First make sure that the model actually has something to detect. For example if you're using a model that is expecting vehicles, that will not be detected on a camera that is viewing an empty warehouse.

### Is the model working

Check if the module is started by looking into the logfile at `/opt/networkoptix-metavms/mediaserver/bin/plugins/nxai_plugin/nxai_manager/etc/sclblmod_log.log`.

```bash
tail -f /opt/networkoptix-metavms/mediaserver/bin/plugins/nxai_plugin/nxai_manager/etc/sclblmod_log.log
```

It should show updates like the following:

```
MODULE: 1720434595502 000000070: Notice: Model run  3727 
MODULE: 1720434595502 000000064: Notice: Postprocesssing [1]
MODULE: 1720434595502 000000104: Notice: Converting bboxes to image space 
MODULE: 1720434595503 000000193: Notice: Could not find bboxes array in inference results.
MODULE: 1720434595503 000000077: Notice: Could not find scores output in inference results.
MODULE: 1720434595503 000000070: Inference completed with BBoxes: 3, Scores: 0, Counts: 0
```

If there is no output, or the only output is an error message the plugin is not running.

### Is the model downloaded

Check if the model file exists and has the correct size

See if the model with the ID from the cloud is downloaded and has the correct size.&#x20;

For example the **80-Classes Object Detector \[640x640]** model has the following model ID: `7b65bdda-39da-4259-b1bf-b0d1dbb7b162` on the model detail page:

<figure><img src="/files/0Jzryw3P7nkUAMEhNYbR" alt=""><figcaption></figcaption></figure>

Models are downloaded into `/opt/networkoptix-metavms/mediaserver/bin/plugins/nxai_plugin/nxai_manager/cache/` on the local file system.&#x20;

Open a SSH session to the server and use the `ls` command to list the model file and verify if it matches the expected size, you can compare the files by manually downloading the model file and checking it with the version in the cache on the system:

```
ls --full-time -h /opt/networkoptix-metavms/mediaserver/bin/plugins/nxai_plugin/nxai_manager/cache/7b65bdda-39da-4259-b1bf-b0d1dbb7b162.*
-rwxrwxrwx 1 networkoptix-metavms networkoptix-metavms 24M 2024-05-22 12:40:39.151613981 +0200 /opt/networkoptix-metavms/mediaserver/bin/plugins/nxai_plugin/nxai_manager/cache/7b65bdda-39da-4259-b1bf-b0d1dbb7b162.onnx
```


# OS checks

## Check Internet and DNS Connectivity

To get started with the AI Manager, ensure you have internet access and a functioning DNS. To troubleshoot and verify internet connectivity and DNS functionality on a Linux system, follow these steps:

#### 1.. Test Internet Connectivity

To test if you have internet connectivity, you can try pinging an external server like Google's DNS server.

* **Ping an external server:** Run the following command:

  ```bash
  ping -c 4 8.8.8.8
  ```

  This command sends four ICMP echo requests to Google's DNS server. If you receive replies, your internet connection is working.

#### 2. Verify DNS Functionality

If your network connection is active but you suspect DNS issues, you should verify that DNS resolution functions correctly.

* **Ping a domain name:** To check if DNS is working, try pinging a domain name:

  ```bash
  ping -c 4 google.com
  ```

  If the domain name resolves to an IP address and you receive replies, your DNS works. If not, you might see an error like "unknown host," indicating a DNS resolution issue.

## **Failed to create SHM:: Function not implemented**

The issue is that the image on the device has not been compiled with the SHM flag. We work with shared memory. (By default, Ubuntu, and Debian, have SHM enabled.) In other words, `CONFIG_SYSVIPC=y` needs to be enabled.

Explanation and Clarification:

1. **The Issue**:

   The problem arises because the software image (likely an operating system or kernel) on a particular device was not compiled with the SHM (Shared Memory) flag enabled. This flag is necessary for certain features related to shared memory to work properly.
2. **Shared Memory**:

   Shared memory is a method of inter-process communication (IPC) that allows multiple processes to access the same segment of memory. This is essential for certain applications that need to exchange data quickly without going through the slower process of sending data through sockets or files.
3. **Ubuntu Default**:

   Ubuntu (which is likely the base operating system being used) has shared memory support enabled by default. This means that the necessary settings for shared memory are turned on in the standard Ubuntu configuration.
4. **CONFIG\_SYSVIPC=y**:

   This is a configuration option in the Linux kernel. `CONFIG_SYSVIPC` controls whether System V IPC (which includes shared memory, semaphores, and message queues) is enabled in the kernel. The `y` indicates that this option should be enabled. Without this setting, shared memory and other IPC mechanisms would not be available.

Summary: The current device's software image doesn't support shared memory because the SHM flag wasn't enabled during compilation. To fix this, the `CONFIG_SYSVIPC=y` option needs to be enabled in the kernel configuration.

## Make sure *libgomp* is installed

As is mentioned in 1. Install Network Optix, you need to have `libgomp` (the GNU Offloading and Multi Processing Runtime Library)  installed. You can do so with:

```
sudo apt update
sudo apt upgrade -y
sudo apt-get install -y libgomp1 gdebi wget
```

It should not be necessary after you have installed it. But to double check whether `libgomp` is indeed installed on your system, you can use one of the following methods depending on your operating system:

#### 1. **On Linux (Debian/Ubuntu)**

You can use the `dpkg` command:

```bash
dpkg -l | grep libgomp
```

If `libgomp` is installed, you will see an output listing the package details. If it is not installed, there will be no output.

Alternatively, you can use the `apt` command to search for the package:

```bash
apt list --installed | grep libgomp
```

#### 2. **On Linux (RedHat/CentOS/Fedora)**

You can use the `rpm` command to check if `libgomp` is installed:

```bash
rpm -qa | grep libgomp
```

If `libgomp` is installed, this will display the package name and version.

#### 3. **Using the `ldconfig` Command**

You can also check if the shared library is available using `ldconfig`:

```bash
ldconfig -p | grep libgomp
```

This command will list the path to `libgomp.so` if it is installed.


# System checks

Things to check on the system if everything is running correctly, and how to check it.

### Is Nx Meta version 6.0 or later installed <a href="#is-nx-meta-version-6.0-or-later-installed" id="is-nx-meta-version-6.0-or-later-installed"></a>

You need Nx Meta 6.0 or later for the Nx AI Manager plugin. Follow the instructions to see [1. Install Network Optix](/nx-ai-manager-v4.x/nx-ai-manager/1.-install-network-optix). You need both the client and server programs, but the server can be installed on another machine than the client. Typically the **server** is a computer connected to some **cameras** over the network, and the **client** can be installed on your **local workstation** or **laptop**.

### Is the storage full <a href="#is-the-storage-full" id="is-the-storage-full"></a>

Can you store data or is the system low on resources. If the system has no space left the Nx AI Manager will not work correctly.

### Is the camera working <a href="#is-the-camera-working" id="is-the-camera-working"></a>

Do you see images in the camera preview window? If not, check the camera control app that came with the camera if that does show images.

* If the camera is not working there, you need to fix the camera input first before trying any next steps.
* If the camera is working but not visible in Nx Meta, please try to fix the camera display in Nx Meta first before trying any next steps.

### Are the necessary drivers installed <a href="#are-the-needed-drivers-installed" id="are-the-needed-drivers-installed"></a>

#### NVIDIA Orin accelerated <a href="#nvidia-orin-accelerated" id="nvidia-orin-accelerated"></a>

If you're running on NVIDIA Orin - is a current version of NVIDIA Jetpack installed?

#### Hailo Accelerated Devices <a href="#hailo-accelerated-devices" id="hailo-accelerated-devices"></a>

In order for the runtime using Hailo accelerators to work, the correct Hailo Runtime (**hailort)** needs to be installed. Currently, the Nx AI Runtime supports Hailo driver version **4.17.0**. Ensure that the correct runtime is installed.

### Is the system registered to a cloud user <a href="#is-the-system-registered-to-a-cloud-user" id="is-the-system-registered-to-a-cloud-user"></a>

If the plugin is detected and you are greeted with this message:

<figure><img src="https://files.gitbook.com/v0/b/gitbook-x-prod.appspot.com/o/spaces%2F4Ho7de78I0gSMd4YY72l%2Fuploads%2Ff8RbtUAIVoB88Knm5UnH%2Fnocloud.png?alt=media&#x26;token=d281363e-7b9f-41d6-93a0-e229306c80ff" alt=""><figcaption></figcaption></figure>

It is most likely that your system is not connected to a cloud account. If you do not have an Nx Cloud account yet, follow the steps at [1. Install Network Optix](/nx-ai-manager-v4.x/nx-ai-manager/1.-install-network-optix) . The plugin requires a system to be connected to the cloud account to work.To add your system to your cloud account, right click on your system in the left-hand pane and select the Cloud tab:​​​

<figure><img src="https://files.gitbook.com/v0/b/gitbook-x-prod.appspot.com/o/spaces%2F4Ho7de78I0gSMd4YY72l%2Fuploads%2F3C4k7HioYwwHZKNh3KUo%2Fcloud_management.png?alt=media&#x26;token=2c02991d-cb36-42c5-8b60-514b213be44a" alt=""><figcaption></figcaption></figure>


# Things to try

Things you can try to narrow down where the problem might be.

### Have you tried turning it off and on again <a href="#have-you-tried-turning-it-off-and-on-again" id="have-you-tried-turning-it-off-and-on-again"></a>

Always try to restart the system to see if it fixes the problem.&#x20;

Also check all cables (by unplugging them and plugging them back in)

#### Restart the Nx Meta Mediaserver <a href="#restart-the-nx-meta-mediaserver" id="restart-the-nx-meta-mediaserver"></a>

For the plugin to be detected after install, make sure to restart the Nx Meta mediaserver. This can be done through the Nx Meta mediaserver web interface.Navigate to "\<Server IP Address>:7001" in your web browser. Go to the **Servers** tab, and click the restart button.

### Reinstall the plugin <a href="#reinstall-the-plugin" id="reinstall-the-plugin"></a>

Firstly completely remove the existing version of the plugin by following the [uninstall instructions](/nx-ai-manager-v4.x/nx-ai-manager/6.-removing-the-nx-ai-manager). And then follow the [install instructions](/nx-ai-manager-v4.x/nx-ai-manager/2.-install-nx-ai-manager-plugin) for a clean installation the plugin.

### Try another version <a href="#try-another-version" id="try-another-version"></a>

There might be a newer version of Nx Meta or Nx EVOS available. The new version might have improved functionality. Download the [new version](https://meta.nxvms.com/download/releases) and install it to see if your problems are solved.Check if the latest beta fixes your problem, or if it worked in a previous release.

* Nx AI Manager plugin - see the [install instructions](/nx-ai-manager-v4.x/nx-ai-manager/2.-install-nx-ai-manager-plugin).
* Nx Meta Mediaserver - check if there is a [newer version or a beta](https://meta.nxvms.com/download/releases) available.
* Nx Meta client - check if there is a [newer version or a beta](https://meta.nxvms.com/download/releases) available.

### Try another model <a href="#try-another-model" id="try-another-model"></a>

See if you can install another model and see if it gives correct results. Verify that the model is [downloaded](/nx-ai-manager-v4.x/support-and-troubleshooting/troubleshooting/plugin-checks) and running.

### Try another camera <a href="#try-another-camera" id="try-another-camera"></a>

Check if the model works on another camera. If no other camera is available, you can point the camera at a different scene.

### Try to reset an unresponsive USB camera

When you are using a USB webcam on ubuntu or another linux, those cameras can get lost in sleep mode and become unresponsive.

You can unplug it and reconnect it to get the camera back, but that's kind of hard to do when you're remote.

To remotely reset a USB camera you can login to the console of the machine where the camera is connected and use the command `usbreset` to get a list of the USB devices. Resetting a specific device can then be done with `usbreset 001/001` for example to reset a device that is located on that bus number.

### Try a test camera stream <a href="#try-a-test-camera-stream" id="try-a-test-camera-stream"></a>

If no camera change is possible, try a video feed instead of a live camera. You can then try a [test camera](https://support.networkoptix.com/hc/en-us/articles/360018067074-Testcamera-IP-Camera-Emulator) with a video which is especially suited for your model.

### Try another computer <a href="#try-another-computer" id="try-another-computer"></a>

If you have another computer available, install the Nx Meta Mediaserver or Nx EVOS and check if it works on that system.The Nx AI Manager in Nx Meta and Nx EVOS can run on systems like the Raspberry Pi or the NVIDIA Orin Nano and on many standard PCs and laptops.


# Controlling the server and the plugin

How to start and stop the server an the plugin.

## Start the server

The mediaserver will usually be started automatically when the computer it is installed on is started.

However it also can be started manually from the command line with either of the following commands:

```sh
sudo service networkoptix-metavms-mediaserver start
```

```sh
sudo systemctl start networkoptix-metavms-mediaserver.service
```

## Restarting the server

Restarting the server can be done on the command line too.

```sh
sudo service networkoptix-metavms-mediaserver restart
```

```sh
sudo systemctl restart networkoptix-metavms-mediaserver.service
```

But it can also be done on the built-in NX Meta Server web interface by accessing the webpage at port `:7001` for instance, at `https://localhost:7001/` or use the IP address for localhost `https://127.0.0.1:7001/`  or use your external IP address with the same port.&#x20;

<figure><img src="/files/whyJumtgmBdrT0MYvBVa" alt=""><figcaption></figcaption></figure>

## Stopping the server

Stopping the server on the command line is similar to starting and restarting.

```sh
sudo service networkoptix-metavms-mediaserver stop
```

```sh
sudo systemctl stop networkoptix-metavms-mediaserver.service
```

## Starting the plugin

To start the plugin the plugin needs to be enabled by toggling the switch next to the title and then also enabling the 'Device Active' toggle that will then appear.

<figure><img src="/files/pPtXz6IvHjFde0sjNUmo" alt="" width="375"><figcaption><p>The popup window showing that the plugin is disabled for this device</p></figcaption></figure>

<figure><img src="/files/6MfwDBwr2R9vvlcqNgmj" alt="" width="375"><figcaption><p>The popup window showing that the plugin is enabled for this device, but the device is not active.</p></figcaption></figure>

## Stopping the plugin

Stopping the plugin when it is running can be done from within the Nx Client.

To stop the plugin all devices on a server need to be disabled by switching the 'Device Active' toggle to off.

<figure><img src="/files/GKoDI8HQGTdoGKPMQNhB" alt="" width="375"><figcaption><p>The popup window showing that the plugin is enabled and the device is active.</p></figcaption></figure>


# Q\&A

### I don't see any bounding boxes in the Nx Client <a href="#i-dont-see-any-bounding-boxes-in-the-nx-client" id="i-dont-see-any-bounding-boxes-in-the-nx-client"></a>

First make sure that the model actually has something to detect. For example if you're using a model that is expecting vehicles, that will not be detected on a camera that is viewing an empty warehouse.If the camera actually sees something that should be detected you can check if the objects view is active. If the notifications or another tab is active the bounding boxes will not be displayed.When you switch to the objects tab the bounding boxes should show up.If there are still no bounding boxes, please go through the [plugin checks](https://app.gitbook.com/o/bcLqIPiXVKcQXjqrnQSu/s/4Ho7de78I0gSMd4YY72l/support-and-troubleshooting/troubleshooting/plugin-checks), [system checks](https://app.gitbook.com/o/bcLqIPiXVKcQXjqrnQSu/s/4Ho7de78I0gSMd4YY72l/support-and-troubleshooting/troubleshooting/system-checks) and [things to try](https://app.gitbook.com/o/bcLqIPiXVKcQXjqrnQSu/s/4Ho7de78I0gSMd4YY72l/support-and-troubleshooting/troubleshooting/things-to-try) sections to solve the problem.

<figure><img src="https://files.gitbook.com/v0/b/gitbook-x-prod.appspot.com/o/spaces%2F4Ho7de78I0gSMd4YY72l%2Fuploads%2FUxDv5NA4DaORwcb9tGgP%2Fimage.png?alt=media&#x26;token=6c34c3d4-f646-4dda-a9f2-d3ce2b949e41" alt=""><figcaption></figcaption></figure>

<figure><img src="https://files.gitbook.com/v0/b/gitbook-x-prod.appspot.com/o/spaces%2F4Ho7de78I0gSMd4YY72l%2Fuploads%2FtfickTa2IFac8PNGeXPY%2Fimage.png?alt=media&#x26;token=4985cf72-ed7f-4b48-9612-2d565e3f873e" alt=""><figcaption></figcaption></figure>

### The Nx AI Runtime is having trouble starting <a href="#the-nx-ai-manager-cannot-be-started" id="the-nx-ai-manager-cannot-be-started"></a>

#### No matching architecture found for model

This message might appear if you have a model assigned that is not compatible with your current hardware or runtime. The NxAI WebUI should prevent you from assigning incompatible models, but it might still happen if devices were moved to different servers, or if the runtime on the server was changed.&#x20;

This problem could be solved by assigning a different compatible model or reselecting the runtime.

#### AI Manager failed to create listening socket

The AI Manager tries to create a socket file on the filesystem to communicate with the Network Optix Mediaserver. It will try to create this file at the default location.

If a file exists, or for whatever reason the AI Manager does not have permissions to write to the default location, this will fail.&#x20;

Making this path available should solve the issue. On devices where this is not an option, the file location can be controlled through ini settings. See [7.5 Enable ini settings](/nx-ai-manager-v4.x/nx-ai-manager/7.-advanced-configuration/7.5-enable-ini-settings)

#### If all else fails

If the message still appears, there could be a problem with your installation. Try manually installing the Nx AI Manager [7.1 Nx AI Manager Manual Installation](/nx-ai-manager-v4.x/nx-ai-manager/7.-advanced-configuration/7.1-nx-ai-manager-manual-installation) .

<figure><img src="https://files.gitbook.com/v0/b/gitbook-x-prod.appspot.com/o/spaces%2F4Ho7de78I0gSMd4YY72l%2Fuploads%2F2aceU4cO160rtVwxloDa%2Fruntime_status_nostart.png?alt=media&#x26;token=5db6d9e4-c393-40a6-92d2-102705e1aca0" alt=""><figcaption></figcaption></figure>

### How can I check if the Metadata is generated <a href="#how-can-i-check-if-the-metadata-is-generated" id="how-can-i-check-if-the-metadata-is-generated"></a>

> I noticed that plugin stops generating metadata for some reason Is there any log or additional information I can collect for you so it would be useful in this case?

For advanced users, it might be advisable to check the output log of the Nx Mediaserver to see if any errors are logged. The log can be gathered by executing:

```sh
sudo journalctl -u networkoptix-metavms-mediaserver.service
```

### Is it possible to send output to a different endpoint? <a href="#is-it-possible-to-send-output-to-a-different-endpoint" id="is-it-possible-to-send-output-to-a-different-endpoint"></a>

No this is not possible. It is possible to access the data and pass it through. See [7.2 External Post-processing](/nx-ai-manager-v4.x/nx-ai-manager/7.-advanced-configuration/7.1-external-post-processing)

### The bounding boxes appear to be out of sync with the stream

This issue occurs when the visualized stream differs from the one used for AI inference. It typically happens when using a [test camera](https://support.networkoptix.com/hc/en-us/articles/360018067074-Testcamera-IP-Camera-Emulator). The problem usually arises from a mismatch between the primary and secondary streams, leading to the visualization of a different stream than the one used for AI processing. For instance, if the plugin operates on the secondary stream while you are viewing the primary stream, it can appear as though the bounding boxes are out of sync in the video:

<figure><img src="https://mail.google.com/mail/u/1?ui=2&#x26;ik=c0def2cba3&#x26;attid=0.1&#x26;permmsgid=msg-a:r-2168785569618819936&#x26;th=191792f7d5bbb8d8&#x26;view=fimg&#x26;fur=ip&#x26;sz=s0-l75-ft&#x26;attbid=ANGjdJ8ZnW7QaSsRFItDttyEXycruOmPMkS0U_hLiykPnOtn7D5k9xtRW1QSuIVYLoMtJAwL9h7jFE5JlgElX7KaBMBQe2uatQe15E0BWN5Td0RATvQOfHZFZq2YtDE&#x26;disp=emb&#x26;realattid=ii_m050ie1e0" alt=""><figcaption></figcaption></figure>

In this case, to fix the issue where the plugin operates on the secondary stream while you are viewing the primary stream, either set the plugin to use the Primary stream or view the ‘Low’ resolution stream in the Client:

<figure><img src="https://mail.google.com/mail/u/1?ui=2&#x26;ik=c0def2cba3&#x26;attid=0.2&#x26;permmsgid=msg-a:r-2168785569618819936&#x26;th=191792f7d5bbb8d8&#x26;view=fimg&#x26;fur=ip&#x26;sz=s0-l75-ft&#x26;attbid=ANGjdJ8lXNyzRSaNphCAACkVJjOUOVYmKzkcZC0DllLD045hD7Rn4RWByF8RtqAItqGTr1SzvXWU6FG6SUV4PMonq30IZ84HktwnnYqyEGIKIUgMbbAn_y0nHyT931s&#x26;disp=emb&#x26;realattid=ii_m050ir0f2" alt=""><figcaption></figcaption></figure>

<figure><img src="/files/NiFRMqBGAje6GqreR9nR" alt=""><figcaption></figcaption></figure>

### How to install the nightly version?

{% hint style="warning" %}
Only if our support team has requested you install the nightly version of the AI manager.&#x20;
{% endhint %}

```bash
sudo bash -c "$(wget -q -O - https://artifactory.nxvms.dev/artifactory/nxai_open/NXAIPlugin/install.sh)" package=nightly
```

### Is it safe to update?

If you want to update or re-install the Nx AI Plugin you can safely re-run the install command.&#x20;

The old version of the plugin will be removed by the install script before the new version is installed.

Your settings will be stored as far as possible. You still need to check the settings, because in some cases new options are available that require some changes. An example might be a new runtime that is available for your hardware.


# How-to videos

Some videos to get you started

## Initial setup with requirements

The initial setup of the Nx AI Manager. The requirements are listed, the plugin installation is checked and a walk through of the initial setup is shown, as is an explanation of the UI elements related to the Nx AI Manager.

{% embed url="<https://youtu.be/aVj06Qdy6oY>" %}

## Remove models and pipelines from a device

A quick video on how to remove models and pipelines from a device

{% embed url="<https://youtu.be/d7XXu2yZ8cw>" %}

## Configure and manage models

A video on how to add a pipeline with one model, and how to replace that model for another one.

{% embed url="<https://youtu.be/kKmiBg-bFu0>" %}


# Introduction

The Nx AI Manager accelerates AI models inference using various built-in **runtimes**, each of which is dedicated to a specific platform and AI accelerator (CPU, GPU, NPU, etc.). These runtimes are seamlessly integrated within the AI Manager, facilitating effortless utilization for individuals employing new runtimes and harnessing various forms of AI acceleration.&#x20;

When a user uploads a [supported](/nx-ai-manager-v4.x/for-data-scientists/importing-models) AI model to the Nx AI Cloud, the uploaded model file is subject to several conversion processes, **each of which generates a new model artifact that is used by one of the** [**runtimes**](/nx-ai-manager-v4.x/ai-accelerators-support/supported-ai-accelerators) **that are provided.**

### Example of a Teachable Machine model

Suppose you've trained a teachable machine model, and exported it according to the guidelines mentioned [here](/nx-ai-manager-v4.x/for-data-scientists/importing-models/from-teachable-machine), the following model artifacts are stored to be used by the Nx AI Manager when needed:

<figure><img src="/files/wKQwyVqMtnKuL9TApIU1" alt=""><figcaption></figcaption></figure>

* `application/zip; source=original`: is the original ZIP archive that's uploaded in the interface.
* `application/zip; kind=teachable-machine`: is the same file that's uploaded but with a different MIME type after detecting its nature.
* `application/x-tensorflow-lite; type=float32`: is the TFLite file that's extracted from the TM archive.
* `application/x-onnx`: the TFLite  generated in an earlier stage is converted to ONNX, validated and optimized to run on both **CPU** and **Nvidia** hardware.\
  *Please note, that in this step, no quantization is performed on the model.*
* `application/zip; device=mxa`: is the artifact generated by compiling the ONNX file into an optimized file dedicated only for MemryX hardware.
* `application/x-onnx; device=hailo`: is a custom ONNX generated specifically for Hailo-8 chips.

{% hint style="info" %}
Any runtime/toolchain combination adhering to the [Open AI Accelerator eXchange (OAAX)](https://www.oaax.org/) standard is compatible with the Nx AI Manager, enabling straightforward substitution of any existing installed runtime with new one.\
If you're a AI chip maker and would like to integrate with the Nx AI Manager, please refer to this documentation repository on [Github](https://github.com/OAAX-standard/OAAX).
{% endhint %}


# Supported AI accelerators

The Nx AI Manager has integrated several runtimes allowing to benefit from hardware acceleration to run the deployed models.

The following table contains a compiled list of supported runtimes:

| AI Accelerator                                                          | CPU Architecture | API/driver version                    |
| ----------------------------------------------------------------------- | ---------------- | ------------------------------------- |
| CPU                                                                     | aarch64, x86\_64 | -                                     |
| Intel (OpenVINO)                                                        | x86\_64          | -                                     |
| Hailo-8                                                                 | x86\_64, aarch64 | 4.17.0, 4.18.0, 4.19.0, 4.20.0        |
| Hailo-8L                                                                | x86\_64, aarch64 | 4.18.0, 4.19.0, 4.20.0                |
| Hailo-15 (coming soon)                                                  |                  |                                       |
| MemryX                                                                  | x86\_64          | 2.2.37                                |
| Nvidia [CUDA](https://developer.nvidia.com/cuda-toolkit-archive)        | x86\_64          | CUDA 11, CUDA 12                      |
| Nvidia [Jetpack](https://developer.nvidia.com/embedded/jetpack-archive) | aarch64          | Jetpack 4.6, Jetpack 5.x, Jetpack 6.x |
| Qualcomm (coming soon)                                                  | aarch64          | 2.20.x                                |
| MemryX (coming soon)                                                    | aarch64          | 2.2.37                                |
| DeepX (coming soon)                                                     | aarch64, x86\_64 | -                                     |


# Nvidia Support

The ONNX-Cuda runtime is available on both x86\_64 machines (for eg. machines with Nvidia RTX 4090, A100, etc.) and AARCH64 machine (for eg. Jetson Orin AGX, Jetson Xavier NX, etc.).

## Operating conditions

For the AI Manager to work on the machine with Nvidia GPUs, the machine needs to have CUDA properly installed, in which case these conditions needs to be met:

### On X86\_64

1. The `nvidia-smi` command should be installed, has to be compatible with the installed Nvidia drivers and works properly.

### On AARCH64

* A compatible JetPack version needs to be installed. You can verify that by running this command:

  ```cpp
  dpkg-query --showformat='${Version}' --show nvidia-l4t-core
  ```

The command returns the version of the installed NVIDIA JetPack SDK.

## Installing the runtime manually

{% hint style="info" %}
Before trying to  install the runtime, make sure that the Nvidia GPU and CUDA version are supported by reviewing [this table](/nx-ai-manager-v4.x/ai-accelerators-support/supported-ai-accelerators), and that they correctly installed by checking the conditions above.
{% endhint %}

First setup to setup the runtime manually is to download the correct runtime library for the relevant machine using one of the links below:

### For X86\_64

* [CUDA 11](https://artifactory.nxvms.dev/artifactory/nxai_open/OAAX/runtimes/v4-4/nvidia-cuda_11-x86_64-ort.tar.gz)
* [CUDA 12](https://artifactory.nxvms.dev/artifactory/nxai_open/OAAX/runtimes/v4-4/nvidia-cuda_12-x86_64-ort.tar.gz)

### For AARCH64

* [Jetpack 4.6](https://artifactory.nxvms.dev/artifactory/nxai_open/OAAX/runtimes/v4-4/nvidia-cuda_10-aarch64-ort.tar.gz)
* [Jetpack 5.x](https://artifactory.nxvms.dev/artifactory/nxai_open/OAAX/runtimes/v4-4/nvidia-cuda_11-aarch64-ort.tar.gz)
* [Jetpack 6.0 ](https://artifactory.nxvms.dev/artifactory/nxai_open/OAAX/runtimes/v4-4/nvidia-cuda_12-aarch64-ort.tar.gz)

When the download is complete, unpack the archive in this directory using this command:

```bash
tar -xf <archive-path> -C /opt/networkoptix-metavms/mediaserver/bin/plugins/nxai_plugin/nxai_manager/bin
```

then, create a file named `installed_runtime.txt` in the same directory and set its content as `ONNX-CUDA` using this command:

```bash
echo "ONNX-CUDA" > /opt/networkoptix-metavms/mediaserver/bin/plugins/nxai_plugin/nxai_manager/bin/installed_runtime.txt
```

After that, for changes to take effect, restart the Nx server using this command:

```bash
sudo systemctl restart networkoptix-metavms-mediaserver.service
```

## Troubleshooting

For systems using NVIDIA's JetPack SDK, especially recent installations, the `networkoptix-metavms` user might not automatically be added to the `render` group. This group membership is essential for the Network Optix AI Manager plugin to fully utilize NVIDIA GPUs for hardware acceleration. While this process will be automated in a future Nx Server release, for now, you can manually add the user to the `render` group by following these steps:

#### 1. Check if the 'render' Group Exists

First, verify whether the `render` group exists on your system:

```bash
getent group render
```

* **Expected Output**

  If the `render` group exists, you will see output similar to:

  ```
  render:x:104:username
  ```

  This indicates that the group exists and lists the users currently in the group.
* **No Output**

  If there's **no output**, the `render` group does not exist on your system. In this case, there's no need to continue with the next steps. Y

#### 2. Add 'networkoptix-metavms' to the 'render' Group

* Run the following command to add the user to the `render` group:

  ```bash
  sudo usermod -aG render networkoptix-metavms
  ```

  **Explanation of the Command:**

  * `sudo` runs the command with administrative privileges.
  * `usermod` is used to modify user accounts.
  * `-aG` appends the user to the specified group(s) without removing them from others.
  * `render` is the group you're adding the user to.
  * `networkoptix-metavms` is the username for the Network Optix VMS user.

#### 3. Verify the Group Membership

Confirm that the `networkoptix-metavms` user has been added to the `render` group:

```bash
groups networkoptix-metavms
```

* **Expected Output**

  The command will list all groups the user is a part of. You should see `render` included in the list.

#### 4. Restart the Network Optix Service

For the changes to take effect, restart the Network Optix media server service:

```bash
sudo systemctl restart networkoptix-mediaserver.service
```

* This command restarts the service, allowing it to recognize the updated group permissions.

{% hint style="info" %}
If the AI Manager doesn't work even when the conditions above are met, please refer to our [general troubleshooting section](/nx-ai-manager-v4.x/support-and-troubleshooting/how-to-get-support).
{% endhint %}


# OpenVino Support

To use OpenVino runtimes, you have the option select it on plugin install for compatible hardware.\
\
If you want to preselect GPU or NPU runtimes, make sure you have the very latest Intel drivers and  libtbb installed on your machine.\
\
For the Intel drivers, follow:\
\
\-  For GPU:[ ](https://github.com/intel/compute-runtime/releases/tag/25.09.32961.5)<https://github.com/intel/compute-runtime/releases/tag/25.09.32961.5>\
\-  For NPU: <https://github.com/intel/linux-npu-driver/releases/tag/v1.16.0>

Also make sure you have the latest libtbb installed:

```
sudo apt install libtbb12 ocl-icd-libopencl1
```

Add the user to video and gender groups:

```
sudo usermod -aG video $USER

sudo usermod -aG render $USER
```

\
\
Then,  add `Environment="DEVICE_TYPE=GPU" vs Environment="DEVICE_TYPE=NPU"` to `/etc/systemd/system/networkoptix-metavms-mediaserver.service` under `[Service]:`

```
# Network Optix Media Server

[Unit]
Description=Network Optix Media Server
After=network.target local-fs.target remote-fs.target
Requires=networkoptix-metavms-root-tool.service

[Service]
Environment="DEVICE_TYPE=GPU"
PermissionsStartOnly=true
ExecStartPre=/opt/networkoptix-metavms/mediaserver/lib/scripts/systemd_mediaserver_pre_start.sh
ExecStart=/opt/networkoptix-metavms/mediaserver/lib/scripts/systemd_mediaserver_start.sh
User=networkoptix-metavms
Group=networkoptix-metavms
Restart=always
TimeoutStopSec=120
KillMode=process
TasksMax=8191
LimitCORE=infinity

[Install]
WantedBy=multi-user.target


```


# Hailo Support

Deploying to Hailo chips requires the compilation of ONNX models to Hailo-ONNX format. And due to the nature and involvement in the compilation process, it's prohibitively complicated to automate this process on the cloud. Hence, we provide a workaround where the user compiles the model locally, then uploads the compiled Hailo-ONNX file to the Nx AI Cloud.

## Compiling an ONNX model

### Requirements

* Python 3.8
* Python environment
* **Hailo Dataflow compiler** and **HailoRT Python API** installed in that environment
* A set of calibration images (similar to images used to train the model)

### Example

In this example, we'll go over the compilation steps of a Yolov4-tiny model trained on the COCO dataset. Albeit, most of the instructions mentioned here apply to all kinds of ONNX models, with some requiring changes based on the model.

{% file src="/files/YivPgrS8LGcNpNh2ErvJ" %}
A Yolov4-tiny model that's conforming to Nx's model requirements
{% endfile %}

To compile the model, you can run the Python script below after changing the ONNX path.

{% file src="/files/7QV8RdF0ZitaTFJ0miZG" %}
Python script to compile an ONNX model to the Hailo format
{% endfile %}

The code performs the following tasks:

1. it transpiles the ONNX model to another format optimized for Hailo,
2. it quantizes and optimizes the model using the supplied set of calibration images,
3. it compiles the model to a HEF and embedds it inside an ONNX file as an operator, while the keeping the pre-processing and post-processing intact. \
   **Please note that this step returns an ONNX file that can have different input & output names and shapes.**
4. Finally, a new metadata field, named `chip` is injected in the ONNX to save which Hailo chip the model was optimized for. This needed by the Nx AI Cloud to determine the target chip of the model.

{% hint style="info" %}
The value of chip can be either `hailo` for Hailo-8 chips or `hailo-8l` for Hailo-8L chips.
{% endhint %}

After all the aforementioned steps are executed, a new ONNX file is generated. The latter needs to have his IOs metadata (names & shapes) adjusted. The Python script below is used for that purpose, it creates a new ONNX model with the adjusted inputs and outputs.\
The idea of the script is to make sure the generated ONNX is conforming to Nx's ONNX [requirements](/nx-ai-manager-v4.x/for-data-scientists/onnx-requirements).

{% file src="/files/8tIKCIXyWQHtNxY0AJ3S" %}
Python script to adjust the ONNX input & ouptut metadata.
{% endfile %}

{% hint style="info" %}
To  adapt these two scripts for any other ONNX model, make sure to check out the TODO comments and adjust them accordingly.
{% endhint %}

## Deploying on a machine with Hailo-8 or Hailo-8L chips

1. The first step is to verify that you have a compatible HailoRT driver installed. Please check out this [table](/nx-ai-manager-v4.x/ai-accelerators-support/supported-ai-accelerators) to determine if your driver version is supported.\
   For general Hailo driver install [see here](https://hailo.ai/developer-zone/software-downloads/) (you will need to register for the Hailo Dev Zone).\
   For the Raspberry Pi AI HAT+ [see here](https://www.raspberrypi.com/documentation/accessories/ai-hat-plus.html#ai-hat-plus) for install instructions. For the Raspberry pi AI Kit [see here](https://www.raspberrypi.com/documentation/accessories/ai-kit.html#ai-kit).
2. Next, install the Nx AI plugin by following [these instructions](/nx-ai-manager-v4.x/nx-ai-manager/2.-install-nx-ai-manager-plugin).
3. If all is well, you should be able to select the Hailo runtime when enabling the Nx plugin as shown below:

![](/files/0aUCSpJSaZdh2C98Acqu)

4. After the installation is finished, the plugin interface will look something like this:

![](/files/sySOK1z7NsPK0wmjTD1T)

5. To manually verify that the Hailo runtime is downloaded and set up, feel free to check out the content of the `bin` folder of the AI Manager and make sure it contains these files:\
   \- libhailort.so.4.xx.0 (xx is the minor version of the library)\
   \- libonnxruntime\_providers\_hailo.so\
   -libonnxruntime\_providers\_shared.so\
   \- libRuntimeLibrary.so

```sh
ubuntu@ThinkStation-P360-Tower:~$ ls /opt/networkoptix-metavms/mediaserver/bin/plugins/nxai_plugin/nxai_manager/bin/
installed_runtime.txt libhailort.so.4.17.0 libonnxruntime_providers_hailo.so libonnxruntime_providers_shared.so libRuntimeLibrary.so sclbld sclblmod
```

6. Finally, to deploy a model that can be accelerated on the Hailo chip, make sure that it has a `application/x-onnx; device=hailo` or `application/x-onnx; device=hailo-8l` based on the Hailo chip (Hailo-8 or Hailo-8L) model file in the Nx AI Cloud:

![](/files/1HJutyKdpwuJTFLNx8F2)

If that is not the case, you'll need to manually compile the ONNX model and upload the generated model to the cloud as illustrated in the example above.

## Limitations

### Number of parallel models

The Nx AI Manager offers the ability to operate multiple AI models at the same time. This flexibility allows you to efficiently manage resources and optimize the performance of your AI applications. However, it's important to consider the limitations of the hardware you're using. Specifically, each Hailo chip, whether it's the Hailo-8 or the Hailo-8L, is capable of running only one model at a given time. Therefore, the number of models you can run concurrently on a single machine directly corresponds to the number of Hailo chips installed in that machine. Failing to account for this limitation may lead to the AI Manager's failure.

## Monitoring

**How to Enable Hailo Monitoring with `hailortcli monitor`**

To monitor Hailo usage with the `hailortcli monitor` command, you need to set a specific environment variable. Follow these steps:

1. **Edit the Media Server Service Configuration:**<br>

   Add the following line to the `/etc/systemd/system/networkoptix-metavms-mediaserver.service` file to set the necessary environment variable:<br>

   ```plaintext
   Environment="HAILO_MONITOR=1"
   ```

   \
   The updated configuration file should look like this:<br>

   ```plaintext
   [Unit]
   Description=Network Optix Media Server
   After=network.target local-fs.target remote-fs.target
   Requires=networkoptix-metavms-root-tool.service

   [Service]
   PermissionsStartOnly=true
   ExecStartPre=/opt/networkoptix-metavms/mediaserver/lib/scripts/systemd_mediaserver_pre_start.sh
   ExecStart=/opt/networkoptix-metavms/mediaserver/lib/scripts/systemd_mediaserver_start.sh
   User=networkoptix-metavms
   Group=networkoptix-metavms
   Restart=always
   TimeoutStopSec=120
   KillMode=process
   TasksMax=8191
   LimitCORE=infinity
   Environment="HAILO_MONITOR=1"

   [Install]
   WantedBy=multi-user.target
   ```
2. **Restart the NX Media Server:**<br>

   After updating the configuration file, restart the Network Optix Media Server for the changes to take effect. You can do this by running one of the following commands:<br>

   ```bash
   sudo systemctl restart networkoptix-metavms-mediaserver.service
   ```

   \
   or<br>

   ```bash
   sudo service networkoptix-metavms-mediaserver restart
   ```
3. **Run hailortcli**\
   &#x20;\
   `HAILO_MONITOR=1 hailortcli monitor`

<figure><img src="/files/gnlvlwLJBWAWHUbHrQRt" alt=""><figcaption></figcaption></figure>

## PCIe descriptor page size error

If you encounter the following error (actual page size may vary), it indicates that your host does not support the specified PCIe descriptor page size:

```
[HailoRT] [error] CHECK_AS_EXPECTED failed - max_desc_page_size given 16384 is bigger than hw max desc page size 4096
```

This issue is common on ARM64 devices like the Raspberry Pi AI Kit. To resolve it, add the following configuration to `/etc/modprobe.d/hailo_pci.conf`. If the file does not exist, create it and set the `max_desc_page_size` to the value mentioned in the error (e.g., 4096):

```bash
options hailo_pci force_desc_page_size=4096
```

You can add this configuration by running the following command:

```bash
echo 'options hailo_pci force_desc_page_size=4096' | sudo tee -a /etc/modprobe.d/hailo_pci.conf
```

Reboot the machine for the changes to take effect. Alternatively, you can reload the driver without rebooting by executing these commands:

```bash
sudo modprobe -r hailo_pci
sudo modprobe hailo_pci
```

## Experimental `.ini` setting <a href="#enable-.ini-settings" id="enable-.ini-settings"></a>

Explicitly setting multiple Nx AI runtime engines is controlled by an `.ini` file. This `.ini` file does not exist by default and must be created by the user.

Create an empty file by running:

```bash
sudo mkdir -p /home/networkoptix-metavms/.config/nx_ini 
sudo touch /home/networkoptix-metavms/.config/nx_ini/nxai_plugin.ini 
sudo chmod 666 /home/networkoptix-metavms/.config/nx_ini/nxai_plugin.ini
```

Then restart the mediaserver:

```
sudo service networkoptix-metavms-mediaserver restart
```

Once the mediaserver is restarted, the .ini file should be filled with defaults. Each setting should have a description in the .ini file.

Now, you can set multiple runtimes through:&#x20;

```
#enableOutput=false

# If enabled, the NxAI Plugin, NXAI Manager, and Inference Engine logs will be logged to the console. Default: false
#logToConsole=false

# If enabled, the NxAI Plugin will send frames to the AI Manager even when inactive. Default: false
#sendFramesOverride=false

# The path of the AI Manager's socket file is listening for messages. Default: "/tmp/nxai_manager.sock"
#AIManagerSocketPath="/tmp/nxai_manager.sock"

# The path of the socket file the plugin will listen for messages. Default: "/tmp/nxai_plugin.sock"
#PluginSocketPath="/tmp/nxai_plugin.sock"

# The URL of the NXAI cloud. Default: "https://api.sclbl.nxvms.com"
#CloudAPI="https://api.sclbl.nxvms.com"

# The AI Manager will spawn this many runtimes per model. Default: 1
runtimesPerModel=2


```


# Introduction

&#x20;This section of our documentation describes how to create vision models that can be easily deployed to your edge devices running Nx Meta Server.&#x20;

{% hint style="info" %}
This section of the docs focuses on creating models. Once you have a model ready in ONNX format, you [can find instructions on uploading it to the Nx Cloud platform here](/nx-ai-manager-v4.x/nx-ai-cloud/upload-your-model).&#x20;
{% endhint %}

## High-level process

Our standard process for creating and uploading your models to the Nx AI Cloud is to:

1. Create a model using your favorite training tools. You can create an [ONNX model/pipeline from scratch](/nx-ai-manager-v4.x/for-data-scientists/custom-model-creation) or import a model using one of the training tools we integrate with.
   1. If you create your ONNX from scratch, ensure the [resulting ONNX graph is proper](/nx-ai-manager-v4.x/for-data-scientists/onnx-requirements).
2. Once you have your model ready, you can upload it to the Nx AI Cloud platform; we will automatically convert it to several different device-type optimized versions and ensure that it can be deployed to any edge device running the Nx AI manager efficiently.

{% @mermaid/diagram content="graph TD
A(Train model using your favourite training tools)
subgraph ONNX
B\[Ensure Nx ONNX specs]
end
C(Upload to platform)
D(Automatic conversion to different representations)
E(Manage deployment)
A-->B
B-->C
C-->D
D-->E
" %}

In this section of the docs, you can find the following:

* General [information and resources regarding ONNX](/nx-ai-manager-v4.x/for-data-scientists/about-onnx).
* Details on how to [generate your own ONNX graphs](/nx-ai-manager-v4.x/for-data-scientists/custom-model-creation) and how to check your ONNX graph.
* Details on how to import models that have been [exported from various model training platforms](/nx-ai-manager-v4.x/for-data-scientists/importing-models).


# About ONNX

[ONNX](https://onnx.ai) (stands for **O**pen **N**eural **N**etwork **E**xchange) provides a standardized file structure to store trained AI and ML pipelines. Although ONNX is mostly used to store a fitted model (i.e., to export a model from some training platform or framework), we use it more broadly to create full data processing pipelines (also known as *computational graph*) and to merge and combine models flexibly. Before reading the docs on [custom model creation](/nx-ai-manager-v4.x/for-data-scientists/custom-model-creation) using ONNX, it is useful to have a general understanding of ONNX.

{% hint style="info" %}
The ONNX ecosystem is [rapidly advancing](https://onnx.ai/about.html): more and more model training platforms support exporting to ONNX (and thus can be used to create models for edge deployment using the Nx AI manager). We are active contributors to the ONNX ecosystem.&#x20;
{% endhint %}

### A short ONNX introduction

According to the official [ONNX website](https://onnx.ai/index.html):

*”ONNX is an open format built to represent machine learning models. ONNX defines a common set of operators — the building blocks of machine learning and deep learning models — and a common file format to enable AI developers to use models with various frameworks, tools, runtimes, and compilers.”*

Thus, ONNX is an open file format to store (trained) machine learning models/pipelines containing sufficient detail (regarding data types, etc.) to move from one platform to another. The specificity of ONNX allows one to *automatically* compile the stored operations in lower-level languages for embedding on various devices. Effectively, an onyx file will contain all you need to know to instantiate a full data processing pipeline when moving from one platform to the other. It contains a full description of the process of turning the model input (for example, an image coming from a camera) into the desired output (for example, a count of the number of people in front of the camera).

Conceptually, the ONNX format is easy enough: An ONNX file defines a [directed acyclic graph](https://en.wikipedia.org/wiki/Directed_acyclic_graph) in which each edge represents a tensor specifying data of a specific type that is “moving” from one node to the other. The nodes themselves are called [operators](https://github.com/onnx/onnx/blob/master/docs/Operators.md) and specify operations on their inputs (i.e., the results of their parent nodes in the graph) and submit the result of their operation to their children. [ONNX](https://onnx.ai/)  thus specifies a list of operations that jointly allow one to specify virtually any AI/ML operation you might want to carry out (and if not, the set of operators is easily extendable).

### A simple example

The figure below shows an example of an ONNX graph rendered using Netron for rudimentary image processing (see [this medium post](https://towardsdatascience.com/onnx-for-image-processing-from-scratch-6694f9b141b0) for details). This graph can detect movements in front of a camera with an otherwise static background.

The logic of the graph is easy enough to follow:

* At the top, we have the start node (or named input) that is called `xin`. It is a `in64` tensor of dimensions 300x400x3: Effectively, this encodes passing a color image of 300 by 400 pixels with 3 color channels, which are each encoded using `int64`.
* In the second `Sub` node, the input image is simply pixel-by-pixel and subtracted from another image (called `B` in this graph: simply a static image encoding the static background). A full list of ONNX operators can be found [here](https://github.com/onnx/onnx/blob/main/docs/Operators.md).
* After the input image and the background have been subtracted, the `Abs` node is used to compute the absolute value of the difference between the values. This is again done pixel-by-pixel. The result is effectively an image encoding all that is left of the input image after subtracting the static background.
* Next, the `ReduceSum` node sums over all pixels to generate a single number that quantifies the difference between the input image and the static background.&#x20;
* Finally, a simple `Less` check is used to see if there is a difference between the input image and the background that is large enough to conclude that something has appeared in front of the camera: the `out` node is simply a boolean value indicating whether something has appeared in front of the camera.

![](/files/IjSxEKet6T4XV9NkaFp3)


# Custom model creation

Here, we demonstrate the creation of *custom* ONNX models/pipelines for use within the Nx ecosystem. To export a model from your preferred training platform, please look at the[ importing model pages](/nx-ai-manager-v4.x/for-data-scientists/importing-models).

{% hint style="info" %}
Note that throughout this section, we heavily rely on the open-source [sclblonnx](https://pypi.org/project/sclblonnx/) python package; you can find more examples in the [sclblonnx git repository](https://github.com/scailable/sclblonnx/tree/master/examples).
{% endhint %}

This article explains how to build ONNX graphs from scratch that encode a pipeline (i.e., an AI model including potential pre- and post-processing) that can be deployed to any edge device running the Nx AI manager.&#x20;

We cover the following steps:

1. Basic background regarding the `sclblonnx` package.
2. Using `sclblonnx` to create an ONNX graph from scratch.

{% hint style="info" %}
If you do not know the ONNX format, we encourage you to read our[ about ONNX page](/nx-ai-manager-v4.x/for-data-scientists/about-onnx) at this point.
{% endhint %}

## 1. Basic background regarding the `sclblonnx` package

Because at Nx, we use ONNX often, and because our use of ONNX models/pipelines almost always extends (far) beyond simply [storing a fitted model in a single environment](/nx-ai-manager-v4.x/for-data-scientists/importing-models) to use it in that exact same environment later on, we often find ourselves in the situation that we would like to *create,* *inspect*, *alter*, *test*, or *merge* existing ONNX graphs. For example, we often add image resizing to an existing vision model such that the resulting ONNX pipeline can be put into production for cameras with different resolutions. However, in our view, the existing [onnx.helper API](https://github.com/onnx/onnx/blob/master/docs/PythonAPIOverview.md) is challenging to use. Thus, internally, we have developed (and are continuously trying to improve) a higher-level API for the manipulation of ONNX graphs. This higher level tooling is openly available in the `sclblonnx` python package.

{% hint style="info" %}
The source for the `sclblonnx` package can be found on [git](https://github.com/scailable/sclblonnx). Easy installation of the package can be done using [pip](https://pypi.org/project/sclblonnx/).
{% endhint %}

In its bare essence, the `sclblonnx` package provides a number of high-level utility functions to deal with ONNX graphs. We try to use a consistent syntax, which looks as follows:

```
# Importing the package
import sclblonnx as so

# Assuming we have a graph object g:
g = so.FUNCTION(g, ...)
```

Thus, we provide a number of functions to operate on a graph (and often alter an existing graph), which results in an updated version of the graph. Common functions are:

* `add_node(g, node)`: Add a node to an existing graph (and yeah, obviously, you can also delete\_node(g, node)).
* `add_input(g, input)`: Add a new input to an existing graph. You can also delete or change inputs.
* `add_output(g, output)`: Add a new output to an existing graph.
* `add_constant(g, constant)`: Add a constant to a graph.
* `clean(g)`: Clean up the graph; this is important as exported graphs are often bloated or inconsistent.
* `check(g)`: Check whether the graph is valid, can be run, and can be deployed using the Nx AI Manager (the latter you can turn off)
* `display(g)`: Visually inspect the graph using Netron.
* `merge(g1, g2, outputs, inputs)`: Merge two (sub) graphs into a single graph. E.g., add preprocessing to a trained model.

{% hint style="info" %}
The `sclblonnx` git repository contains many [examples](https://github.com/scailable/sclblonnx/tree/master/examples) that should help you get started.
{% endhint %}

## 2. Using `sclblonnx` to create an ONNX graph from scratch.

Here we provide the syntax to use the `sclblonnx` package to create a super simple ONNX graph to add two scalars.

{% hint style="warning" %}
The code example is the first example of creating an ONNX graph from scratch.&#x20;

Note that the resulting graph cannot be deployed to the AI manager as it does not operate on an image input and does not adhere to our [ONNX requirements](/nx-ai-manager-v4.x/for-data-scientists/onnx-requirements).&#x20;
{% endhint %}

We start by creating an empty graph:

```
# Use the empty_graph() method to create a named xpb2.GraphProto object:
g = so.empty_graph()
```

Next, we add the `Add` node to the graph (you can find the list off all possible nodes, or ONNX operators) [here](https://github.com/onnx/onnx/blob/master/docs/Operators.md)).

```
# Add a node to the graph.
n1 = so.node('Add', inputs=['x1', 'x2'], outputs=['sum'])
g = so.add_node(g, n1)
```

By now, we have a graph with a single computational operator called Add. The inputs and output of the add operator are named, but we have not specified their types yet. This is our next step:

```
# We should explicitly specify the named inputs to the graph -- note that the names determine the graph topology.
# Also, we should specify the data type and dimensions of any input.
# Use so.list_data_types() to see available data types.
g = so.add_input(g, 'x1', "FLOAT", [1])
g = so.add_input(g, 'x2', "FLOAT", [1])

# Similarly, we add the named output with its corresponding type and dimension.
# Note that types will need to "match", as do dimensions. Please see the operator docs for more info.
g = so.add_output(g, 'sum', "FLOAT", [1])
```

By now we have effectively created a fully functioning ONNX graph: we specified all our operators and the inputs and outputs to the graph (including their types and dimensions).

Next, we provide a few options to check, clean, and inspect the resulting graph:

```
# so.check() checks the current graph to see if it matches Nx upload criteria for .wasm conversion.
so.check(g)

# Now, a few tricks to sanitize the graph which are always useful.
# so.clean() provides lossless reduction of the graph. If successful cleaned graph is returned.
g = so.clean(g)

# so.display() tries to open the graph using Netron to inspect it. This worsk on most systems if Netron is installed.
# Get Netron at https://github.com/onnx/onnx/blob/master/docs/Operators.md
so.display(g)
```

If the created graph `g` passes the `so.check()` function you can be sure your ONNX graph is proper.

> **Note:** The `_sclbl_check` argument of the `so.check()` function can be used to toggle whether or not you would like to check the graph for usage within the Nx ecosystem.

After finalizing and checking the graph, it's easy to test the resulting graph locally using the [onnx runtime](https://github.com/microsoft/onnxruntime):

```
# Now, use the default ONNX runtime to do a test run of the graph.
# Note that the inputs dimensions and types need to match the specification of the graph.
# The outputs returns all the outputs named in the list.
example = {"x1": np.array([1.2]).astype(np.float32), "x2": np.array([2.5]).astype(np.float32)}
result = so.run(g,
                inputs=example,
                outputs=["sum"]
                )
print(result)
```

Finally, a created graph can easily be stored:

```
# We can easily store the graph to a file for upload at https://admin.sclbl.nxvms.com/:
so.graph_to_file(g, "onnx/add-scalars.onnx")
```

After storing a complete graph, you can upload it to the Nx AI Cloud platform by logging into your account at <https://admin.sclbl.nxvms.com/> and going to the "CREATE" tab.&#x20;

{% hint style="info" %}
After creating your ONNX file, and before uploading it to the Nx platform, please check whether your ONNX file meets all the [ONNX requirements](/nx-ai-manager-v4.x/for-data-scientists/onnx-requirements) imposed by the Nx platform.
{% endhint %}

{% hint style="success" %}
Note that the conversion of ONNX to SPMF is one-to-one: i.e., the output produced by the ONNX graph will exactly match the output produced by the AI manager when a model is deployed to any supported edge device.
{% endhint %}


# ONNX requirements

In the previous sections, we have explained how to create ONNX graphs from scratch, providing several examples in the package to help you understand the concept better. However, if you have already trained your model using your preferred training platform or framework, you can simply export it and obtain a file that you can upload to the Nx platform for deployment.

This page offers a comprehensive specification of an ONNX model needed to benefit from all the built-in functionalities in the Nx AI Manager.

## ONNX version **1.15.0**

To meet the compatibility requirements for Nx AI Manager XPU runtimes, we advise using or exporting only ONNX versions up to 1.15.0. This version is solely compatible with Python 3.11.

We refresh our runtimes at least every six months, so feel free to check back periodically for updates on the latest ONNX version support.

To install ONNX 1.15.0 for Python 3.11, you can use the following pip command:

```bash
pip install onnx==1.15.0
```

For inference purposes, ONNX models are typically executed using the ONNX Runtime. The ONNX Runtime version 1.17.0 supports ONNX opset version 20 and is compatible with Python 3.11. To install the ONNX Runtime for CPU execution, use:

```bash
pip install onnxruntime==1.17.0
```

If you require GPU support, you can install the GPU version of ONNX Runtime:

```bash
pip install onnxruntime-gpu==1.17.0
```

Always ensure your development environment aligns with the above versions to maintain compatibility with your Nx AI Manager XPU runtimes.

## Requirements for the ONNX graph

An ONNX graph/model is an abstract representation of computational graphs that uses nodes to describe operators, such as matrix multiplication, convolutions, and addition.&#x20;

While individuals can construct ONNX models tailored to their specific needs and define new operators or attributes, it's important to note that the Nx AI Manager exclusively accommodates the predefined set of operators outlined in the provided official [specification](https://onnx.ai/onnx/operators/) (also see [here](https://github.com/onnx/onnx/blob/main/docs/Operators.md)). Additionally, each ONNX model includes a property known as "opset\_version," representing the [Operator Set Version](https://github.com/onnx/onnx/blob/main/docs/Versioning.md#operator-sets). It is essential to note that our testing procedures have exclusively evaluated versions up to 17.

Let's talk about the types of ONNX models and variants that can be used with the Nx AI Manager. Currently, the AI Manager supports vision models that process RGB images, but it is not designed to handle textual or any other sensor data without additional coding.

ONNX has a significant advantage in being able to handle graph inputs with dynamic shapes. For example, an image classification model can process images of any shape, such as Height x Width, without prior knowledge of the input shape at runtime. However, it's important to note that our current system only supports graph inputs with static dimensions and does not yet support dynamic input shapes. Within the graph itself, the Nx AI Manager does support dynamic shapes.

To recap, the ONNX models that are supported must:

* be vision models,
* with static input shapes,
* expect to operate on RGB/Grayscale images,
* using only operators defined in this [list](https://onnx.ai/onnx/operators/),&#x20;
* with versions up to 17.

## Named IO specification

The AI Manager streamlines operations by leveraging names of ONNX inputs and outputs (IOs) through built-in functions. This facilitates efficient processing and management within the system.

{% hint style="info" %}
We recommend using [Netron](https://netron.app) to visually inspect your ONNX graph to ensure that the input and outputs match the descriptions provided here.
{% endhint %}

In the following sections, a comprehensive specification will be provided that details the input and output (IO) names of the model, along with their corresponding shapes and data types.

### Inputs specification

It's important to note that while a typical vision model can handle different types of inputs, such as images and confidence scores in different formats and shapes, the AI Manager can only recognize specific, commonly used input types for vision models.&#x20;

The following list gives information about what inputs are supported and how they are expected to be: their names, shapes, and datatypes.

1. **Image input** (*Required*):
   * Description: This input is the primary means of providing images to the model for processing.
   * Name: "`image`"
   * Shape:  The input expects images with two possible shapes: (1, channels, height, width) or (1, height, width, channels), where channels can be either 1 (for Grayscale images) or 3 (for RGB images).
   * Data Type: Floating-point numbers (Float32)
   * Expected value: A tensor containing image values after normalization.
2. **Probability input** (*Optional*):
   * Description: This optional input allows for configuring a threshold score to eliminate bounding boxes with lower detection scores (how likely the bounding box contains an object).&#x20;
   * Name: "`nms_sensitivity`"
   * Shape: (1)
   * Data Type: Floating-point numbers (Float32)
   * Expected value: A floating-point number within the range of \[0, 1].
3. **Mask input** (*Optional*):
   * This input is designed for object detection models and regulates areas in images for model outcomes on a pixel-level granularity.
   * Name: "`mask`"
   * Shape: (Height, Width)
   * Data Type: Boolean (BOOL)
   * Expected value:  A binary value (0 or 1) indicating whether the pixel is included (1) or excluded (0) from the model's processing.

{% hint style="info" %}
While the Mask and Probability inputs are particularly beneficial for object detection models, it's noteworthy that they possess versatile applications within the ONNX graph, extending beyond their immediate utility.
{% endhint %}

### Outputs specification

### Supported ONNX Model Outputs

While ONNX models can produce a wide variety of outputs (scores, bounding boxes, masks, body skeleton, etc.) in numerous formats (number, vectors/list, matrix, etc.), our system currently is able to parse two primary types of outputs that are crucial for most vision-based applications: **Scores** (for image classification models) and **Bounding Boxes** (for object detection models). These outputs are standardized to ensure compatibility and efficiency within our AI Manager framework.&#x20;

Below is an overview of each supported output type:

1. **Scores**:
   * Description: A list of confidence scores for the detected objects.
   * Naming Syntax: "`scores-class_id:class_name`". \
     For example: "scores-0:Cat;1:Dog;2:Horse;3:Nothing".
   * Shape: (1, number of classes)
   * Data Type: Floating-point numbers (Float32)
   * Expected value: Each element of the list is interpreted as a probability/score value.
   * ***Usability***: These scores are used to visualize the model output by picking the category with the highest score.
2. **Alarms**:
   * Description: A list of boolean values for the detected objects.
   * Naming Syntax: "`alarm-class_id:class_name`". \
     For example: "alarm-0:Cat;1:Dog;2:Horse".
   * Shape: (1, number of classes)
   * Data Type: Boolean values (0 or 1)
   * Expected value: Each element within the list denotes a condition that, when met, triggers an alarm.
   * ***Usability***: These boolean values serve the purpose of triggering an alarm whenever a True value is present within the list. For instance, if a cat, dog, or horse is detected, an alarm will be raised accordingly.
3. **Bounding Boxes (bboxes)**:
   * Description: Coordinates for the bounding boxes around detected objects represented as a matrix.
   * Naming Syntax: "`bboxes-format:xyxysc;class_id:class_name`"\
     For example: "bboxes-format:xyxysc;0:Person;1:Bike;2:Car".
   * Shape: (Number of detected bboxes, 6)
   * Data Type: Floating-point numbers (Float32)
   * Expected value: Each entry in this list comprises 6 values representing the coordinates of the top-left corner and the bottom-right corner of the bounding box, followed by the model's confidence score, and the class ID (xmin, ymin, xmax, ymax, score, class), thus the format value in the output name being: xyxysc.
   * ***Usability***: These outputs can be seamlessly integrated with a built-in post-processing mechanism, configurable based on user settings. This post-processing capability extends to various functionalities, including visualization, line-crossing analysis, QR/Barcode scanning, or the application of bounding-box area blurring.

These IO names and formats play a critical role in ensuring the proper functioning of the Nx AI Manager. They are utilized to determine which input values each model input expects during inference and how to interpret the output values generated at the end of inference. This adherence to specified naming conventions and formats enables seamless interaction between the AI Manager and the deployed models, facilitating efficient inference processes.

### Beyond image classification and object detection models

Certain AI models generate raw outputs that require specialized processing, such as image segmentation or pose estimation models. These outputs cannot be directly incorporated into the ONNX model and necessitate hard-coded post-processing using external procedures. This involves extracting insightful information from the model's raw outputs, such as bounding boxes or scores, using specific processing code. The extracted scores or bounding boxes should adhere to the specifications outlined in the previous subsections to ensure compatibility with the Nx AI Manager.


# Importing models

Next to creating your own models, it is very common to train AI or ML models using some training platform or tool which are subsequently imported to the Nx AI cloud. In this section of our docs we provide information on how to export models using various model training tools, and we give tips on how to make sure your model can be uploaded to the Nx AI cloud and deployed to the Nx AI manager.

{% hint style="success" %}
Note that in many cases the tools we discuss here allow you to export your trained model to ONNX. Once you have the ONNX graph, please see if its fits our requirements before uploading it to the Nx AI cloud.
{% endhint %}

Below we discuss training models using:

* [Edge Impulse](https://nx.docs.scailable.net/nx-ai-manager-v4.x/for-data-scientists/www.edgeimpulse.com). Note that for EdgeImpulse exports it is not necessary to convert to ONNX.
* [Tensorflow / tensorflow lite](/nx-ai-manager-v4.x/for-data-scientists/importing-models/from-tensorflow-tflite).&#x20;
* [PyTorch](/nx-ai-manager-v4.x/for-data-scientists/importing-models/from-pytorch).
* [Teachable machine](/nx-ai-manager-v4.x/for-data-scientists/importing-models/from-teachable-machine).
* Other platforms that allows you to export to ONNX.


# From Edge Impulse

## About Edge Impulse

![](/files/7A092vXSa6x7atLVUwHD)

*"Edge Impulse is the leading development platform for machine learning on edge devices, free for developers and trusted by enterprises."* You can find the Edge Impulse training platform [here](https://www.edgeimpulse.com).

## Preliminaries

In this section of our documentation we describe how to use the [Edge Impulse model training platform](https://edgeimpulse.com) to train advanced machine learning models for vision tasks and deploy them seamlessly using the [Nx AI cloud](/nx-ai-manager-v4.x/nx-ai-cloud/introduction). To follow the documentation at this point we assume that you have access to the following:

* An edge device with the Nx AI manager installed. If you do not have access to an edge device with the Nx AI manager installed please see how to purchase a device. Do make sure you can login to the edge device and navigate to the [AI manager installed on the device](/nx-ai-manager-v4.x/nx-ai-manager/get-started-with-the-nx-ai-manager-plugin).
* A camera that can be used as an input source in Nx Meta as well as in stan-alone mode.
* A Nx AI cloud account. You can register for a free trial account at <https://admin.sclbl.net/register>. However, the Edge Impulse integration will need to be activated for your account by our support team; the quickest way to get that done is by reaching out [through our chat](https://scailable.net/chat/).
* An Edge Impulse account. Sign up for a free Edge Impulse account at <https://studio.edgeimpulse.com/>.

{% hint style="success" %}
Due to policy changes, Edge Impulse has removed the built-in YOLOv5 block. Your model will still work, but to train a new model, you'll need to re-upload the YOLOv5 block on Edge Impulse platform. This takes just 5-10 minutes, and you can follow the instructions [here](https://github.com/edgeimpulse/yolov5).

Let us know if you need any assistance!&#x20;
{% endhint %}

Once you have all of the above setup, you should be able to proceed to train your own model using edge impulse and deploy it using Nx AI Manager.&#x20;

## Quick overview

We will demonstrate how to train and deploy your own model step-by-step. And, we will show you how to re-train your model once it has been deployed in-the-field. We will cover the following steps:

1. **Model training using the Edge Impulse platform**. Note that we will not provide an elaborate walk through of the amazing capabilities of the Edge Impulse platform; these can be found in the Edge Impulse docs: <https://docs.edgeimpulse.com/docs/>.
2. **Coupling your Edge Impulse model with Nx AI cloud**. We will show how to sync your Edge Impulse model with your model catalog.
3. **Deploying (and testing) your model on your edge device**. This section will detail how to deploy your Edge Impulse model effortlessly to your edge device using the [Nx AI cloud](/nx-ai-manager-v4.x/nx-ai-cloud/introduction).&#x20;
4. **Retraining your model**. This step is optional, but cool. Once you have a model setup you can collect new training examples in the field and use these to retrain a model. Once done you can iterate (go back to step 1) and get better!

## 1. Model training using the Edge Impulse platform

We start the development of a novel edge AI solution by creating a new project on the Edge Impulse platform:

![](/files/PZ0cEb4bS55eyGTY0YIz)

The Edge Impulse platform is very intuitive, and allows you to upload and annotate training examples and to train object detection models. We will focus on the Edge Impulse's Yolov5 model; find a quick getting started guide here: <https://docs.edgeimpulse.com/docs/tutorials/detect-objects-using-fomo>.

The important bit for this tutorial is to train an object detection model and to select the correct Yolo models. Work through the data acquisition and impulse creation steps in the Edge Impulse platform to get to the object detection model:

![](/files/PzYJ5RtQ9GTBWPH58yQm)

<img src="/files/0kMBIbh9N2Kr79xif18K" alt="" data-size="original">

Do make sure to select the **FOMO MobileNetV2 (both 0.1 and 0.35), or Yolov5 option**. Next, after you have clicked "Start training" and the model training has finished, you are done (for now) on the Edge Impulse platform.

{% hint style="warning" %}
At this point we **only** support imports of the **FOMO MobileNetV2 and Yolov5** from Edge Impulse. We will be adding support for more Edge Impulse models shortly.
{% endhint %}

## 2. Coupling your Edge Impulse model with Nx

After training your model, you can leave the Edge Impulse platform (but do leave it open in a tab) and move to <https://admin.sclbl.nxvms.com/>. After logging in at the Nx AI cloud you will arrive at your dashboard showing your current models and devices (which might both be 0 when you are just getting started):

![](/files/VddZ2To7vIfk54h8xXk6)

Click the model tab on the left, and next click the  "Add a model" button:

![](/files/o1IE9o4mtSGaQU3STZXX)![](/files/FgKbhYMtGYHrzf2BmcKP)

You will arrive at the model upload page, from where you can [select "linking an Edge Impulse project](https://admin.sclbl.net/link-edgeimpulse)". Yes, you can also just click [this](https://admin.sclbl.net/link-edgeimpulse) link. This all should get you here:

![](/files/3yr4zc1CPyHCRvjfSrI4)

At this point you can use your Edge Impulse API key and project ID to import your trained model directly from Edge Impulse.

* Your Project ID is located on the project info page in a separate box, or as the last item in the URL:

<figure><img src="/files/uW32E8FrkY5VCbDE7bst" alt="" width="375"><figcaption></figcaption></figure>

* Your API key can be found at your dashboard:

<figure><img src="/files/BAkyTntsUQ676ZPNKpYh" alt="" width="375"><figcaption></figcaption></figure>

After filling out the API- and project- keys you can click the "Link model" button, and your Edge Impulse model will be imported into your Nx AI library:

<figure><img src="/files/huGF1yzDjRgPwgNvL8XH" alt="" width="375"><figcaption></figcaption></figure>

You can obviously change the model name and documentation (as usual), but effectively, after the import, the model is directly available for deployment. Once you click "Return to models" you will see the model on the top of you model list:

<figure><img src="/files/kng09VCbljE0B4xTYc1H" alt="" width="375"><figcaption></figcaption></figure>

You are now ready to deploy your model to your selected edge device.

## 3. **Deploying (and testing) your model on your edge device**

In Nx Meta, connect to your system and open the plugin page.

<div align="left"><figure><img src="/files/X1dGWzytEiEafCkkTjGn" alt="" width="375"><figcaption></figcaption></figure></div>

Click "Manage device" and select the model you created.

<div align="left"><figure><img src="/files/QxXYDQdT5A8cPDZg4GYT" alt="" width="314"><figcaption></figcaption></figure></div>

And click on "Use this model" return to the plugin.

The video feed should then show some detection boxes when you activate the object tab.

<div align="left"><figure><img src="/files/dgrtQMMNTw0xpyqnnG3r" alt="" width="375"><figcaption></figcaption></figure></div>

That's it really; you have just trained and deployed a pretty nifty AI model to your edge device.

## 4. **Retraining your model**

Although steps 1 to 3 basically got you started, there are a few nice tricks you can use to improve your solution over time. Particularly, you can set the on-device AI manager to capture new training images when needed.&#x20;

Set up a [postprocessor](https://github.com/scailable/sclbl-integration-sdk/tree/main/postprocessor-python-edgeimpulse-example) from the integration SDK for image uploads. You can set the postprocessor up to send images every `N` seconds or when the result is below a certain `P` value.

Let the system run with the postprocessor for a while.

At this point you can navigate back to your Edge Impulse project, label the uploaded images, retrain the model, and then [re-deploy your model](#3.-deploying-and-testing-you-model-on-your-edge-device).

## Wrap up

The above covers the basics of "training-using-Edge-Impulse-deploying-using-Nx". Very cool stuff, and in this article we really only scratched the surface of the potential applications. If you want to learn more, feel free to [reach out anytime](https://scailable.net/chat/).


# From Nota AI

## About Nota AI

Nota AI provides a software optimization platform, focusing on reducing the time and resources required to develop an artificial intelligence (AI) model and **optimizing** it for the target device.

Nota AI developed [NetsPresso](https://www.nota.ai/netspresso), which is a hardware-aware AI model optimization platform. The platform focuses on optimizing AI models to run efficiently on various hardware devices. They provide a set of [free optimized models](https://launchx.netspresso.ai/models) for various tasks.

## Deploying models

To upload NetsPresso models to Nx AI Platform, you need to export your AI model from [LaunchX](https://launchx.netspresso.ai/main) to **TFlite**. Then, upload the **TFLite** (`.tflite`) in the [platform](https://admin.sclbl.net/create#tflite-upload-wrapper). \
In addition to the model, there a couple of descriptive fields: model name and documentation, where meta-data about the model can be saved.

<figure><img src="/files/FgKbhYMtGYHrzf2BmcKP" alt=""><figcaption><p>Where to upload a NetsPresso model in the Nx AI Cloud.</p></figcaption></figure>

After the model is converted on the Nx AI Platform, the next step is to set the right mean and std (standard deviation) values that were used during the training phase of the model. \
To do so, go to the model page, then click on the *Edit* button to access the interface for setting the normalization values and other model parameters such as the model input width & height.\
When done editing, make sure to click on the *Save* button at the bottom of the page.

<figure><img src="/files/G6mnYS8LIG9L7ZD64iCK" alt=""><figcaption><p>Interface for editing the model normalization values.</p></figcaption></figure>


# From Teachable Machine

## About Teachable Machine

![](/files/XqGrvqAUhmYJqiM4nskm)

[Teachable Machine](https://teachablemachine.withgoogle.com) is a web-based tool that makes creating machine learning models fast, easy, and accessible to everyone.

## Model deployment from Teachable Machine

We currently support super easy exports from image classification models trained using Teachable Machine to Nx AI Platform. The steps are:

1. First, start a [new standard image project in Teachable Machine](https://teachablemachine.withgoogle.com/train/image).
2. Next, follow the Teachable machine instructions to train your image classification model. You can find useful instruction video's [here](https://www.youtube.com/watch?v=DFBbSTvtpy4).
3. After the model has been trained Click the "Export Model" button (see image).\
   ![](/files/JduB2JOYZcghGwDZIZ13)
4. Select the TensorFlow lite tab, and click Download my model.\
   \
   ![](/files/OWYSk55XuOizIFYLjE4z)
5. After few seconds "Converting model", you will be able to download a `.zip` archive&#x20;
6. Upload the zip archive directly through the admin platform.\
   \
   ![](/files/4icJ6Qi7Hp0R71TmecF1)\ <br>


# From Hugging Face

### About Hugging Face

![](/files/PQz9U0XcgaKZyVJGY3F1)

> Hugging Face, Inc. is a French-American company headquartered in New York City, specializing in the development of computer tools for building applications using machine learning. Renowned for its transformers library tailored for natural language processing (NLP) applications, the company also offers a platform enabling users to share machine learning models and datasets while showcasing their work.

Despite Hugging Face focusing mostly on NLP models based on the transformers architecture, they are also providing support for image classficatin models in their [timm](https://huggingface.co/docs/timm/en/index) library, and some object object detection models in the [transformers](https://huggingface.co/docs/transformers/en/index) library.

### Deploying Hugging Face models

As stated previously, our interest is focused only on vision models not NLP models, and specifically image classification and object detection models.

To deploy an image classification model, check out the [Common Models](/nx-ai-manager-v4.x/for-data-scientists/importing-models/common-models) guides.


# From Ultralytics

### About Ultralytics

![](/files/fny7adCeTkmXg2LfNMGn)

> Ultralytics is a software company specializing in computer vision and deep learning solutions. They are known for developing and maintaining popular open-source libraries such as YOLOV8, which is a state-of-the-art object detection model. YOLO (You Only Look Once) is a family of real-time object detection algorithms, and YOLOv8 is the latest iteration developed by Ultralytics.

### Deploying Ultralytics models

Ultralytics provides two main models Yolov5 and Yolov8. You can find a guide that shows how to deploy these two categories of models [here](/nx-ai-manager-v4.x/for-data-scientists/importing-models/common-models).


# From PyTorch

## About PyTorch

![](/files/QC1nB2Nwo93nrSx4kgS3)

[PyTorch](https://pytorch.org) is a [machine learning](https://en.wikipedia.org/wiki/Machine_learning) [framework](https://en.wikipedia.org/wiki/Software_framework) based on the [Torch](https://en.wikipedia.org/wiki/Torch_\(machine_learning\)) library, used for applications such as [computer vision](https://en.wikipedia.org/wiki/Computer_vision) and [natural language processing](https://en.wikipedia.org/wiki/Natural_language_processing), originally developed by [Meta AI ](https://en.wikipedia.org/wiki/Meta_AI)and now part of the [Linux Foundation](https://en.wikipedia.org/wiki/Linux_Foundation) umbrella. It is [free and open-source software](https://en.wikipedia.org/wiki/Free_and_open-source_software) released under the [modified BSD license](https://en.wikipedia.org/wiki/Modified_BSD_license). Although the [Python](https://en.wikipedia.org/wiki/Python_\(programming_language\)) interface is more polished and the primary focus of development, PyTorch also has a [C++](https://en.wikipedia.org/wiki/C%2B%2B) interface.

## Model deployment from PyTorch

Model deployment from PyTorch is simple to achieve by exporting your PyTorch model to ONNX and subsequently using (if neccesary) the `sclblonnx` package to [clean and check the resulting graph](/nx-ai-manager-v4.x/for-data-scientists/onnx-requirements#automatic-checking-using-the-sclblonnx-check-function) for an upload to the Nx AI cloud.&#x20;

* You can find details on PyTorch to ONNX exports [here](https://pytorch.org/tutorials/advanced/super_resolution_with_onnxruntime.html). You can find an insightful tutorial [here](https://deci.ai/blog/how-to-convert-a-pytorch-model-to-onnx/).
* You can find an example using PyTorch and sclblonnx [here](https://github.com/scailable/sclblonnx/blob/master/examples/example_03.py).

After obtaining a [clean ONNX graph that adheres to our requirements](/nx-ai-manager-v4.x/for-data-scientists/onnx-requirements), you can [upload it to the Nx AI cloud](/nx-ai-manager-v4.x/nx-ai-cloud/upload-your-model) for deployment.


# From TensorFlow / TFLite

## About TensorFlow

![](/files/YlcpRNv0GFTeb6m2xIMG)

**TensorFlow** is a [free and open-source](https://en.wikipedia.org/wiki/Free_and_open-source_software) [software library](https://en.wikipedia.org/wiki/Library_\(computing\)) for [machine learning](https://en.wikipedia.org/wiki/Machine_learning) and [artificial intelligence](https://en.wikipedia.org/wiki/Artificial_intelligence). It can be used across a range of tasks but has a particular focus on [training](https://en.wikipedia.org/wiki/Types_of_artificial_neural_networks#Training) and [inference](https://en.wikipedia.org/wiki/Statistical_inference) of [deep neural networks](https://en.wikipedia.org/wiki/Deep_neural_networks).[\[4\]](https://en.wikipedia.org/wiki/TensorFlow#cite_note-4)[\[5\]](https://en.wikipedia.org/wiki/TensorFlow#cite_note-YoutubeClip-5)

TensorFlow was developed by the [Google Brain](https://en.wikipedia.org/wiki/Google_Brain) team for internal [Google](https://en.wikipedia.org/wiki/Google) use in research and production.[\[6\]](https://en.wikipedia.org/wiki/TensorFlow#cite_note-6)[\[7\]](https://en.wikipedia.org/wiki/TensorFlow#cite_note-7)[\[8\]](https://en.wikipedia.org/wiki/TensorFlow#cite_note-8) The initial version was released under the [Apache License 2.0](https://en.wikipedia.org/wiki/Apache_License_2.0) in 2015.[\[1\]](https://en.wikipedia.org/wiki/TensorFlow#cite_note-Credits-1)[\[9\]](https://en.wikipedia.org/wiki/TensorFlow#cite_note-Metz-Nov9-9)Google released the updated version of TensorFlow, named TensorFlow 2.0, in September 2019.[\[10\]](https://en.wikipedia.org/wiki/TensorFlow#cite_note-:12-10)

TensorFlow can be used in a wide variety of programming languages, including [Python](https://en.wikipedia.org/wiki/Python_\(programming_language\)), [JavaScript](https://en.wikipedia.org/wiki/JavaScript), [C++](https://en.wikipedia.org/wiki/C%2B%2B), and [Java](https://en.wikipedia.org/wiki/Java_\(programming_language\)).[\[11\]](https://en.wikipedia.org/wiki/TensorFlow#cite_note-:13-11) This flexibility lends itself to a range of applications in many different sectors.

## Model deployment from TFLite

You can upload a [TFLite](https://www.tensorflow.org/lite) model directly, and the cloud will take care of exporting the model to ONNX.

## Model deployment from TensorFlow

Exporting from TensorFlow to ONNX is also possible using [the tf2onnx tools](https://github.com/onnx/tensorflow-onnx), as illustrated in these examples: [here](https://github.com/scailable/sclblonnx/blob/master/examples/example_04.py) and [here](https://onnxruntime.ai/docs/tutorials/tf-get-started.html#converting-a-model).

Your TensorFlow model can be exported to ONNX and subsequently using cleaned and checked by the the `sclblonnx` package for an upload to the Nx AI cloud.&#x20;

After obtaining a [clean ONNX graph that adheres to our requirements](/nx-ai-manager-v4.x/for-data-scientists/onnx-requirements), you can upload it to the [Nx AI cloud for deployment](/nx-ai-manager-v4.x/nx-ai-cloud/upload-your-model).


# From Scikit-learn

## About Scikit-learn

![](/files/34dtkRULieIUEJJ3epOZ)

[**scikit-learn**](https://scikit-learn.org/stable/) is a Python module for machine learning built on top of SciPy and is distributed under the 3-Clause BSD license. The project was started in 2007 by David Cournapeau as a Google Summer of Code project, and since then many volunteers have contributed.

Scikit-learn contains a collection of classic ML models that can be used to solve various practical tasks: classification, regression, data points clustering, etc. using for instance SVM, logistic regression, decision tree, isolation forest, etc.

## Model deployment from Scikit-learn

Model deployment from scikit-learn is simple to achieve by exporting your sklearn model to ONNX using the [skl2onnx](https://onnx.ai/sklearn-onnx/) package.

After obtaining a [clean ONNX graph that adheres to our requirements](/nx-ai-manager-v4.x/for-data-scientists/onnx-requirements), you can upload it to the [Nx AI cloud for deployment](/nx-ai-manager-v4.x/nx-ai-cloud/upload-your-model).


# Common Models

The Nx toolkit currently offers support for image classification and object detection models. To facilitate easy deployment, we provide several tutorials containing instructions on how to deploy common models such as MobileNet, ResNet, EfficientNet, ViT, LeViT for image classification, and YoloS, Yolov4, Yolov7, Yolov8 for object detection.

Key steps involved in this process include:

1. Incorporating necessary post-processing steps such as masking and a configurable Non-Maximum Suppression (NMS) for object detection models and Softmax for image classification models directly into the ONNX graph.
2. Modifying the model's input and output shapes and names as per the requirements of the AI Manager.
3. Making sure the exported ONNX has an Operator Set Version less than 18.

The primary objective of these tutorials is to equip AI developers with off-the-shelf scripts, enabling them to deploy these models within minutes. This is achieved by exporting the models to ONNX format, ensuring compatibility with the AI Manager as described [previously](/nx-ai-manager-v4.x/for-data-scientists/onnx-requirements).

{% hint style="info" %}
You can find the tutorials on this [Github repository](https://github.com/scailable/nxai-model-to-onnx).
{% endhint %}


# Nx AI Certification Test

## Certification Test

### Quickstart

The Nx AI Certification test should be able to run on any Ubuntu installation which is also compatible with Network Optix Server.&#x20;

Ensure your device has at least a few gigabytes of free space, a working internet connection and a working Python 3 and Pip installation.

{% code title="Python requirements" %}

```bash
# on some systems you may need to install pip
# for example with the following command on ubuntu
sudo apt update
sudo apt install python3-pip
```

{% endcode %}

{% hint style="warning" %}
If you are testing a GPU or NPU, also make sure that the required drivers are installed, for example the Jetpack drivers for NVIDIA accelerators.
{% endhint %}

Execute the following commands:

{% code title="Download tests" %}

```bash
## Create and enter folder for test
mkdir nxai_test
cd nxai_test

## Download testing suite
wget https://artifactory.nxvms.dev/artifactory/nxai_open/NXAITest/nxai_test.tgz

## Unpack testing suite
tar -xvf nxai_test.tgz
```

{% endcode %}

{% code title="Ubuntu quirk" %}

```bash
# on newer ubuntu systems you need to activate a python venv
sudo apt install python3-venv
python3 -m venv ./ # create venv in current dir
source ./bin/activate # activate python venv in current dir
```

{% endcode %}

{% code title="Install acceleration library" %}

```bash
## Install all required Python packages
pip3 install -r requirements.txt

## Install NX AI Manager
./Utilities/install_nxai_manager.sh

## Install acceleration runtime
python3 Utilities/install_acceleration_library.py
#python3 Utilities/install_acceleration_library.py "Nx CPU"
```

{% endcode %}

{% hint style="info" %}
Running the `python3 Utilities/install_acceleration_library.py` command will automatically detect the available hardware acceleration that is available on your device. If the script finds more than one option, it will pause execution and ask you to choose. If you want to execute these commands without pausing, add an the accelerator name to the command, such as the "Nx CPU" example.
{% endhint %}

{% code title="Download models" %}

```bash
## Download required models
python3 Utilities/download_models.py
```

{% endcode %}

{% hint style="warning" %}
The `download_models.py` command will download approximately 3.5GB of model data, depending on your connection this may take a while.
{% endhint %}

{% code title="Run tests" %}

```bash
## Start test
python3 all_suites.py
```

{% endcode %}

{% code title="Gather info and print ID" %}

```
## Gather info
python3 Utilities/gather_hwinfo.py
```

{% endcode %}

```
## Upload results to cloud
python3 Utilities/upload_results.py
```

{% hint style="warning" %}
The test will run for a couple of hours and will stress the device. Do not power off your device.
{% endhint %}

### Introduction

The Nx AI Certification Test is meant to test any device to ensure it is compatible and stable enough to run the Nx AI Manager for extended periods of time.&#x20;

The test will attempt to run multiple common model architectures, with different sizes, and even multiples of those models to test compatibility and what can be expected to run on the device. The test will also run long operation tests to check if there are any memory issues or degradation in performance due to overheating or other reasons.

Finally, the test will gather all results in a folder which can be used to generate a report, either on the device or somewhere else. The report should contain enough information to determine if the device is indeed compatible.

### Installing Nx AI Manager

A useful script is provided to install the Nx AI Manager runtime locally within the test environment. This will ensure that this testing does not interfere with any existing installations on the device.&#x20;

```bash
./Utilities/install_nxai_manager.sh
```

### Installing Nx Acceleration Library

Acceleration libraries act as layers between the Nx AI Manager and your acceleration hardware. Any device should be able to run the tests on CPU, without acceleration hardware. However if your device has AI acceleration hardware, such as an Nvidia Cuda device, or a Hailo AI chip, these can be used to accelerate the AI pipeline.

Running this script will automatically detect available hardware. If more than one is found, the script will present a list of options which you can choose from.

```
python3 Utilities/install_acceleration_library.py
```

### Download Models

The Certification Test will test a variety of models to see if they can run on your device and libraries. After installing the acceleration library the correct models for your device can be downloaded.

{% hint style="warning" %}
This step could use a lot of data as many large files need to be downloaded. This might also take a long time depending on network conditions.
{% endhint %}

```
## Download required models
python3 Utilities/download_models.py
```

### Running test

The Nx AI Certification test includes a collection of tests to test different aspects of your device to ensure that the Nx AI Toolkit can run on your device. To run all of these tests in one large test, run:

```bash
python3 all_suites.py
```

This could take many hours to complete.

### Gathering Hardware Information

This command will detect some hardware information about your device and package it with the test results. This will gives context to the test results and allows for better analysis about the device's performance.

```
## Gather info
python3 Utilities/gather_hwinfo.py
```

This command will clearly print the ID of your device. This ID can then later be used to identify your device when the test results are uploaded. This command can be run again at any time if you need the ID again.

### Uploading Results

An endpoint was created where you can upload and view the test results of your device. After the test has completed, run the following to automatically upload the script to the cloud:

```bash
python3 Utilities/upload_results.py
```

## Custom Model Benchmark

{% hint style="info" %}
The Custom Model Benchmark can only be used to benchmark models which have been uploaded to the Nx AI Cloud.
{% endhint %}

The test allows you to benchmark your own models on different devices. The Certification Test includes the functionality to add your own models to its benchmark test. If you already have that downloaded, you can skip downloading and extracting the benchmark test. If you are only interested in benchmarking a model, you can instead download the smaller benchmark package:

{% code title="Download benchmark" %}

```sh
## Create and enter folder for test
mkdir nxai_benchmark
cd nxai_benchmark

## Download testing suite
wget https://artifactory.nxvms.dev/artifactory/nxai_open/NXAITest/nxai_benchmark.tgz

## Unpack testing suite
tar -xvf nxai_benchmark.tgz
```

{% endcode %}

Install an Nx AI Manager with runtime by following the steps at [#installing-nx-ai-manager](#installing-nx-ai-manager "mention")

Next, add as many models as you want to benchmark by running:

```bash
python3 Utilities/add_benchmark_model.py <Model ID>
```

And entering the ID of the model you want to test. The ID of your model can be found by navigating to your model in the [model cloud](https://admin.sclbl.nxvms.com/models). For example:

```bash
python3 Utilities/add_benchmark_model.py 4c5527f3-242a-4e17-b2e3-727dd6740f7c
```

After you have successfully added all the models you want to benchmark, you can download the model files from the cloud by running:

```bash
python3 Utilities/download_models.py
```

Once all your models have been downloaded, start the benchmark by running:

```bash
python3 Benchmark-Suite/run_suite.py
```

The test should now automatically benchmark all the models you've added and give you an overview of how this model/device performs.

## Troubleshooting

If the device is working well, but the test is not passing, feel free to contact us for support. To make it easier for us to provide support, please include log files so that we can see what is going wrong on the device.&#x20;

Make sure you're in the root folder of the test suite and run the following command to gather all the log files:

```bash
find ./ -type f \( -name "*.log" -o -name "failed_output.json" \) -printf '%P\n' | xargs tar -czf test_logs.tgz Results/
```

This will create a file called `test_logs.tgz` , please send us this file with your request.


# Nx AI Manager on SCAiLX

<figure><img src="/files/p5BiFzTdQtmvBrSaPKCI" alt=""><figcaption></figcaption></figure>

## Installing the Nx AI Manager

Nx supports the Videology SCAiLX camera. If your SCAiLX Zoom Block camera didn't come preinstalled with our Nx AI Manager (previously Scailable) runtime, don't worry. Just follow our installation documentation [here](https://nx.docs.scailable.net/nx-ai-manager/get-started-with-the-nx-ai-manager-plugin).


# Privacy policy

**Network Optix, Inc. is committed to protecting your privacy and using your personal data in accordance with applicable data privacy legislation (like GDPR).**

Please take a few minutes to read through the information below to understand why we collect and use your personal data. References in this privacy notice to “Network Optix”, “we”, “us”, and “our” are references to Network Optix, Inc. This document was originally written in the English language, and the English text of this document shall prevail over any translation hereof.

&#x20;

&#x20;

**What is Personal Data?**

**Personal Data** means any information relating to an identified or identifiable natural person (‘data subject’); an identifiable natural person is one who can be identified, directly or indirectly, in particular by reference to an identifier such as a name, an identification number, location data, an online identifier or to one or more factors specific to the physical, physiological, genetic, mental, economic, cultural or social identity of that natural person. (Definition from [Article 4 of GDPR](https://gdpr-info.eu/art-4-gdpr/))

&#x20;

**What personal data do we collect?**

Network Optix (“Nx”) collects the following types of personal data:

* **CONTACT:** Information required to contact you (e.g. name, email address, and phone number)
* **COMPANY:** Information related to your company / employer (e.g. contact details and your position)
* **BILLING:** Information required in order to process payments (e.g. credit card information)
* **ACCOUNT:** Information pertaining to your preferences for your Nx account (e.g. whether you want to receive marketing communications; language preferences)
* **SYSTEM:** Information required to use Nx products and services (e.g. IP address; system name)
* **OTHER:** Information that you voluntarily share with Nx as part of normal business processes such as filling out requests for product information or support

**What’s the purpose of collecting personal data?**

The following are the types of and reasons for how Nx uses personal data:

&#x20;

| **Use**                                       | **How and Why**                                                                                                                                                                                                                                                                                                                                                                                                                                                                                                                                                                                                                                                                                                                                                                                     |
| --------------------------------------------- | --------------------------------------------------------------------------------------------------------------------------------------------------------------------------------------------------------------------------------------------------------------------------------------------------------------------------------------------------------------------------------------------------------------------------------------------------------------------------------------------------------------------------------------------------------------------------------------------------------------------------------------------------------------------------------------------------------------------------------------------------------------------------------------------------- |
| BUSINESS Transactions                         | To send transactional information to you when you request information about Nx products or services during the course of normal business transactions.This use, including the collection of the personal data needed to do it, is necessary for the purpose of our legitimate interest to commence and sustain the business relationship with you or your company.                                                                                                                                                                                                                                                                                                                                                                                                                                  |
| ACCOUNT Creation, Management, and Maintenance | To create and manage your online account, as requested by you when registering for your account. This use, including the collection of the personal data needed to do it, is necessary to perform (as applicable), the contract between Nx and you regarding your use of your online account and the service features available through the account.                                                                                                                                                                                                                                                                                                                                                                                                                                                |
| MARKETING Communications                      | To provide you with marketing communications, where you have opted in to receive such communications (including information about Nx, our products, solutions and services, competitions and promotions). These can be shared via electronic means (for example, SMS, emails and online advertising) and via mail. This use, including the collection of the personal data needed to do it, is necessary for the purpose of our legitimate interest to market, promote and demonstrate our business, products, solutions, services, competitions, events and similar and to provide you and/or your company with relevant product, solution and service offerings and any other information about Nx and/or our products that you may seek or we think might be of interest to you or your company. |
| PURPOSE Communications                        | To communicate with you specifically for the purpose that you contacted Nx.                                                                                                                                                                                                                                                                                                                                                                                                                                                                                                                                                                                                                                                                                                                         |
| ADMINISTRATIVE Monitoring                     | To monitor, for necessary administrative purposes and improvement, your use of our different online products, solutions and services.                                                                                                                                                                                                                                                                                                                                                                                                                                                                                                                                                                                                                                                               |

&#x20;

**What type of personal data do we collect in our applications?**

Who you are and the purpose of your interaction with Nx determine what personal data we collect and how it is used. Below is a quick summary:

&#x20;

| **Who are you?**                                                                                           | **What is collected?**                                                                 | **How is it used?**                                                                                 |
| ---------------------------------------------------------------------------------------------------------- | -------------------------------------------------------------------------------------- | --------------------------------------------------------------------------------------------------- |
| <p><strong>My Nx User</strong><br>my.networkoptix.com</p>                                                  | <ul><li>Contact</li><li>Company</li><li>Account</li><li>Other</li></ul>                | <ul><li>BUSINESS</li><li>ACCOUNT</li><li>MARKETING</li><li>PURPOSE</li><li>ADMINISTRATIVE</li></ul> |
| <p><strong>Nx Cloud User</strong><br>nxvms.com</p>                                                         | <ul><li>Contact</li><li>Company</li><li>Account</li><li>System</li><li>Other</li></ul> | <ul><li>ACCOUNT</li><li>PURPOSE</li><li>ADMINISTRATIVE</li></ul>                                    |
| <p><strong>Nx customer, partner, or reseller</strong><br>e.g. daily operations</p>                         | <ul><li>Contact</li><li>Company</li><li>Billing</li><li>Other</li></ul>                | <ul><li>BUSINESS</li><li>PURPOSE</li><li>MARKETING</li></ul>                                        |
| <p><strong>Interested party</strong><br>e.g. Events, exhibitions, and offline</p>                          | <ul><li>Contact</li><li>Company</li><li>Other</li></ul>                                | <ul><li>BUSINESS</li><li>PURPOSE</li><li>MARKETING</li></ul>                                        |
| <p><strong>Support</strong> <br>e.g. support portal, supported devices list, developer feedback forms…</p> | <ul><li>Contact</li><li>Company</li><li>Other</li></ul>                                | <ul><li>PURPOSE</li></ul>                                                                           |

&#x20;

**Network Optix as a Data Controller**

As a data controller, Nx does not share any of your personal data except for the purposes described in this privacy notice and as required by law.\
\
Please note that this privacy policy is specific to personal data that Nx collects and uses as a data controller. In using Nx products and services, you and/or your company or other third-party act as the data controller of data to which you give Nx access. Examples of such data or content include video and image or other personal data contained therein. In such case, Nx acts solely as the data processor and will only process the data on your behalf as the data controller, in accordance with your instructions and applicable law.

&#x20;

**How long do we retain your personal data?**

Nx will not use your personal data for any longer than needed in order to fulfil the purposes described in this privacy policy. After that, we will delete or permanently de-identify your personal data unless required or entitled by law to retain it, or parts of it.

&#x20;

**How can you control / delete / remove your personal data?**

You have a right to request and receive information on what personal data we have about you, get access to this data, request that we erase parts or the entirety of your personal data, request that we restrict the use of or cease using your personal data, and/or have your personal data re-submitted to you in a structured and accessible format.

Please note that if you ask us to erase or restrict the use of any of your personal data, we may not be able to continue managing your Nx online account and/or providing services to you.

If you wish to exercise any of these rights, or if you have any other questions regarding your personal data that you believe were not answered in this privacy policy please contact us at <info@networkoptix.com>

To request deletion of your personal information [click here](https://airtable.com/shrbVvkkFoCEBPvpg).


# Support

{% embed url="<https://www.networkoptix.com/developers/nx-toolkit>" %}

{% embed url="<https://support.networkoptix.com/hc/en-us/categories/360000737654-Develop-with-Nx-Meta>" %}

{% embed url="<https://meta.nxvms.com/>" %}


# End user license agreement

&#x20;

**IMPORTANT!**

BY REGISTERING FOR AN ACCOUNT OR ACCESS TO OUR PLATFORM, BY DOWNLOADING, USING, ORACCESSING ANY OF OUR SOFTWARE OR BY SIGNING A LICENSE AGREEMENT OR OTHERWISEPURCHASING A LICENSE, YOU AGREE TO BECOME BOUND BY THE TERMS AND CONDITIONS OF USE AS SET OUT HEREIN (THE “AGREEMENT”). IF YOU FAVOR A BASE LICENSE (AS DEFINED HEREINAFTER), AND TO ACCESS AND USE SCAILABLE’S PLATFORM AND SOFTWARE, YOU MUST (I) REVIEW AND ACCEPT THE TERMS AND CONDITIONS OF THIS AGREEMENT BY CLICKING ON THE “I ACCEPT” BUTTON AT THE END OF THE TEXT AND (II) REGISTER AN ACCOUNT AS SET OUT AT THE END OF THE TEXT IN ORDER TO INSTALL OR USE SOFTWARE. IF YOU FAVOR A COMMERCIAL LICENSE (AS DEFINED HEREINAFTER), WE WILL MAKE YOU A OFFER SEPARATE FROM THIS CONTEXT. IF YOU DO NOT AGREE WITH THE TERMS AND CONDITIONS OF THIS AGREEMENT, YOUMUST NOT, AND HAVE NO RIGHTS TO, INSTALL, USE, ACCESS OR RETAIN ANY COPIES OF THESOFTWARE NOR USE OUR PLATFORM AND SERVICES IN ANY WAY, SHAPE, OR FORM.

## 1. Software and Licensee

These Terms of Use, if and as accepted by you, will be a legally binding agreement (“Agreement”) between you and Scailable B.V. of Eindhoven, The Netherlands (“Scailable” or “we”) for the use of Software or Content we agree to license to you as our licensee, in accordance with the terms and conditions set out herein and/or in a separate license agreement hereto (the “License Agreement” if applicable).

<table data-header-hidden><thead><tr><th width="245"></th><th></th></tr></thead><tbody><tr><td>“Software” or “Content” </td><td>means any data, software, On-device Software consisting of,amongst others but not limited to the AI Manager and the runtime software, system or computer-implemented method and machine learned models, object codes, algorithms, images, (set of arranged) instructions, or innovations, or any written summaries, photographs, or drawings describing any data, data, software, algorithms, method, models, artificial intelligence (“AI”) or innovations made available by Scailable for the purpose of using the Platform, including all patches, revisions, updates, upgrades or replacements of such software, and, unless subject to a separate license agreement, all separate or additional scripts, modules or software to be used with or in conjunction with such software, all related Documentation, sample code and model libraries (in any form) and all copies thereof</td></tr><tr><td>“AI Manager” </td><td>means the portion of the Software specified in the Documentation of the applicable License Agreement. </td></tr><tr><td>“On-device Software” </td><td>means the AI Manager, run-time software and all other Software except the Software available on the Platform as may be specified in a License Agreement, in other document made part of the Agreement or on our website.</td></tr><tr><td>“Platform” </td><td>means the software platform, its content and related services hosted by Scailable and made available to Licensee under this Agreement.</td></tr><tr><td>“Documentation” </td><td>means any and all materials and documentation related to the Platform or Software or any other Services, including, without limitation, manuals, guides, training materials, policies, help files, programmer's notes and remarks, and any other written, graphic or printed materials, whether in hard copy or digital format, provided or made available by us, whether through posting on our Platform, a web site, or otherwise.</td></tr></tbody></table>

&#x20;

In this Agreement, “us” or “our” refers to Scailable, and “you”, “your” or “Licensee” refers to the (legal) person identified in a License Agreement or, if you have not executed a License Agreement, to you, a natural person, as identified at the time you registered for a Scailable account or downloaded, installed, or registered a Scailable runtime, unless you are using our Platform on behalf of a university, research institution, commercial entity, or other organization (an “Institution”) and whether or not you have named such legal person at the time you registered for an account or runtime, you are agreeing to this Agreement for that Institution and you are representing and warranting to us that you have the authority to bind that Institution to this Agreement (and, in which case, the terms “you”, “your” and “Licensee” will refer to that Institution). If that Institution has a separate written agreement with Scailable covering your account and use of the Platform, that agreement will govern your account and use of our Platform in the event of a conflict with the terms and conditions of this Agreement.

## 2. License types

**A.         Base License.** Subject to the terms and conditions of this Agreement, we grant you a limited, non-exclusive,non-assignable, non-transferable, non-sublicensable right to use the Platform and Software for the purposes set out herein and for your internal use only (the “License”) and to not use the Platform and Software as prohibited under subsection C (ii) below.

**B.         Commercial License**. If you have entered into a License Agreement and/or have paid a license or subscription fee to license any Software, the License is subject to: (a) your payment, as and when due, ofapplicable fees; and (b) the limitations, restrictions and term, as applicable, set forth in the LicenseAgreement (a “Commercial License”).

**C.         Community License.** We may from time to time in our sole discretion make certain Software identified as“Community Use” Software available for your use at our Platform and other accountholders allowed to use Community Use Software (the “Community”) at no charge, provided you have registered for anaccount. If we make available Software that has been identified as Community Use Software, the License is subject to the following additional conditions:&#x20;

(i)    you agree that the functionality of the Software may be limited or restricted;

(ii)   you shall not use the Software or any data, models or information processed using the Software directly or indirectly for or in connection with: (i) any undertaking that is a business, trade, commercial undertaking or an adventure or concern in the nature of trade; or (ii) the generation of income, compensation or profit or with the purpose, objective or intent of generating or realizing income, compensation or profit, including without limitation the provision of any support, consulting or other services related to the Software or any data, models or information processed using the Software or the sale of any product, device or computing service that uses or is intended to use the Software, any data,models or information processed using the Software or the functionality thereof; and

(iii)  we reserve the right to terminate the License at any time, following which you shall cease all usage and destroy all copies of the Software (a “Community License”).&#x20;

**D.       Evaluation License.** If you receive Software that has been identified as evaluation Software, the License is subject to the following additional conditions: (a) you may use the Software and any output of the Software or any data, models or information processed using the Software, solely for evaluation purposes and may not use it or such output in any other manner or for any other purpose whatsoever, including any production purpose; (b) you may only use the Software for the evaluation period we have advised you of in writing (or if we have not so advised you, for a period of 30 days) (the “Evaluation Period”) following which you shall cease all usage and destroy all copies of the evaluation Software; and (c) we reserve the right to limit or disable functions in evaluation Software and disable all functions at the end of the Evaluation Period (an “Evaluation License”).

## 3. Registration, Key and Protective Measures

In order to install or use Software, you must register an account as set out at the end of the text. “Account” means the user account you establish with us prior to accessing the Platform and Software Furthermore, for the AIManager, and our (On-device Software) runtimes you must register certain details to personalize your account and to get access to a code (a “Key”) the use of which shall be limited to personal use of activating and use of the Software only in accordance with this Agreement. You represent and warrant that the informationyou provide when registering is accurate, complete and up to date and that you over eighteen (18) years of age. Our [privacy policy](https://github.com/scailable/sclbl-tutorials/blob/master/terms/privacy-policy-03112021.pdf) shall apply to the information we collect from your Account. You understand and agree that our Platform and Software may contain technological measures designed to: (a) limit functionality of the Software for every type of License; (b) disable the Software upon expiration of Evaluation Periods or at the termination of a License; or (c) prevent or detect the illegal usage of the Software or usage of the Software that violates the terms and conditions of this Agreement or the applicable License Agreement. Such measures may include thetransmission of information regarding usage of the Software or Key(s) to verify your compliance. You agree notto circumvent (or attempt to circumvent) such measures and consent to such transmissions.

## 4. Back-Up Copies

You may make up to two copies (the “Backup Copy”) of the Software solely for archival and backup purposes.Each Backup Copy may only be used as an offline backup and may not be installed or used at disaster recoveryfacilities, including without limitation use on mirrored or clustered servers or similar configurations. You may only use a Backup Copy for so long as the normal production instance of the Software is not operational and, upon recovery of same, may continue to use a Backup Copy only for the period reasonably required to transition to such production instance, following which the Backup Copy shall be uninstalled and deleted from the system on whichit was installed. Use of a Backup Copy may not, in any event, exceed thirty (30) days without our prior writtenconsent.

## 5. Other Restrictions

You agree not to: (a) copy the Software or any Key(s) except: (i) solely as required to exercise the rightsexpressly granted to you; or (ii) to make Backup Copies; (b) use the Software or any Key in a manner thatbreaches or exceeds the quantities, limitations or restrictions set forth in the applicable License Agreement orthat are applicable to a Community, or Evaluation License; (c) distribute, disclose, sublicense, sell, resell, assign, give away, loan, lend, rent, transfer, transmit, pledge or create a security interest in the Software or any Key, whether temporarily or permanently; (d) remove, destroy, cover, obfuscate or alter in any manner any notices or legends pertaining to proprietary rights; (e) modify, port, adapt, translate, reverse engineer, decompile, disassemble or convert into human readable form the Software, or create derivative works based on, or any competitive or emulating software using, the Software; (f) provide or make available any functionality, use or benefit of the Software as an application service provider, a hosted service, software-as-a- service, a computer or processing service business, a service bureau, an outsourced facility or service, on a timesharing or similarbasis or otherwise for or on behalf of any third party, including without limitation using the Software to convert,generate or otherwise process the any work, models, data or other materials of any person other than you; (g)use any Key except for the sole purpose of activating the Software for use in accordance with this Agreement;(h) disclose or allow the use of any Key issued to you to any other person; (i) use the Software or any Key in amanner or for a purpose that infringes upon the lawful rights of others or in contravention of applicable law; (j)disclose to any third party any performance information or analysis relating to the Software; or (k) attempt, orcause, permit or encourage any other person to do any of the foregoing. You understand that the Software issubject to applicable export control laws and regulations and agree that you shall comply with such laws andregulations and shall not export or re-export any Software, directly or indirectly, in contravention of such laws andregulations.

## 6. Licensing Metrics

![](blob:https://app.gitbook.com/9f5cf3dd-0b52-4996-9082-3514dcd46258)This Section applies only to Commercial Licenses.

A Licensee under a Commercial License may only use our Platform and install or operate Software only on thedevices and locations, and for the duration designated in the applicable License Agreement. Any on-deviceSoftware will be associated with a unique Key (which is potentially generated automatically upon installation ofthe Software). The Key is one-to-one tied with a single registered device and is not useable or transferablebetween devices or between users.

## 7. Your Responsibilities

You are responsible for procuring at your expense all third-party equipment, products, software and services(“Third Party Products”) meeting or exceeding the minimum requirements for the Software as identified in ourDocumentation. If we provide or make available any Third-Party Products to you, we do so on an “as-is” basis, without any warranty and subject to any additional terms and conditions accompanying such Third-Partyproducts. You agree that failure to use or procure Third Party Products that meet such requirements may resultin the inability to use the Software, failures or errors. You agree to provide us information and access to yourrelevant systems in a timely and reasonable manner as we may reasonably require to perform our obligations. We or our agent may inspect you, your systems and records to verify your compliance with the Agreement. You agree to provide reasonably and timely assistance, cooperation, information and access to your relevant systemsand information in connection with any such inspection.

## 8. Fees

![](blob:https://app.gitbook.com/9f5cf3dd-0b52-4996-9082-3514dcd46258)This Section applies only to Commercial Licenses

A Licensee under a Commercial License will pay the fees as set out in the License Agreement. All overdueamounts will bear interest at the rate of 1.5% per month (19.56% per year). We reserve the right to increasefees applicable to each renewal term upon prior written notice. All fees are exclusive of all applicable goods and services taxes, sales taxes and any other taxes imposed or levied by any government or government agency,including sales or use taxes.

## 9. Support and Maintenance

![](blob:https://app.gitbook.com/9f5cf3dd-0b52-4996-9082-3514dcd46258)This Section applies only to Commercial Licenses.

We will provide a Licensee under a Commercial License support and maintenance in respect of your permitted use of the Software as specified in the applicable License Agreement (the “Services”.

## 10. Ownership

The Platform and Software is protected by copyright and other intellectual property rights and is licensed as a service to you, not sold as a good. By acquiring the right to use the Platform, Software or a Key you do not become the owner of the Platform, Software or such Key. Except for the rights expressly granted to you under this Agreement and the applicable License Agreement, all right, title and interest (including all copyrights, trademarks, service marks, patents, inventions, trade secrets, intellectual property rights and other proprietary rights) in and to the Platform, Software, each Key and all copies thereof (regardless of the form or media upon which such copies are recorded) are and shall remain exclusively owned by Scailable or our licensors. Scailable and all other trade names, company names, trademarks, service marks and other product and service names and logos in the Software are the proprietary marks of us or our licensors, and are protected by law and may not be copied, imitated or used, in whole or in part, without the consent of their respective owners. This Agreement does not grant you any rights in respect of any such marks.&#x20;

You acknowledge that the Platform, Software and each Key constitute and incorporate our confidential information and that any unauthorized publication or disclosure thereof may cause immediate and irreparable harm to us. Consequently, you agree to take all reasonable steps to maintain the confidentiality of the Software and each Key and shall not, without our prior written consent, disclose, or make it in any form to any other person.&#x20;

Our Software may include, or we may deliver our Software together with, open-source software (collectively, “OSS”) as identified on our website, in our Documentation or as provided to you with the Software. Notwithstanding anything to the contrary herein, your use of any OSS is governed exclusively by the licensing terms applicable to such OSS and not this Agreement. We have no obligation or liability in respect of any OSS, all of which is provided on an “as-is” basis.&#x20;

You agree that any feedback, input, suggestions, recommendations, improvements, changes, specifications, test results, or other data or information that we collect or that are provided or made available to us arising from or related to the Platform or Software or the use, testing or evaluation thereof, including optimization metadata automatically transmitted to us by the Software (which transmissions you hereby consent to and agree not to block, restrict or circumvent), or in the course of utilizing our Services, shall become our exclusive property andmay be used to modify, enhance, maintain, improve and create the Software, our Platform or other products orservices, without any obligation or payment to you whatsoever. The foregoing does not apply to any of models,data or information that you process using the Software, provided however that you grant us the right to usesuch models, data or information as reasonably required for the purposes for which you have provided it to us,including for the provision to you of support, maintenance or other services.

## 11. Warranty and Disclaimer

Scailable warrants to you during the term of the licensed use of the Software by you that the Software will function substantially in accordance with the Documentation if operated on the Platform in accordance with the Documentation. If Software licensed under a Commercial License does not function substantially in accordancewith the Documentation during the term, we will, upon receipt of written notice from you of such failure providingreasonable details thereof and verification of reproducibility, use commercially reasonable efforts to diagnose,correct or provide a reasonable workaround for same in accordance with our support policies. The foregoing constitutes your sole and exclusive remedy and our sole obligation for any such failure. We have no obligation or liability whatsoever if Software has been modified by anyone other than us, or to the extent any failure of our Platform or Software arises or results from improper or unauthorized use, your breach of this Agreement, your negligence or willful misconduct, failures in hardware or equipment not owned or controlled by us, or failures, errors, or misconfigurations of third party products or services. Failures in third party products are addressed exclusively by the terms and conditions applicable to such third party products and not this Agreement and we have no obligation or liability in respect of same.

EXCEPT FOR THE FOREGOING, THE PLATFORM, SERVICES AND SOFTWARE IS PROVIDED “AS IS” ANDWE DISCLAIM ANY AND ALL REPRESENTATIONS, WARRANTIES OR CONDITIONS, EXPRESS, IMPLIED,STATUTORY OR OTHERWISE, INCLUDING WITHOUT LIMITATION ANY REPRESENTATIONS, WARRANTIES OR CONDITIONS OF MERCHANTABILITY, MERCHANTABLE QUALITY, DURABILITY, TITLE, NON-INFRINGEMENT AND FITNESS FOR A PARTICULAR PURPOSE AND THOSE ARISING BY STATUTE, IN LAW OR FROM A COURSE OF DEALING OR USAGE OF TRADE. THE ENTIRE RISK ARISING OUT OF THE USE OR PERFORMANCE OF THE PLATFORM, SERVICES AND SOFTWARE REMAINS WITH YOU. WE DO NOT WARRANT THAT THE PLATFORM SERVICES OR SOFTWARE WILL MEET YOUR REQUIREMENTS OR THAT IT WILL BE FREE FROM DEFECTS, ERRORS AND OMISSIONS OR FUNCTIONS WITHOUT INTERRUPTION. WE DO NOT WARRANT THAT THE SOFTWARE WILL OPERATE PROPERLY AS DEPLOYED IN OR ON ANY DEVICE, INTEGRATED IN PRODUCTS OR ON ANY SYSTEM(S) OR DEVICE(S) YOU USE OR ENABLES OTHERS TO USE. WE DO NOT WARRANT THAT THE PLATFORM, SERVICES OR SOFTWARE WILL BE CAPABLE OF ACHIEVING ANY PARTICULAR RESULT IN YOUR OPERATIONS.

## 12. Limitation of Liability

&#x20;YOU AGREE THAT, TO THE MAXIMUM EXTENT PERMITTED BY APPLICABLE LAW, OUR MAXIMUMLIABILITY WILL BE LIMITED TO YOUR DIRECT DAMAGES, NOT TO EXCEED: (A) IF IN RESPECT OFSPECIFIC SOFTWARE OR SERVICES, THE FEES YOU HAVE PAID TO US IN RESPECT OF SUCH SOFTWARE OR SERVICES IN THE LAST TWELVE MONTHS IMMEDIATELY PRECEDING THE CAUSE OF ACTION; (B) IN AGGREGATE IN RESPECT OF ALL CLAIMS, THE ALL FEES YOU HAVE PAID TO US IN THE LAST TWELVE MONTHS IMMEDIATELY PRECEDING THE CAUSE OF ACTION. TO THE MAXIMUM EXTENT PERMITTED BY APPLICABLE LAW, IN NO EVENT SHALL WE BE LIABLE FOR ANY CONSEQUENTIAL, INCIDENTAL, INDIRECT, SPECIAL, PUNITIVE, OR OTHER DAMAGES, OR DAMAGES FOR LOSS OF REVENUE, PROFITS, OR EXPECTED SAVINGS, BUSINESS INTERRUPTION, LOSS OF DATA OR INFORMATION OR OTHER PECUNIARY LOSS, EVEN IF WE FORESEE OR HAVE BEEN ADVISED OF THE POSSIBILITY OF SUCH DAMAGES.

## 13. Applicability

&#x20;THE LIMITATIONS AND EXCLUSIONS OF LIABILITY AND DISCLAIMERS IN THIS AGREEMENT SHALLAPPLY IRRESPECTIVE OF THE NATURE OF THE CAUSE OF ACTION, INCLUDING BREACH OFCONTRACT, NEGLIGENCE, TORT OR ANY OTHER LEGAL OR EQUITABLE THEORY, AND WILL SURVIVE AFUNDAMENTAL BREACH OR FAILURE OF THE ESSENTIAL PURPOSE OF THIS AGREEMENT OR ANYREMEDY, INCLUDING ANY EXCLUSIVE REMEDY. SOME JURISDICTIONS DO NOT ALLOW LIMITATIONS OREXCLUSIONS OF CERTAIN TYPES OF DAMAGES AND/OR WARRANTIES AND CONDITIONS. THELIMITATIONS, EXCLUSIONS AND DISCLAIMERS SET FORTH IN THIS AGREEMENT SHALL NOT APPLY IFAND TO THE EXTENT THAT THE LAWS OF A COMPETENT JURISDICTION REQUIRE LIABILITY BEYONDAND NOTWITHSTANDING SUCH LIMITATIONS, EXCLUSIONS AND DISCLAIMERS.

## 14. Term and Termination

The initial term of each Commercial License commences on the date of the applicable License Agreement and continues for the initial term specified in such License Agreement. At the end of the initial term or any renewal term, the Commercial License may automatically renew for an additional renewal term as specified in the License Agreement, unless either party notifies the other party in writing at least 60 days prior to the expiration of the then- current initial term or renewal term of such party’s desire not to renew. The initial term of each other type of License commences on the date of your registering for an account or access to our Platform, or the downloading, using, or accessing any of our Software, and such License shall terminate, at our discretion, by posting a termination message on our Platform or by email to you.

We reserve the right to terminate this Agreement and all Licenses without notice if you breach or otherwise fail to comply with any provision of this Agreement. Upon termination of this Agreement: (a) any and all rights granted to you under this Agreement, including all Licenses, shall immediately cease; (b) you shall destroy all Softwareand Keys in your possession or control; (c) you shall cease the use of any On-device Software unless expressly provided otherwise in the applicable License Agreement, and (d) you  shall deliver to us a writtencertificate confirming such destruction.

## 15.  Changes

We may change this Agreement and License hereunder or under any License Agreement from time to time by posting revisions on the Platform or according a License Agreement, if any. It is your responsibility to check our website from time to time, or email message(s) to you, for any such changes. Any such changes become effective 30 days after being posted on our website or as detailed in our email message(s). If you do not agree with any such changes, your sole and exclusive remedy is to terminate this Agreement or License Agreement by delivering written notice to us prior to the effective date of such changes. Your continued use of the Platform and Software after a change to these terms has become effective constitutes your binding acceptance of the updated Agreement or License Agreement.  We reserve the right to modify our Software from time to time as we determine in our sole discretion.

## 16. Assignment

You shall not transfer or assign this Agreement, the Software, any Key or any rights granted to you hereunder inwhole or in part, whether voluntarily, by operation of law or otherwise, without our prior written consent and any such attempted assignment or transfer shall be null  and void.

## 17. Publicity

You agree that we may identify you as a user of the Platform or Software on our website, in publications and in discussions with customers or prospective customers. Any content that identifies you will be subject to your review and approval, not to be unreasonably withheld or delayed. If you are a Licensee under a Commercial License, you may be asked to agree to cooperate with us to: (a) issue a press release with us regarding your use of our Platform and Software within 30 days after you first license the Software; (b) develop and issue one (or more, if mutually agreed) case studies regarding your use of the Platform and Software within 12 months after you first license of the Software; and, (c) develop other promotional materials as mutually agreed in writing.&#x20;

## 18. Dispute Resolution

In the event of any claim, dispute or disagreement (a “Dispute”), upon the written request of either party, theparties will meet for the purpose of resolving such dispute. The parties agree to discuss the problem and negotiatein good faith without the necessity of any formal proceedings related thereto. No formal proceedings for theresolution of such dispute may be commenced until either party concludes in good faith that resolution throughcontinued negotiation of the matter in issue does not appear likely.

The parties further agree that all Disputes which cannot be settled in through such discussions will be settledaccording the provisions set out in Clause 19 below.

## 19. Governing Law and Forum

This Agreement will be deemed to have been made and performed exclusively in the city of Eindhoven, the Netherlands, and any Dispute which cannot be settled amicably according Clause 18 will be governed by and construed under Dutch law without giving effect to its conflict of laws principles and without reference to the United Nations Convention on Contracts for the International Sale of Goods, the application of which is expressly excluded.

You hereby irrevocably attorn to the exclusive jurisdiction of the Dutch courts in the district of Oost-Brabant, the Netherlands for any Dispute arising from or in connection with this Agreement and agree not to bring any action or proceeding against us in any jurisdiction other than the Netherlands.

## 20. Language

At the request of the parties, the official language of this Agreement and all communications and documents relating hereto is English or Dutch.

## 21. Entire Agreement

This Agreement constitutes the entire agreement between you and us with respect to its subject matter andcancels and supersedes any prior understandings and agreements. There are no representations, warranties,terms, conditions, undertakings or collateral agreements, express, implied or statutory, between you and usother than as expressly set forth in this Agreement. You represent and warrant that you have not been inducedto enter into this Agreement by any other statement, representation or warranty not contained in this Agreement.The headings in this Agreement are for convenience of reference only and do not affect the construction orinterpretation of this Agreement.

## 22. Severability

To the extent that any provision of this Agreement is declared by a court or other lawful authority of competentjurisdiction to be invalid, illegal or unenforceable, such provision shall be severed and deleted or limited so as togive effect to the intent of the parties insofar as possible and you and we will substitute a new provision of likeeconomic intent and effect for the illegal, invalid or unenforceable provision, and the remainder of this Agreementshall continue in full force and effect with respect to all other provisions.

## **23. Data Privacy and User Responsibility**

End users assume complete responsibility for data privacy upon uploading or integrating their models into Scailable services and applications. They must comply with all relevant laws and regulations pertaining to the processing of Personally Identifiable Information (PII). It is the users' duty to implement sufficient privacy measures and accept accountability for any legal repercussions associated with their data handling. Users are required to protect Scailable from any legal claims that may arise from data privacy infringements linked to their use of AI models through Scailable services and applications.

## 24. Force Majeure

We will be not be liable or responsible for any failure or delay in performing our obligations if caused by or resultsfrom causes beyond our reasonable control, including fires, floods, embargoes, shortages, epidemics,quarantines, war, acts of war (whether war be declared or not), terrorism, insurrections, riots, civil commotion,strikes, lockouts or other labour disturbances, acts of God or acts, omissions or delays in acting by anygovernmental authority.

## 25. Amendments and Waivers

No modification, amendment, addition to or waiver of any rights, obligations or defaults shall be effective unlessin writing and signed by the party against whom the same is sought to be enforced. One or more waivers of anyright, obligation or default shall be limited to the specific right, obligation or default waived and shall not beconstrued as a waiver of any subsequent right, obligation or default. No delay or failure of we in exercising anyright hereunder and no partial or single exercise thereof shall be deemed of itself to constitute a waiver of suchright or any other rights hereunder.

## 26. Notices

Any demand, notice or other communication to be given to us shall be delivered by mail to: Scailable B.V., Stoutheuvel 1, 5632 MN Eindhoven, The Netherlands.

Any demand, notice or other communication to be given to you shall be delivered to the address or number thatyou provided during registration, or as specified in the License Agreement (if any), or such other address ornumber as you have advised us of from time to time.


# Nx cloud cookie statement

## 1. The use of cookies

sclbl.nxvms.com uses cookies. A cookie is a small file that is sent along with pages from this website and / or Flash applications and stored by your browser on the hard drive of your computer, mobile phone, smartwatch or tablet. The information stored therein can be sent back to our servers on a subsequent visit.

The use of cookies is of great importance for the smooth running of our website, but also cookies of which you do not immediately see the effect are very important. Thanks to the (anonymous) input from visitors, we can improve the use of the website and make it more user-friendly.

## 2. Permission for the use of cookies

Your permission is required for the use of certain cookies. No permission is required for the cookies we use.&#x20;

## 3. The type of cookies and their objectives

We use the following types of cookies:\
Functional cookies: these allow us to operate the website better and they make our website more user-friendly for the visitor. For example, we store your login details or what you have put in your shopping cart. &#x20;

## 4. Your rights with regard to your data

You have the right to inspect, rectify, limit and delete personal data. You also have the right to object to the processing of personal data and the right to data portability. You can exercise these rights by sending an e-mail to <info@networkoptix.com> . To prevent abuse, we may ask you to identify yourself adequately. When it comes to access to personal data linked to a cookie, we ask you to send a copy of the cookie in question. You can find this in the settings of your browser.

## 5. Blocking and deleting cookies

At any time you can easily block cookies yourself or delete them via your internet browser. You can also set your internet browser so that you receive a message when a cookie is placed. You can also indicate that certain cookies may not be placed. View the help function of your browser for this option. If you delete the cookies in your browser, this may have consequences for the pleasant use of this website. Some tracking cookies are placed by third parties which, among other things, show you advertisements via our website. You can delete these cookies centrally via [youronlinechoices.com](http://www.youronlinechoices.eu).\
\
Please note that if you don't want any cookies, we cannot guarantee that our website still works well. Some functions of the site may be lost or you may not be able to visit the website at all. In addition, refusing cookies does not mean that you will no longer see advertisements at all. The advertisements are then no longer tailored to your interests and can therefore be repeated more often.

How you can adjust your settings differs per browser. Please refer to the help function of your browsing or click on one of the links below to go directly to the manual of your browser.

·     Firefox:[ https://support.mozilla.org/en/kb/cookies-delete-data-delete-websites-stored](https://support.mozilla.org/nl/kb/cookies-verwijderen-gegevens-wissen-websites-opgeslagen)

·     Google Chrome:[ https://support.google.com/chrome/answer/95647?co=GENIE.Platform=Desktop\&hl=en](https://support.google.com/chrome/answer/95647?co=GENIE.Platform=Desktop\&hl=nl)

·     Internet Explorer:[ https://support.microsoft.com/en-gb/kb/278835](https://support.microsoft.com/nl-nl/kb/278835)

·     Safari on smart phone:[ https://support.apple.com/en-en/HT201265](https://support.apple.com/nl-nl/HT201265)

·     Safari on Mac: [https://support.apple.com/en-gb/guide/safari/sfri11471/mac](https://support.apple.com/nl-be/guide/safari/sfri11471/mac)

## 6. New developments and unforeseen cookies

The texts of our website can be adjusted at any time due to continuous developments. This also applies to our cookie statement. Therefore, please read this statement regularly to stay informed of any changes. In blog articles, use can be made of content that is hosted on other sites and made accessible by sclbl.nxvms.com by means of certain codes (embedded content), as with YouTube videos for example. These codes often use cookies. However, we have no control over what these third parties do with their cookies.

It is also possible that cookies are placed via our websites by others, of which we are not always aware. Do you encounter unforeseen cookies on our website that you cannot find in our overview? Please contact <info@networkoptix.com>. You can also contact the third party directly and ask which cookies they placed, what the reason is, what the lifespan of the cookie is and how they have guaranteed your privacy.

## 7. Concluding remarks

We will have to adjust these statements from time to time, for example when we adjust our website or change the rules regarding cookies. You can consult this webpage for the latest version.  &#x20;

If you have any questions or comments, please contact <info@networkoptix.com>

January 27, 2025

&#x20;

&#x20;

&#x20;


# test

The Nx AI Manager integrates several runtimes that allow you to benefit from hardware acceleration when running deployed models.

## Fully supported

The following AI accelerators are available out of the box in the current release:

| AI Accelerator     | Support Level | CPU Architecture | Operating System    | API/driver version                   |
| ------------------ | ------------- | ---------------- | ------------------- | ------------------------------------ |
| CPU (OpenVINO)     | Supported     | x86\_64          | Windows, Linux      | OpenVINO runtime (see OpenVINO page) |
| CPU                | Supported     | aarch64          | Linux               | -                                    |
| Nvidia CUDA        | Supported     | x86\_64          | Windows             | CUDA 11, CUDA 12                     |
| Nvidia Jetson Orin | Supported     | aarch64          | Linux (Jetson Orin) | JetPack (Orin supported versions)    |

## Advanced configuration

These accelerators are supported through advanced configuration and additional validation. Contact Nx if you plan to use them in production.

| AI Accelerator            | Support Level          | CPU Architecture | Operating System | API/driver version               |
| ------------------------- | ---------------------- | ---------------- | ---------------- | -------------------------------- |
| Hailo (Hailo 8, Hailo 8L) | Advanced configuration | x86\_64, aarch64 | Linux            | HailoRT (see Hailo Support page) |
| DeepX                     | Advanced configuration | x86\_64, aarch64 | Linux            | DeepX SDK (vendor specific)      |

## Requested and planned integrations

The following vendors have requested and committed to an integration with Nx AI Manager. These accelerators are not yet available in the current release.

| AI Accelerator | Support Level       | CPU Architecture | Operating System | API/driver version |
| -------------- | ------------------- | ---------------- | ---------------- | ------------------ |
| EdgeCortix     | Planned integration | TBD              | TBD              | TBD                |
| Axelera        | Planned integration | TBD              | TBD              | TBD                |
| SiMa.ai        | Planned integration | TBD              | TBD              | TBD                |
| MemryX         | Planned integration | TBD              | TBD              | TBD                |


# Nx AI Manager plugin version 6.1.1

<figure><img src="/files/44dX6m4Stc1f7fkuExxu" alt=""><figcaption></figcaption></figure>

The Nx AI Manager plugin is a tool that enables you to create and manage large-scale Edge AI solutions using the [Network Optix toolkit](https://www.networkoptix.com/developers/nx-toolkit). With this plugin, you can turn any compatible edge device, like a router, gateway, or IPC, into a "smart" device that can run advanced Artificial Intelligence (AI) and Machine Learning (ML) models on input data. Using AI and ML models, you can analyze a video stream and gain valuable insights, such as counting the number of cars passing by in the video stream.

The documentation here offers detailed instructions on setting up and configuring your edge AI solutions on Linux-based Nx Meta-supported edge hardware.

## The Nx AI Manager plugin Architecture.

The Nx AI Manager plugin is the starting point for creating AI solutions within the Nx Meta framework. It can run within Nx Meta Server on any supported edge device (such as a smart camera, gateway, and PC) and allows you to configure the solution you want to create by selecting an AI model and configuring the device settings.&#x20;

The Nx AI Manager plugin currently mainly focuses on video input (a stream of images from a camera).

You can use the Nx Cloud Platform to remotely configure your solution and manage it at scale: i.e., if you have hundreds of devices, you can manage them in one go.&#x20;

The core "magic" that goes into creating edge AI solutions is the **AI model**; the model effectively transforms the input (images) to the desired output (a count of the number of people in front of the camera, an "OK" / "NG" output for product inspection, the license plate of a car in front of the camera, or whether or not a person in front of the camera is wearing a helmet). We have some of off-the-shelf models in our model library, allowing users to configure new solutions. However, if you are a data scientist, you can create models and upload them to our platform for your custom needs.


# Getting started

## Get started with Network Optix and the Nx AI Manager plugin

A basic Nx platform comprises of one or more Nx Meta servers administered through an Nx client, this platform can either be a set of Nx Witness, Nx Go or Nx Meta servers and the corresponding client.

The Nx AI Manager Plugin is a tool that enables you to create and manage large-scale Edge AI solutions using the [Network Optix toolkit](https://www.networkoptix.com/developers/nx-toolkit). With this plugin, you can turn any compatible edge device, like a router, gateway, or IPC, into a "smart" device that can run advanced Artificial Intelligence (AI) and Machine Learning (ML) models on input data. Using AI and ML models, you can analyze a video stream and gain valuable insights, such as counting the number of cars passing by in the video stream.

## Often used terms

Here, we provide a short list of terms that pop up repeatedly in these docs and are good to know:

* **The Nx AI Manager:** The Nx AI Manager is the name for the package of components that is the Plugin, Runtime and Cloud.
* **The Nx AI Manager Plugin**: Nx AI Manager Plugin is the plugin for Nx Meta, or another Powered-By-Nx product, that runs on an edge device, enabling you to configure your edge AI solution.&#x20;
* **The Nx AI Runtime**: The Nx AI Runtime is the library component of the Nx AI Manager responsible for running AI models on AI accelerators. \
  It is controlled by the Nx AI Manager Plugin within Nx Meta and in turn manages the AI accelerator library and the downloaded models.
* **The Nx AI Cloud:** The Nx cloud environment (found at <https://admin.sclbl.nxvms.com/>) allows you to&#x20;
  1. manage your devices and AI models and&#x20;
  2. add your models to your personal AI model collections.&#x20;
* **The Network Optix Toolkit**: All development tools, libraries, applications, and utilities that enable integration with Network Optix in your own application are available, including the Nx AI Manager Plugin and the [Nx Meta API](https://meta.nxvms.com/doc/developers/api-tool/main).
* **EVOS**: Network Optix's Enterprise Video Operating System, which includes all of Network Optix's open tools, enables developers to manage numerous video streams across multiple locations, deploy on-site AI models (at the edge), visualize videos, establish business rules, and deliver meaningful applications to end users.
* **Nx Meta:** The version of EVOS that is mostly used for development with the Nx AI Manager, it consists of one or more server installations and a client to manage those servers. Nx Witness and Nx Go can also be used instead.
* **An AI/ML model:** We use this term somewhat loosely for any model definition that describes the transformation of input (streams of images) to output (bounding boxes, license plate, "OK"/"NG" etc.). This model can be a Deep Neural Network (AI), a simple classification model (ML), or a traditional Vision pipeline. Ultimately, the logic running on the device does the "magic".&#x20;
* **Edge device:** We loosely refer to any device (camera, gateway, IPC, etc.) that runs the Nx AI manager.&#x20;

{% @mermaid/diagram content="flowchart LR
subgraph Nx Meta / Witness / Go
subgraph A\[Nx AI Manager Plugin]
B\[Nx AI Runtime]
D\[AI Accelerator]
C\[AI/ML Model]
B-->D
B-->C
D<-->C
end
end

" %}

## Get started with the Nx AI Manager plugin

To get started with Nx and the Nx AI Manager plugin, follow the steps outlined below:

{% content-ref url="/pages/ZuSvvX87sZbTNZmX2lFG" %}
[Install Network Optix](/nx-ai-manager-v6.1.1/nx-ai-manager/install-network-optix)
{% endcontent-ref %}

{% content-ref url="/pages/iFRdkGmk2C4WNa5SV9PF" %}
[Starting the Nx AI Manager Plugin](/nx-ai-manager-v6.1.1/nx-ai-manager/install-plugin)
{% endcontent-ref %}

{% content-ref url="/pages/6EEE07YOwLbczVzy2LX3" %}
[Configure the Nx AI Manager Plugin](/nx-ai-manager-v6.1.1/nx-ai-manager/configure-the-plugin)
{% endcontent-ref %}

{% content-ref url="/pages/Quc1TjRlMVonDT3GtbE1" %}
[Plugin Settings](/nx-ai-manager-v6.1.1/nx-ai-manager/install-plugin/plugin-settings)
{% endcontent-ref %}

{% content-ref url="/pages/kYml6bG4tXeQarcJgaSQ" %}
[Advanced configuration](/nx-ai-manager-v6.1.1/nx-ai-manager/advanced-configuration)
{% endcontent-ref %}

And because it's sometimes necessary:

{% content-ref url="/pages/qDZwbJbgQKfjDu2FwxZ3" %}
[System requirements](/nx-ai-manager-v6.1.1/nx-ai-manager/getting-started/system-requirements)
{% endcontent-ref %}

{% content-ref url="/pages/j7zFBVM5eY0h36HLMBVn" %}
[Troubleshooting](/nx-ai-manager-v6.1.1/support-and-troubleshooting/troubleshooting)
{% endcontent-ref %}


# System requirements

{% hint style="info" %}
**Minimum Hardware Requirements**

* **x86\_64 Systems**: Intel i5 (10th Gen quad-core equivalent) or higher, with at least 4 GB of RAM\
  *Note: The processor must support AVX2 instructions. Check* [*here*](https://avx2checker.com/processors) *if you are in doubt.*
* **ARM Systems**: Raspberry Pi 4B equivalent or higher (AARCH64), with at least 4 GB of RAM
* **NVIDIA Jetson**: A NVIDIA Jetson device with [Jetpack 5, 6 or 7](/nx-ai-manager-v6.1.1/ai-accelerators-support/nvidia-support) installed

**OS Requirements**

*The Nx AI Manager is supported on the Nx Server for Nx Witness, Nx Go and Nx Meta on Ubuntu Linux LTS version 20.04 or higher, Windows 10 and Windows 11. Refer to the* [*Nx Witness Operating System Support*](https://support.networkoptix.com/hc/en-us/articles/205313168-Nx-Witness-Operating-System-Support) *for other systems where the Mediaserver is supported.*

*The Nx AI Manager is not supported on systems running Windows Server 2016 and older versions.*\
\
**Software Requirements**\
*Nx Meta Client 6.1+   \[X86\_64, Arm64]*\
*Nx Meta Server 6.1+  \[X86\_64, Arm64]*
{% endhint %}

## Performance recommendations

{% hint style="info" %}
**Note:** The recommendations below are based on the assumption that the computer being used is dedicated to the Nx Meta Server application with the default settings and one Nx AI Plugin and is not used to run additional applications concurrently as this may impact the performance and stability of your System.
{% endhint %}

For example, a system with one camera, no saved layouts, few rules, and a single user on the minimal required hardware will work just fine. A System with multiple models, many cameras per server, dozens or hundreds of layouts, numerous rules, and hundreds of concurrently connected users would require much more substantial hardware.

### AI input resolution and secondary stream recommendation

Enabling the plugin for a camera secondary stream with a resolution of 512x512 or slightly higher, e.g. 720p, and a minimum frame rate of 6 frames per second (FPS) is recommended. Please refer to your camera's documentation to configure the camera's secondary stream accordingly.

While enabling the Nx AI Manager plugin for a camera primary stream is possible, that is not recommended. Running the plugin on a primary stream will require the Nx server to decode the high-resolution stream and scale it down. This primary stream decoding and scaling imposes a high load on the CPU and will significantly increase memory consumption. Running AI plugins on the primary stream will not improve the accuracy of the AI detections and will reduce the number of AI detections per second on your Nx Server.

### AI detections per second

For accurate AI detection in security or surveillance use cases, a minimum of 6 detections per second is typically sufficient. By default, the Nx AI Manager plugin will perform as many detections per second as possible. The number of detections per second is limited by the number of frames per second in the video stream and the AI processing power of the device it runs on.

On an Intel i5 12th gen device with 8GB of memory, using 720p resolution secondary camera streams, the following performance can be expected:

Single 720p RTSP H264 secondary stream at 24 fps stream performance with Detection plugin:

* Up to 23.2 FPS for the large people detection model.

Four 720p RTSP H264 secondary streams at 24 fps stream performance with Detection plugin:

* Up to 9.0 FPS per stream for the large people detection model

These numbers can serve as a reference point for estimating the system's performance, but remember that the actual performance may vary based on specific configurations, hardware variations, and other factors.

### Hardware recommendations

When AI is enabled on one or multiple cameras of an Nx server, that server's CPU/GPU load and memory consumption will increase. This is because the Nx server needs to decode the camera streams for which AI is enabled, and the Nx AI Manager plugin requires resources to perform the AI inference.&#x20;

The following recommendations assume that the device is dedicated to Nx with Nx AI Manager plugin with default settings and that the AI plugin is enabled on 720p secondary camera streams.

#### Memory requirement

It is recommended to add 512 MB in RAM capacity per stream for which the AI plugin is enabled

#### CPU/GPU requirement

Up to 6 cameras with AI detection: Intel i5 10th gen or AMD Ryzen 5 3000 Quad-Core.

Up to 12 cameras with AI detection: Intel i7 12th gen or AMD Ryzen 7 3000 Quad-Core.

#### Other hardware

For other hardware architectures such as ARM, NVIDIA Jetson Orin, Hailo, etc, please contact <info@networkoptix.com>


# Install Network Optix

## Getting Started with Network Optix

A basic Nx platform comprises of one or more Nx Meta servers administered through an Nx client, this platform can either be a set of Nx Witness, Nx Go or Nx Meta servers and the corresponding client.

The typical installation is Nx Witness, for detailed installation instructions please refer to the [Nx Witness installation](https://support.networkoptix.com/hc/en-us/sections/200824738-Installation-Updates) instructions.

{% hint style="success" %}
If you have an existing cloud account for a Powered-by-Nx solution, you can log in with your existing cloud credentials.
{% endhint %}

{% tabs fullWidth="false" %}
{% tab title="Nx Witness" %}
The typical installation is Nx Witness, for detailed installation instructions please refer to the installation instructions for your operating system:

{% embed url="<https://support.networkoptix.com/hc/en-us/articles/205752937-Windows-OS-Installation-Guide>" %}

{% embed url="<https://support.networkoptix.com/hc/en-us/articles/360010535793-Ubuntu-Linux-OS-Installation-Guide>" %}

## Create a Network Optix Witness account

Sign up for a Free account at the Nx Witness Portal.

* Head to [nxvms.com](https://nxvms.com/)
* Click on [Create Account](https://nxvms.com/authorize?client_type=create)
* Verify your email address and sign in.

## Download and install Nx Witness.&#x20;

To get started with the Nx AI Manager, we advise you to install the Nx Witness Client and Server on your computer, but a separate computer for the server is also possible.

You need both the client and server programs, but the server can be installed on another machine than the client. Typically the **server** is a computer connected to some **cameras** over the network, and the **client** can be installed on your **local workstation** or **laptop**.

{% hint style="warning" %}
Ensure you download Nx Witness version 6.1.1, this version and later will be shipped with the Nx AI Manager plugin included.
{% endhint %}

If the computer you want to run the client fits the requirements, you can download and install the Nx Witness client and server by following the steps below:

* [Download the client and server by going to this page](https://nxvms.com/download/releases), then continue with the next step.

{% embed url="<https://nxvms.com/download>" %}

* A suggested operating system will automatically appear.
* Select your target OS if you want to install the client on an OS different from the automatically selected one.
* Download the client package that is suitable for your client computer and OS.
* Download the server package that is built for your server architecture and OS.
* Run the installer for the client first and follow the installation process.
* Next install the Nx Server on the same **or** on a separate device. The installation will be similar to installation of the client.
* Use the Nx Witness account you made earlier to login and configure the server.
  {% endtab %}

{% tab title="Nx Go" %}

## Create a Nx GO account

Sign up for a Free account at the Nx Witness Portal.

* Head to <https://cloud.nxgo.io/>
* Click on [Create Account](https://nxvms.com/authorize?client_type=create)
* Verify your email address and sign in.

## Download and install Nx Go.&#x20;

To get started with the Nx AI Manager, we advise you to install the Nx Witness Client and Server on your computer, but a separate computer for the server is also possible.

You need both the client and server programs, but the server can be installed on another machine than the client. Typically the **server** is a computer connected to some **cameras** over the network, and the **client** can be installed on your **local workstation** or **laptop**.

{% hint style="warning" %}
Ensure you download Nx Go version 6.1.1, this version and later will be shipped with the Nx AI Manager plugin included.
{% endhint %}

If the computer you want to run the client fits the requirements, you can download and install the Nx Witness client and server by following the steps below:

* [Download the client and server by going to this page](https://cloud.nxgo.io/download/releases), then continue with the next step.

{% embed url="<https://cloud.nxgo.io/download>" %}

* A suggested operating system will automatically appear.
* Select your target OS if you want to install the client on an OS different from the automatically selected one.
* Download the client package that is suitable for your client computer and OS.
* Download the server package that is built for your server architecture and OS.
* Run the installer for the client first and follow the installation process.
* Next install the Nx Server on the same **or** on a separate device. The installation will be similar to installation of the client.
* Use the Nx Witness account you made earlier to login and configure the server.
  {% endtab %}

{% tab title="Nx Meta" %}

## Create a Network Optix Meta account

Sign up for a Free account at the Nx Meta Developer Portal.

* Head to [meta.nxvms.com](https://meta.nxvms.com/)
* Click on [Create Account](https://meta.nxvms.com/register)
* Verify your email address and sign in.

## Download and install Nx Meta.&#x20;

To get started with the Nx AI Manager, we advise you to install the Nx Meta Client and Server on your computer, but a separate computer for the server is also possible.

You need both the client and server programs, but the server can be installed on another machine than the client. Typically the **server** is a computer connected to some **cameras** over the network, and the **client** can be installed on your **local workstation** or **laptop**.

{% hint style="warning" %}
Ensure you download Nx Meta version 6.0 or later to be able to use the Nx AI Plugin. Version 6.1.1 or later will be shipped with the Nx AI Manager plugin included.
{% endhint %}

If the computer you want to run the client fits the requirements, you can download and install the Nx Meta client and server by following the steps below:

* [Download the client and server by going to this page](https://meta.nxvms.com/download/releases), then continue with the next step.

{% embed url="<https://meta.nxvms.com/download>" %}

* A suggested operating system will automatically appear.
* Select your target OS if you want to install the client on an OS different from the automatically selected one.
* Download the client package that is suitable for your client computer and OS.
* Download the server package that is built for your server architecture and OS.
* Run the installer for the client first and follow the installation process.
* Next install the Nx Server on the same **or** on a separate device. The installation will be similar to installation of the client.
* Use the Nx Meta account you made earlier to login and configure the server.
  {% endtab %}
  {% endtabs %}


# Starting the Nx AI Manager Plugin

This page provides instructions on how to install the Nx AI Manager Plugin

## Starting the plugin

After successful installation of Nx Server and Nx Client, an "Integrations" tab should be visible when opening a camera's settings via the context menu:

<figure><img src="/files/QA1zUH5cka5YwYrqA6No" alt=""><figcaption><p>Camera Settings Navigation</p></figcaption></figure>

To start the plugin the plugin needs to be enabled by toggling the switch next to the title and then also enabling the 'Device Active' toggle that will then appear.

<figure><img src="/files/qy3KWFHcfsPWRCS4m5ot" alt=""><figcaption><p>The popup window showing that the plugin is disabled for this device</p></figcaption></figure>

<figure><img src="/files/vucyTGRHDzEAYOuBa6wA" alt=""><figcaption><p>The popup window showing that the plugin is enabled for this device, but the device is not active.</p></figcaption></figure>

## Stopping the plugin

Stopping the plugin when it is running can be done from within the Nx Client.

To stop the plugin all devices on a server need to be disabled by switching the 'Device Active' toggle to off.

<figure><img src="/files/2wATdJxfVA0VYVz3YZnx" alt=""><figcaption><p>The popup window showing that the plugin is enabled and the device is active.</p></figcaption></figure>


# Plugin Settings

The Nx AI Manager Plugin contains several settings to manage its behavior.&#x20;

Navigate to the camera settings and enable the Nx AI Manager Plugin. The following settings should appear:&#x20;

* Device active
* Manage Device
* Reselect Runtime
* Model settings
* Video settings
* Input Masks
* Class visualization&#x20;

## Device Active

If this switch is enabled, the frames from this device's video stream will be sent to the AI Manager for inference. The AI Manager runs as a separate process on the server, and is started if at least one device on the server has this setting enabled.

This setting is off by default. This allows you to configure your device, assign a model pipeline, and then enable the device for the first time.

## Manage Device

This button opens the Nx AI Manager Client popup. In the Nx AI Manager Client popup you can add model pipelines, and manage the models and their details here.

## Reselect Runtime

An option to switch between different [acceleration runtimes](/nx-ai-manager-v6.1.1/ai-accelerators-support/supported-ai-accelerators). For example if your device has a built in NPU and the runtime for that is not working correctly, you might switch to a CPU based runtime until the NPU runtime is fixed.

## Device Overview

A compact overview of the device's settings, including which acceleration runtime is active, and an overview of the assigned pipelines.

## Video Settings

Contains settings related to how the input frames should be processed for the AI Manager.

### Resize Method

In nearly all cases, the video stream will not be the same resolution as the model's input. While the frame can easily be resized, if the aspect ratio is different there are a couple of ways to adapt the input frames to the aspect ratio the model expects:

* **Letterbox:** ( default ) The AI Manager will add black bars to the sides or the top and bottom of the frame to correct the aspect ratio for the model.
* **Stretch**: The frame will be stretched to the aspect ratio of the model. This could influence the performance of the model if the aspect ratios are significantly different.
* **Crop:** The sides or top and bottom of the frame is cut off to fit the input frame to the aspect ratio of the model. This could mean that detections on the edge of the frame will be missed.

## Postprocessors

The Nx AI Manager platform provides a number of built-in standard postprocessors for convenience. It also allows advanced users to create and add their own custom postprocessors, see [External Postprocessing](/nx-ai-manager-v6.1.1/nx-ai-manager/advanced-configuration/external-postprocessing)

When building a pipeline, a list is provided with all postprocessors available on that server, including the custom external postprocessors. When one of these is selected, its settings will become available in the Plugin UI.

### Loitering Detection

The Nx AI Manager has the functionality to detect loitering. This is a tool to detect if a certain object is detected for longer than the desired amount of time.

It is generally recommended to use loitering detection in tandem with feature extraction, since Identity models generate vectors for their input images, it is useful to first detect objects in a frame, and then send these extracted sub-frames to the Identity model for identification.

Once it is detected that this subject is loitering, a bounding box with the 'loiterer' type will be generated to clearly show where this is happening.

<figure><img src="/files/1tFKH6aR3h8nfsGOLKgT" alt=""><figcaption><p>Loitering Detection Settings</p></figcaption></figure>

**Loiter Detection Time Threshold:** A subject detected for at least this amount of time, in seconds, will be considered loitering.

**Loiter Detection Forget Threshold:** When a subject has not been detected for at least this amount of time, in seconds, it will be forgotten. If the same object returns after this amount of time, it will be considered as a new detection.

### Left Behind Object Detection

Illegal dumping detection works by comparing the bounding boxes of a model to a reference. Detected objects which are not in the reference are tracked and timed. If these objects persist for longer than the threshold time they are flagged as dumped objects.&#x20;

Left behind objects are presented as standard bounding boxes with the 'dumped' type. It is therefore advised to create an event in Nx Meta to raise an alarm when a 'dumped' type object is detected.

By default, a reference image will be created from the first frame the Nx Edge AI Manager receives when starting up for the first time. This reference image will then be saved and reused in future runs. It is also possible to manually create a reference image.

When the frame is empty of temporary objects and a good representation of the background is being displayed, make use of the "Trigger Reference Run" button to set the new reference. Once the button is pressed, the following frame(s) will be used to set a new reference.

<figure><img src="/files/kgWQd3yNiEaArUYNlrQb" alt=""><figcaption><p>Left Behind Object Detection settings</p></figcaption></figure>

**Dumping Detection Class:** The class of objects to run the postprocessor on. This is useful if you have a model which detects multiple types of objects, but you only want to check for left behind objects on a specific class, for example 'backpack'.

**Dumping Detection Time Threshold:** The amount of time ( in seconds ) an object of the desired class has to be in frame and completely stationary before it is flagged as a dumped object.

**Trigger Reference Run:** A button to trigger a reference run. When clicked, the following frame(s) will be used to create a new reference, the previous reference will be discarded.

Left behind object detection is compatible with any model which generates bounding boxes.

### Line Crossing Detection

Line crossing detection can be used to detect or count objects which cross a defined line. The postprocessor works by tracking objects through the frames, and detect when this object crosses a line, and the direction.

<figure><img src="/files/oSLnYokcQoRN5f3RQeuR" alt=""><figcaption><p>Line Crossing  Detection settings</p></figcaption></figure>

Make use of the Nx Meta interface to draw a line on the video frame and click 'Apply' for changes to take effect.

When a crossing is detected, an event is generated. This event can be configured to trigger any action, see [adding event rules](/nx-ai-manager-v6.1.1/nx-ai-manager/configure-the-plugin).&#x20;

<figure><img src="/files/VauzHmDThPR7dCVhdXZR" alt=""><figcaption><p>Line Crossing Detection event configuration</p></figcaption></figure>

Note that the Line Crossing Detection postprocessor may have to be selected, and 'Apply' button clicked, before the event can be made.

Line Crossing Detection is compatible with any model which generates bounding boxes.

### Object Counting

The Object Counting postprocessor is useful for models which generate bounding boxes. This postprocessor will count all the bounding boxes per class and create a counting event.

<figure><img src="/files/6iR3onM3JVaHtVSpW8QM" alt=""><figcaption><p>Objects Counted event configuration</p></figcaption></figure>

Object Counting postprocessor is compatible with any model which generates bounding boxes.

## Input Masks

Some models accept [input masks](/nx-ai-manager-v6.1.1/nx-ai-manager/configure-the-plugin/input-masks-and-roi). It is possible to create these masks on the video frame inside the plugin settings.

<figure><img src="/files/wZKeD87ENEemAe4YtJ6W" alt=""><figcaption><p>Input Masks setting</p></figcaption></figure>

Click 'Apply' for changes to take effect.

## Class Visualization

It is sometimes desired to control which types of objects get visualized, and which to ignore. This is useful if you have a model which detects many class types, but you are only interested in some of them.&#x20;

<figure><img src="/files/09qEQ2EPnGi8lj0mEq1M" alt=""><figcaption><p>Class Visualization setting</p></figcaption></figure>

A list of checkboxes are presented. This list is generated from the named output of the assigned models. If a new model is assigned to the Nx AI Manager, it might be necessary to click the 'Refresh' button to see the changes.

Click 'Apply' for changes to take effect.


# Configure the Nx AI Manager Plugin

This page gives instructions on how to configure basic operations of the Nx AI Manager Plugin

{% hint style="info" %}
Nx Witness, Nx Go and Nx Meta will work in the same way for the configuration.
{% endhint %}

## Configure Nx Server

After successful installation of Nx Server and Nx Client, an "Integrations" tab should be visible when opening a camera's settings:

<figure><img src="/files/QA1zUH5cka5YwYrqA6No" alt=""><figcaption><p>Camera Settings Navigation</p></figcaption></figure>

The plugin can be enabled/disabled per device on the Integrations tab:

<figure><img src="/files/qy3KWFHcfsPWRCS4m5ot" alt="" width="375"><figcaption><p>Nx AI Manager Integration Tab</p></figcaption></figure>

Once the plugin is enabled you can change the settings and choose a different model than the default.&#x20;

<figure><img src="/files/50fnFvrSXr2xvSC8CgO7" alt="" width="375"><figcaption><p>The Plugin Settings Tab with the Manage Device button</p></figcaption></figure>

To change a model, click the "Manage Device" button, which will open a Device Client popup with the Nx AI Manager open at the device details page where the model library can be used to select another model.

<figure><img src="/files/cQKzTNrOVnL07HBatzA7" alt="" width="375"><figcaption><p>The Nx Client Popup where models can be managed for a device.</p></figcaption></figure>

For specific settings see the [the model settings](/nx-ai-manager-v6.1.1/nx-ai-manager/configure-the-plugin/model-settings).

## Visualizing Bounding Boxes

If a model that outputs compatible bounding boxes is selected and running the Nx AI Manager, bounding boxes can be visualized by visiting the *Objects* tab on the right pane in the Nx Meta Client:

<figure><img src="/files/N9SXd5tbY6HomX9Njron" alt=""><figcaption><p>Visible Bounding Boxes in Nx Meta Client</p></figcaption></figure>

{% hint style="warning" %}

## The objects tab is missing

The Objects tab might not be available, this might happen if you have freshly installed the Nx Server.&#x20;

To fix this you can try to **restart** the Nx Client. This should make the Objects tab appear.

<p align="center"><img src="/files/fa6Sng9K5sxUibZi61En" alt="" data-size="original"></p>
{% endhint %}

## Adding Event Rules

The Nx AI Manager plugin can generate several different types of events. Network Optix gives the user control over what these events should do, from sending an email to showing a notification. In this example, we will show a text overlay on the video.

Rules can be added by navigating to the Camera Rules menu:

<figure><img src="/files/6HjskXxtscDnaFaAXnhN" alt="" width="563"><figcaption></figcaption></figure>

On the Event Rules window, click the **Add** button to add a new rule.&#x20;

From here, several options are available. First, on the left side, select **Analytics Event** from the **When** context menu. This is the type of event the Nx AI Manager plugin generates.&#x20;

Select any, or multiple, camera(s) in the **At** context menu.&#x20;

Under the **Event Type** context menu, you will find a number of event types the Nx AI Manager plugin can generate, from alarms to counting objects. In this example, we will select the *Objects Counted* type.&#x20;

On the right side, it can be configured what should be done when one of these events is triggered. Here you could set up an email or notification trigger. In this example, we will select the Show text overlay option in the **Do** context menu **at** the source camera

<figure><img src="/files/M8FlOyTXtfBDJJo1gi0M" alt=""><figcaption><p>Example Settings for Objects Counted Rule</p></figcaption></figure>

If set up correctly, and a model generating counts is selected and running, we should see an overlay on the camera feed showing us the object counts:

<figure><img src="/files/XVSa9r5LjIG5RvTwFW2i" alt=""><figcaption><p>Example of Objects Counted text overlay</p></figcaption></figure>


# Model pipeline selection and configuration

{% hint style="info" %}
Nx Witness, Nx Go and Nx Meta will work in the same way for the configuration.
{% endhint %}

The device detail page is the central place to manage the model pipelines that the device should run. Pipelines are chains of one or more models that can run with the given video input from the device. Usually a device has a default pipeline configured after the plugin is enabled for the device.

### Add a new pipeline

When no pipelines are set, the only available option is to add a new pipeline:

<figure><img src="/files/EBmiNRBYWCxaupbaly1R" alt="" width="375"><figcaption><p>A device detail page without any pipelines</p></figcaption></figure>

Clicking the "Add a pipeline" button redirects you to the model catalogue.

### Selecting a model

In the model catalogue you can select a model to use in the new (or current) pipeline.

The top of the page will show a message that you are "Currently assigning...".

If you have uploaded custom models, they will also be available in the catalogue.

<figure><img src="/files/Bsuflmp8IK06zeFZuIos" alt="" width="375"><figcaption><p>The model catalogue with the assignment message <br>and the option to select a model for the current pipeline</p></figcaption></figure>

When a model is selected it will be assigned and downloaded to the server for the current device.

<figure><img src="/files/v0efb60LPcxarx3JJ8cb" alt="" width="375"><figcaption><p>Message that the model will be added to the server</p></figcaption></figure>

You will be redirected to the device details page again, with the newly assigned model.

<figure><img src="/files/cQKzTNrOVnL07HBatzA7" alt="" width="375"><figcaption><p>The device detail page with a single pipeline containing one model</p></figcaption></figure>

### Add a chained model

Chained models are models that use the input of a parent model instead of processing the video from the device directly.

You add a chained model by clicking the chain icon <img src="/files/w9OYnQ7DlAQOu0SSGHZi" alt="" data-size="line"> next to the parent model name. You will be redirected to the model catalogue to select a chained model.

<figure><img src="/files/gWqPljfloDp53kUwwrej" alt="" width="375"><figcaption><p>Model pipeline with settings and buttons to manage models in the pipeline</p></figcaption></figure>

The way a chained model will use the input can be chosen by setting a chaining method, currently there are three modes and not all of them may be available at the same time:

* Direct - the chained model gets the output from the parent model as input
* Conditional - the chained model will only run if a field with a given name outputs "`true`"
* Feature extraction - the chained model will get the contents of the bounding boxes that have a certain label

<figure><img src="/files/gSlzm5k27dlLTLjekgWi" alt="" width="375"><figcaption><p>A model pipeline with chaining options</p></figcaption></figure>

Choose the appropriate method, and when you have entered new data the pipeline form will change to indicate that settings need to be saved.

<figure><img src="/files/zk9BD0L1XIN2YiXx8CIQ" alt="" width="375"><figcaption><p>A model pipeline with changes that need to be saved</p></figcaption></figure>

The settings will be applied to the device when you click the "Save pipelines" button.

### Change a model in a pipeline

A parent model or a chained model can be replaced by clicking the left-right arrow button next to the  model title <img src="/files/vwpfoLShwQGgsOGLjE0Q" alt="" data-size="line">. This will redirect you to the normal model selection process where you can select a replacement model.&#x20;

The rest of the settings in the model pipeline are not affected, unless they are directly related to the model.

### Remove a chained model from a pipeline

Removing a chained model from a pipeline can be done by clicking the delete button next to a **chained** model <img src="/files/zw4SZDLScXjbypPZoDKF" alt="" data-size="line"> and the model will be removed directly.

Undoing is not possible, to undo this you will have to select the same model again and set the same chaining options and pre- and post-processing.

### Remove a pipeline

Removing a pipeline with all the models and settings can be done by clicking the delete button next to a **parent** model in a pipeline <img src="/files/NyZ74jNDvBnG9LgIz7SS" alt="" data-size="line"> and the full model pipeline with all associated settings and chained models will be removed.

Undoing is not possible, to restore the settings the same model pipeline must be rebuilt completely.


# Runtime selection

{% hint style="info" %}
Nx Witness, Nx Go and Nx Meta will work in the same way for the configuration.
{% endhint %}

## Automatically detect runtime

When first starting the plugin the Nx AI Manager plugin will auto-detect the available runtimes for your server.

<figure><img src="/files/GwgcxwBZoKizHpyq4Udy" alt="" width="375"><figcaption></figcaption></figure>

After the detection is complete you will usually be presented with a list of the available runtimes to choose from

<figure><img src="/files/Qj09DLn9piycG8VHeos2" alt="" width="375"><figcaption></figcaption></figure>

Usually the default "Nx CPU" runtime is there for your system, and based on the hardware platform, or installed [AI Accelerators](/nx-ai-manager-v6.1.1/ai-accelerators-support/supported-ai-accelerators) other options will appear. Currently Intel OpenVino, NVIDIA, Hailo, MemryX and more are available.


# Model Settings

{% hint style="info" %}
Nx Witness, Nx Go and Nx Meta will work in the same way for the configuration.
{% endhint %}

<figure><img src="/files/cQKzTNrOVnL07HBatzA7" alt="" width="375"><figcaption><p>A device is one model pipeline with a single model</p></figcaption></figure>

A model that is active on a device can have multiple settings These settings depend on the capabilities of the model or the server.

When you change one of these settings, the pipeline form will change to indicate that the settings need to be saved manually.

<figure><img src="/files/zk9BD0L1XIN2YiXx8CIQ" alt="" width="375"><figcaption><p>A model pipeline form with changed settings that are not saved yet</p></figcaption></figure>

To save the settings, click the "Save pipelines" button. If you do not want to save the settings, refreshing the page will reset the form. Navigating away from the device details page will also reset the form without saving the settings.

### Model NMS Threshold

The NMS Threshold (Non Max Suppression) sets the cut off for when models should not return detections with a probability score below the current threshold value.

This is a setting that is model dependent, so not all models have this option.

### Preprocessor

If the server that the device is connected to has any preprocessors available, they can be selected here.

This is a setting that is server dependent, so moving a device to another server may change the available options.

Additional settings for preprocessors may appear on the [plugin settings](/nx-ai-manager-v6.1.1/nx-ai-manager/install-plugin/plugin-settings) screen depending on the chosen option.

### Postprocessor

If the server that the device is connected to has any postprocessors available, they can be selected here.

This is a setting that is server dependent, so moving a device to another server may change the available options.

Additional settings for postprocessors may appear on the [plugin settings](/nx-ai-manager-v6.1.1/nx-ai-manager/install-plugin/plugin-settings) screen depending on the chosen option.


# Input masks and ROI

The inclusion and exclusion areas add a mask over the image that is sent to the AI Manager, the Region of Interest (ROI) removes all information outside the designated region and sends only the information inside the rectangle to the AI Manager.

### Inclusion area

For the inclusion area results that are within the designated polygon will be detected in the inclusion results.&#x20;

{% columns %}
{% column %}
![](https://networkoptix.zendesk.com/attachments/token/q9G7xp2IMw9poDHTZMlYyGAV2/?name=inclusion+area.png)
{% endcolumn %}

{% column %}
![](https://networkoptix.zendesk.com/attachments/token/LWzYDefIq1GvnOaRECRWerEzc/?name=inclusion+results.png)
{% endcolumn %}
{% endcolumns %}

In practice the results will overlap the borders of the polygon a little bit because the middle of the bottom of the detection box is taken as the anchor location for the detected object.&#x20;

{% hint style="info" %}
The center of the bottom of the bounding box is chosen for the anchor location because that is usually a good indication for where a person or object is standing on the ground. In a line-crossing scenario for example, this would make it easier to detect if a person crosses a certain line.
{% endhint %}

### Exclusion area

The same works for the exclusion area - here only objects that have the anchor location outside of the area will be returned.&#x20;

{% columns %}
{% column %}
![](https://networkoptix.zendesk.com/attachments/token/6LjHE11WpF0uGmpEeTKGn3N5O/?name=exclusion+area.png)
{% endcolumn %}

{% column %}
![](https://networkoptix.zendesk.com/attachments/token/nrExKnv9G7JgeXHOkRuhp62r5/?name=exclusion+results.png)
{% endcolumn %}
{% endcolumns %}

### Region of Interest (ROI)

The region of interest defines a square region of the image that will be sent to the AI Manager - the parts outside of the region will not be seen by the model.

{% columns %}
{% column %}

<div align="left"><img src="https://networkoptix.zendesk.com/attachments/token/IVhmTVRZGGxI5KAtapOcZ3Dl3/?name=roi+area.png" alt="" width="375"></div>
{% endcolumn %}

{% column %} <img src="https://networkoptix.zendesk.com/attachments/token/HGdjMnEMGJczucUFIKXybm9mk/?name=roi+results.png" alt="" width="375">
{% endcolumn %}
{% endcolumns %}

This also means that the image can not be another shape than a rectangle, and you may need to change the model resizing method to letterbox for the models to work correctly.

<img src="https://networkoptix.zendesk.com/attachments/token/MCCUqVZiUCvdtdNFwz6jPxSPE/?name=model+resizing+method.png" alt="" width="375">

{% hint style="warning" %}
Note that using masks and region of interest at the same time is not supported.
{% endhint %}

### Custom external processing

If this behavior is not the desired behavior, is possible to create your own preprocessor to create a mask or postprocessor to exclude results from an area that you designate.

For more information on custom preprocessors and postprocessors you can checkout the examples in our GitHub repository&#x20;

{% embed url="<https://github.com/scailable/sclbl-integration-sdk>" %}

&#x20;


# Model pipelines on multiple devices

{% hint style="info" %}
Nx Witness, Nx Go and Nx Meta will work in the same way for the configuration.
{% endhint %}

Multiple devices can be managed at the same time, but this feature is limited at the moment. You can create a new model pipeline on *one* device and then clone it to multiple devices later. To fine tune the pipeline settings they can be set for each device individually later.

## Creating a new pipeline on multiple devices

Start at the site page, where you can see all the available devices on the available servers.

<figure><img src="/files/Bwsb0m93LxOZv7R8DQiu" alt=""><figcaption><p>The site details page with the list of available devices</p></figcaption></figure>

The "Clone this pipeline" button starts the process and enables the checkboxes next to the devices that can have a pipeline applied. Devices that are turned off or have the plugin disabled will not get a checkbox.

<figure><img src="/files/MrMuurmxOgJZsrgrjzVy" alt=""><figcaption><p>The site details page with checkboxes for the available devices</p></figcaption></figure>

Only devices that are enabled can be selected.

<figure><img src="/files/yidY1nCzRYkzruWNORKk" alt=""><figcaption><p>The site details page with selected devices</p></figcaption></figure>

When one or more devices are selected the "Apply pipeline" button is enabled and can be clicked. You will get a confirmation dialog. Confirming will replace all existing pipelines on the selected devices with the selected pipeline.

<figure><img src="/files/BirnhHrYSL9oBXpMTAft" alt=""><figcaption></figcaption></figure>

After confirming the pipeline will be deployed to the selected devices.

<figure><img src="/files/xN0JgdUoWgkvb5xFQIN7" alt=""><figcaption></figcaption></figure>

And after completion of the deployment the pipeline will be activated on the selected devices.

<figure><img src="/files/35BeLt7mvPXM6YCFkd8o" alt=""><figcaption></figcaption></figure>

You can verify the deployment of the new model pipeline by checking one or all the previously selected devices. This is also a good time to do any fine tuning.


# Advanced configuration

The NX AI Manager Plugin allows further integration for advanced users to add custom behaviour or processing.


# External Preprocessing

This page describes how to implement an external preprocessor to integrate with the Nx AI Manager

It is sometimes desired to add custom or proprietary pre-processing to the inference pipeline. It is therefore possible to add a custom application which receives the input frame to the Nx AI Manager and has the opportunity to alter or analyse the input frame.

Examples are provided in how to create these applications. These applications can be created using any programming language, as long as the device can execute this program, send it messages over a Unix socket, and receive a response.

Through the settings, instructions can be provided to the Nx AI Manager on how to start the application. The Nx AI Manager will automatically start the applications on startup, and terminate it when the Nx AI Manager terminates.

The external pre-processor runs as a completely independent application. The Nx AI Manager puts no restrictions on which hardware, API's or tools this application uses. As long as this application can receive and respond to messages over a Unix socket, it will be compatible.

<figure><img src="/files/WrwEb0XjbKaKVynkHR2N" alt=""><figcaption><p>External Preprocessor data flow</p></figcaption></figure>

The external pre-processing step happens before any other pre-processing is done on the frame. This means that the external pre-processor receives the original, full resolution image as it was sent to the Nx AI Manager.&#x20;

The external pre-processor will receive a header message over Unix socket which describes the input frame, as well as provide details on how to connect to the shared memory segment where the input frame is stored. The external pre-processor can then connect to this shared memory, alter the data, or write back a completely new image with new dimensions. The altered data will then be used in the rest of the pipeline.

The Nx AI Manager will wait until the external pre-processor responds with a header message, containing information on the new ( or same ) image dimensions and new ( or same ) shared memory segment containing image data. After this message is received, the Nx AI Manager will copy the data from the shared memory segment and use it for the rest of the inference pipeline.

### Custom external processing

If this behavior is not the desired behavior, is possible to create your own preprocessor to create a mask or postprocessor to exclude results from an area that you designate.

For more information on custom preprocessors and postprocessors you can checkout the examples in our GitHub repository&#x20;

{% embed url="<https://github.com/scailable/sclbl-integration-sdk>" %}


# External Postprocessing

This page describes how to implement an external postprocessor to integrate with the Nx AI Manager

It is sometimes desired to add custom or proprietary processing to the inference pipeline. It is therefore possible to add a custom application which receives information from the Nx AI Manager and returns optionally altered information.

Examples are provided in how to create these applications in both C and Python. However these applications can be created using any programming language, as long as the device can execute this program, send it messages over a Unix socket, and receive a response.

A high-level overview of the inference pipeline is as follows:

<figure><img src="/files/CVoUQ65NjNOFXPJgCjKd" alt=""><figcaption><p>A high-level overview of the inference pipeline </p></figcaption></figure>

The postprocessor can therefore receive the inference results from the model, optionally alter these results, and return them. The changes added by the postprocessor will then be sent to the Network Optix platform, where it can be used to generate bounding boxes or events.

Through the settings, instructions can be provided to the Nx AI Manager on how to start the application. The Nx AI Manager will automatically start the applications once necessary, and terminate them once execution is finished.

### External Postprocessor

A postprocessor receives the inference results as a MessagePack encoded buffer. This message is equivalent to what will be sent to the output. The postprocessor can alter this message and return it. The altered message will then be sent to the Network Optix platform. The returned message should have the same structure as the input message, otherwise the Network Optix platform might be unable to parse it. Examples are provided to show how this structure can be parsed, altered, and written.

<figure><img src="/files/JuPRpoLYtZ4ibKPIXDSG" alt=""><figcaption><p>External Postprocessor data flow</p></figcaption></figure>

### External Tensor Postprocessor

A setting is provided in which the user can indicate that a postprocessor should receive access to the input tensor which the inference results were generated from. This can be useful for many applications, such as investigating the input tensor within the generated bounding boxes, or even create sub-images.&#x20;

When this setting is enabled, the Nx AI Manager platform will write the input tensor to shared memory, where all external postprocessor can access it. It will then send an additional message to the external postprocessor containing information which can be used to access this shared memory.

The image header message is sent after the inference results message. It is therefore required for the external postprocessor to expect to receive two separate messages before responding with its own message. The image header is also a MessagePack encoded message.

<figure><img src="/files/GoDAuMKnrv8RXBP441vc" alt=""><figcaption><p>Tensor Postprocessor data flow</p></figcaption></figure>

The postprocessor can do additional analysis on the tensor data.

### Custom external processing

If this behavior is not the desired behavior, is possible to create your own preprocessor to create a mask or postprocessor to exclude results from an area that you designate.

For more information on custom preprocessors and postprocessors you can checkout the examples in our GitHub repository&#x20;

{% embed url="<https://github.com/scailable/sclbl-integration-sdk>" %}


# Manual Plugin Installation

This page describes how to manually install the plugin if automatic installations do not work

## Plugin installation

The Server for Nx Witness, Nx Go and Nx Meta version 6.1.1 and newer are packaged with the Nx AI Manager Plugin, so a separate installation should not be necessary.

If your Nx Server installation does not come with the plugin, please refer to the [scripted installation](#scripted-installation) or [manual installation](#advanced-manual-installation).

The Nx Client does not need a separate installation of the plugin.

## Scripted installation

{% tabs %}
{% tab title="Nx Witness" %}
The default installation of Nx Witness comes with the plugin. A scripted installation is not provided.
{% endtab %}

{% tab title="Nx Go" %}
The default installation of Nx Go comes with the plugin. A scripted installation is not provided.
{% endtab %}

{% tab title="Nx Meta" %}
If your installation did not come with the Nx AI Plugin, you can install it yourself.

The manual installation works on Linux based systems with a single command line script.

{% hint style="info" %}
Installing the Nx AI Manager Plugin will restart the Nx Mediaserver. This should take a couple of seconds, and the client will reconnect automatically.
{% endhint %}

Open a terminal window on the device where you installed the Nx Mediaserver and execute the following command to install the Nx AI Manager plugin:

```bash
sudo bash -c "$(wget -q -O - https://artifactory.nxvms.dev/artifactory/nxai_open/NXAIPlugin/install.sh)"
```

This script will download the latest plugin and place it in the appropriate plugin folder.&#x20;

The installation will detect some features of the device and select the appropriate settings for installation. This should be sufficient for most users and devices, however it could be the case that some customization is desired, or that the automatic installation did not go well. In that case, you can manually install the Nx AI Manager.
{% endtab %}
{% endtabs %}

## Re-installation or Updates

If you want to update or re-install the Nx AI Manager Plugin you can safely re-run the same command.&#x20;

The old version of the plugin will be removed by the install script before the new version is installed.

Your settings will be stored and reused. You will still need to check the settings, because in some cases new options are available that require some changes. An example might be a new runtime that is available for your hardware.

## Advanced manual installation

The plugin can be downloaded from the following link for x86 devices:

{% embed url="<https://artifactory.nxvms.dev/artifactory/nxai_open/NXAIPlugin/release/libnxai_plugin.so>" %}
Plugin download link x86\_64
{% endembed %}

You can also download an aarch64 version of the plugin for ARM64 based devices:

{% embed url="<https://artifactory.nxvms.dev/artifactory/nxai_open/NXAIPlugin/release/libnxai_plugin_aarch64.so>" %}
Plugin download link aarch64
{% endembed %}

Once downloaded, copy the plugin file to the appropriate plugins folder.

{% tabs %}
{% tab title="Nx Witness Linux" %}

```bash
/opt/networkoptix/mediaserver/var/nx_ai_manager/libnxai_plugin.so
```

The folder and the plugin file should be named in this exact way. Rename the plugin file if necessary.

Make sure to give read and write permissions to the created directory so that the Nx AI Plugin can create the files it needs by running:

<pre class="language-bash"><code class="lang-bash"><strong>sudo chmod -R 777 /opt/networkoptix/mediaserver/var/nx_ai_manager
</strong></code></pre>

Once installed, the Nx Meta Server must be [restarted](/nx-ai-manager-v6.1.1/support-and-troubleshooting/troubleshooting/controlling-the-server-and-the-plugin) before the plugin is detected.&#x20;
{% endtab %}

{% tab title="Nx Go Linux" %}

```bash
/opt/networkoptix/mediaserver/var/nx_ai_manager/libnxai_plugin.so
```

The folder and the plugin file should be named in this exact way. Rename the plugin file if necessary.

Make sure to give read and write permissions to the created directory so that the Nx AI Plugin can create the files it needs by running:

<pre class="language-bash"><code class="lang-bash"><strong>sudo chmod -R 777 /opt/networkoptix/mediaserver/var/nx_ai_manager/
</strong></code></pre>

Once installed, the Nx Meta Server must be [restarted](/nx-ai-manager-v6.1.1/support-and-troubleshooting/troubleshooting/controlling-the-server-and-the-plugin) before the plugin is detected.&#x20;
{% endtab %}

{% tab title="Nx Meta Linux" %}

```bash
/opt/networkoptix-metavms/mediaserver/var/nx_ai_manager/libnxai_plugin.so
```

The folder and the plugin file should be named in this exact way. Rename the plugin file if necessary.

Make sure to give read and write permissions to the created directory so that the NX AI Plugin can create the files it needs by running:

<pre class="language-bash"><code class="lang-bash"><strong>sudo chmod -R 777 /opt/networkoptix-metavms/mediaserver/var/nx_ai_manager
</strong></code></pre>

Once installed, the Nx Meta Server must be [restarted](/nx-ai-manager-v6.1.1/support-and-troubleshooting/troubleshooting/controlling-the-server-and-the-plugin) before the plugin is detected.&#x20;
{% endtab %}

{% tab title="Windows" %}
On windows it is not possible to download the plugin separately at the moment.

The plugin is installed on windows in the following location.

```
C:\Program Files\Network Optix\Nx Witness\MediaServer\plugins\nx_ai_manager_plugin
```

Where your installed version of the MediaServer can be different for each variant of the Nx Client - like Nx Meta VMS

```
C:\Program Files\Network Optix\Nx Meta\MediaServer\plugins\nx_ai_manager_plugin
```

{% endtab %}
{% endtabs %}

#### Customized installation path

The install path can be customized for testing purposes and manually started to see output. However, the Nx AI Manager Plugin expects the Nx AI Manager to be installed in the same folder, and the Stop/Start commands from the Nx AI Manager Plugin UI will not work if the Nx AI Manager is installed somewhere else.


# Removing the Plugin

## Disabling the plugin

Disabling the plugin can be done by switching the plugin of with the toggle switch on the Integrations tab.

<figure><img src="/files/qy3KWFHcfsPWRCS4m5ot" alt="" width="375"><figcaption></figcaption></figure>

Switching off the plugin is enough to free up the resources. If you really need to remove or reinstall the plugin, removing the plugin is also possible. Keep in mind that updating the Nx Server will restore the Nx AI Manager

{% tabs %}
{% tab title="Nx Witness Linux" %}

## Uninstalling the Nx AI Runtime

{% hint style="warning" %}
Please note - the runtime is part of Nx AI, to remove the whole Nx AI manager you will need to remove the Plugin
{% endhint %}

It might be desired to remove the Nx AI Runtime installation, due to a corrupted install or if you want to reinstall the Nx AI Runtime with a different acceleration library.

The Nx AI Runtime can be removed by deleting the folder, assuming default installation:

```bash
sudo rm -r /opt/networkoptix/mediaserver/var/nx_ai_manager/nxai_manager
```

When the Nx Mediaserver is restarted, the plugin will reinstall the Nx AI Runtime.

## Removing the Nx AI Manager Plugin

{% hint style="warning" %}
Removing the Nx AI Manager Plugin can lead to the Nx Mediaserver crashing if it is in use.
{% endhint %}

For added safety, disable the plugin on all devices on the server before removing. This is not full-proof, however, and could still lead to crashes. The only fully safe method of removing the plugin would be to first stop the media server:

```bash
sudo systemctl stop networkoptix-mediaserver.service
```

To remove the Nx AI plugin from your Nx Meta server, log in to the server console and execute the following command:

```bash
sudo rm -r /opt/networkoptix/mediaserver/var/nx_ai_manager
```

If you stopped the Nx media server, it is now safe to restart it:

```bash
sudo systemctl start networkoptix-mediaserver.service
```

{% endtab %}

{% tab title="Nx Go Linux" %}

## Uninstalling the Nx AI Runtime

{% hint style="warning" %}
Please note - the runtime is part of Nx AI, to remove the whole Nx AI manager you will need to remove the Plugin
{% endhint %}

It might be desired to remove the Nx AI Runtime installation, due to a corrupted install or if you want to reinstall the Nx AI Runtime with a different acceleration library.

The Nx AI Runtime can be removed by deleting the folder, assuming default installation:

```bash
sudo rm -r /opt/networkoptix/mediaserver/var/nx_ai_manager/nxai_manager
```

When the Nx Mediaserver is restarted, the plugin will reinstall the Nx AI Runtime.

## Removing the Nx AI Manager Plugin

{% hint style="warning" %}
Removing the Nx AI Manager Plugin can lead to the Nx Mediaserver crashing if it is in use.
{% endhint %}

For added safety, disable the plugin on all devices on the server before removing. This is not full-proof, however, and could still lead to crashes. The only fully safe method of removing the plugin would be to first stop the media server:

```bash
sudo systemctl stop networkoptix-mediaserver.service
```

To remove the Nx AI plugin from your Nx Meta server, log in to the server console and execute the following command:

```bash
sudo rm -r /opt/networkoptix/mediaserver/var/nx_ai_manager
```

If you stopped the Nx media server, it is now safe to restart it:

```bash
sudo systemctl start networkoptix-mediaserver.service
```

{% endtab %}

{% tab title="Nx Meta Linux" %}

## Uninstalling the Nx AI Runtime

{% hint style="warning" %}
Please note - the runtime is part of Nx AI, to remove the whole Nx AI manager you will need to remove the Plugin
{% endhint %}

It might be desired to remove the Nx AI Runtime installation, due to a corrupted install or if you want to reinstall the Nx AI Runtime with a different acceleration library.

The Nx AI Runtime can be removed by deleting the folder, assuming default installation:

```bash
sudo rm -r /opt/networkoptix-metavms/mediaserver/var/nx_ai_manager/nxai_manager
```

When the Nx Mediaserver is restarted, the plugin will reinstall the Nx AI Runtime.

## Removing the Nx AI Manager Plugin

{% hint style="warning" %}
Removing the Nx AI Manager Plugin can lead to the Nx Mediaserver crashing if it is in use.
{% endhint %}

For added safety, disable the plugin on all devices on the server before removing. This is not full-proof, however, and could still lead to crashes. The only fully safe method of removing the plugin would be to first stop the media server:

```bash
sudo systemctl stop networkoptix-metavms-mediaserver.service
```

To remove the Nx AI plugin from your Nx Meta server, log in to the server console and execute the following command:

```bash
sudo rm -r /opt/networkoptix-metavms/mediaserver/var/nx_ai_manager/nxai_manager
```

If you stopped the Nx media server, it is now safe to restart it:

```bash
sudo systemctl start networkoptix-metavms-mediaserver.service
```

{% endtab %}

{% tab title="Windows" %}

## Uninstalling the Nx AI Manager Runtime

{% hint style="warning" %}
Please note - the runtime is part of Nx AI, to remove the whole Nx AI manager you will need to remove the Plugin
{% endhint %}

It might be desired to remove the Nx AI Runtime installation, due to a corrupted install or if you want to reinstall the Nx AI Runtime with a different acceleration library.

The Nx AI Runtime can be removed by deleting the folder from your Mediaserver directory, assuming default installation.

To delete the files you need to [stop the mediaserver](#restarting-the-mediaserver) first.

#### NX Witness

```
C:\Program Files\Network Optix\Nx Witness\MediaServer\plugins\nx_ai_manager_plugin\nxai_manager
```

#### NX Meta

```
C:\Program Files\Network Optix\Nx Meta\MediaServer\plugins\nx_ai_manager_plugin\nxai_manager
```

#### NX Go

```
C:\Program Files\Network Optix\Nx Go\MediaServer\plugins\nx_ai_manager_plugin\nxai_manager
```

When the Nx Mediaserver is restarted, the plugin will reinstall the Nx AI Runtime.

## Removing the Nx AI Manager Plugin

{% hint style="warning" %}
Removing the Nx AI Manager Plugin can lead to the Nx Mediaserver crashing if it is in use.
{% endhint %}

For added safety, disable the plugin on all devices on the server before removing. This is not full-proof, however, and could still lead to crashes.&#x20;

The only fully safe method of removing the plugin would be to first stop the media server:

<figure><img src="/files/kA3XzCCaBnHkzx1OmpES" alt=""><figcaption></figcaption></figure>

To remove the Nx AI plugin from your Nx Meta server,opens the file explorer and remove the plugin directory for your installed Client:

#### Nx Witness

```
C:\Program Files\Network Optix\Nx Witness\MediaServer\plugins\nx_ai_manager_plugin
```

#### NX Meta

```
C:\Program Files\Network Optix\Nx Meta\MediaServer\plugins\nx_ai_manager_plugin
```

#### Nx Go

```
C:\Program Files\Network Optix\Nx Go\MediaServer\plugins\nx_ai_manager_plugin
```

If you stopped the Nx media server, it is now safe to restart it.
{% endtab %}
{% endtabs %}

## Restarting the Mediaserver

After uninstalling the Nx AI Manager Plugin and Nx AI Manager, [restart](/nx-ai-manager-v6.1.1/support-and-troubleshooting/troubleshooting/controlling-the-server-and-the-plugin) the Nx Mediaserver for these changes to take effect.


# Enable .ini settings

Advanced controls can be enabled through an `.ini` file. By default the `.ini` file does not exist. If you create this file and it is empty, the Network Optix Mediaserver will populate it with all available settings, their defaults, and some documentation.

{% tabs %}
{% tab title="Nx Meta" %}
Create an empty file by running:

```bash
sudo mkdir -p /home/networkoptix-metavms/.config/nx_ini 
sudo touch /home/networkoptix-metavms/.config/nx_ini/nx_ai_manager_plugin.ini 
sudo chmod 666 /home/networkoptix-metavms/.config/nx_ini/nx_ai_manager_plugin.ini
```

{% endtab %}

{% tab title="Nx Witness" %}
Create an empty file by running:

```bash
sudo mkdir -p /home/networkoptix/.config/nx_ini 
sudo touch /home/networkoptix/.config/nx_ini/nx_ai_manager_plugin.ini 
sudo chmod 666 /home/networkoptix/.config/nx_ini/nx_ai_manager_plugin.ini
```

{% endtab %}

{% tab title="Nx Go" %}
Create an empty file by running:

```bash
sudo mkdir -p /home/networkoptix/.config/nx_ini 
sudo touch /home/networkoptix/.config/nx_ini/nx_ai_manager_plugin.ini 
sudo chmod 666 /home/networkoptix/.config/nx_ini/nx_ai_manager_plugin.ini
```

{% endtab %}

{% tab title="Windows" %}

Create the server `.ini` folder and in that folder create a file named '`nx_ai_manager_plugin.ini`'&#x20;

```
C:\Windows\System32\config\systemprofile\AppData\Local\nx_ini
```

```
C:\Windows\System32\config\systemprofile\AppData\Local\nx_ini\nx_ai_manager_plugin.ini
```

[Restart the server](/nx-ai-manager-v6.1.1/support-and-troubleshooting/troubleshooting/controlling-the-server-and-the-plugin) and the `.ini` file is populated.

For more information check the instructions in the Nx Witness documentation

{% embed url="<https://support.networkoptix.com/hc/en-us/articles/4410047158167-How-to-Create-ini-Files-for-Nx-Witness>" %}
{% endtab %}
{% endtabs %}

Then [restart](/nx-ai-manager-v6.1.1/nx-ai-manager/install-plugin) the mediaserver. Once the mediaserver is restarted the `.ini` file should be filled with defaults.


# Howto's

Quick guides to do interesting things with the Nx AI Manager


# Show AI inference framerate on video

The ability to display inference speed directly in the video feed of the Nx Meta client using the Nx AI Manager plugin is possible with the standard features that Nx Meta delivers but it is a little bit more complex than enabling a "FPS" switch.

You can achieve this by leveraging the plugin's ability to generate Analytics Events and display them as a Text Overlay on the video feed with the built in Rules Engine.

#### Create an Event Rule in Nx Meta

In the Nx Meta Desktop client, go to the Camera Settings for the camera running the AI plugin that you want to use for the FPS display.

<figure><img src="/files/ktwt00VN9Rf1Yp3OTeID" alt="" width="158"><figcaption></figcaption></figure>

Go to the Event Rules section.

<figure><img src="/files/Jd1PdTPnFe03UgE2meUu" alt="" width="375"><figcaption></figcaption></figure>

Add a New Rule

<figure><img src="/files/1RT4nlf3B628KZo6dblS" alt="" width="375"><figcaption></figcaption></figure>

This will open a dialog where you can configure an event rule.

#### Set the "When" Condition with the following options

**Source**: Select the camera device.

<figure><img src="/files/JKSXaoTf9OUOGznmUvtv" alt="" width="375"><figcaption></figcaption></figure>

**Event**: Select Analytics Event.

<figure><img src="/files/hLg9GYZlZiUEEFHjAcY9" alt="" width="375"><figcaption></figcaption></figure>

#### Set the "Do" Action with the following options

**At**: Select the camera device (Use the same camera as the source camera)

**Action**: Select Show text overlay.

<figure><img src="/files/b4PVaKaiDlo8LgENJ6vh" alt="" width="375"><figcaption></figcaption></figure>

**Text**: Here, you would use a macro or placeholder provided by the Nx AI Manager to insert the value of the inference speed from the analytics event.

The exact placeholder will depend on how your custom postprocessor is structured.&#x20;

For simple events, you might be able to pull the `$eventText` or similar variable that contains the speed you packaged.

In this case the default is sufficient, so no custom text is needed.

<figure><img src="/files/xWHI26VCKIBTxwqZNWn5" alt=""><figcaption></figcaption></figure>

When the analytics event containing the inference speed is triggered, the overlay with the throughput in frames per second will be displayed on the video feed in the Nx Meta client.

<figure><img src="/files/MMalJIWxaQGGgobafaBX" alt=""><figcaption></figcaption></figure>

***


# Show highest scoring category on video

If you have a model that returns a score you can display the highest scoring category on the video feed.

You can achieve this by leveraging the plugin's ability to generate Analytics Events and display them as a Text Overlay on the video feed with the built in Rules Engine.

#### Select a suitable model

The have a highest scoring category, you need to use a model that outputs a score. You can check this by looking at the model output for a model.&#x20;

You can quicly see this if the model has the tag '`Scores`' in the overview.

<figure><img src="/files/Sm27y9UA1hafK829YdtT" alt=""><figcaption></figcaption></figure>

Of if the detailed output shows that the model has scores in the output name.

<figure><img src="/files/UcJQG3AwVuSflSirvQxE" alt="" width="375"><figcaption></figcaption></figure>

#### Create an Event Rule in Nx Meta

In the Nx Meta Desktop client, go to the 'Camera Rules' for the camera running the AI plugin that you want to use for the FPS display.

<figure><img src="/files/JT3Ek1L6yNzwpPJyAo8v" alt=""><figcaption></figcaption></figure>

Then click the button 'Add a New Rule'.

This will open a dialog where you can configure an event rule. See the [inference framerate howto](/nx-ai-manager-v6.1.1/nx-ai-manager/howtos/show-ai-inference-framerate-on-video) for more detailed info.

#### Set the "When" Condition with the following options

**Source**: Select the camera device, it will usually be preselected.

**Event**: Select "*Analytics Event*' with the type "*Category detected*"

#### Set the "Do" Action with the following options

**At**: Select the camera device (Use the same camera as the source camera)

**Action**: Select Show text overlay.

**Text**: Here, you would use a macro or placeholder provided by the Nx AI Manager to insert the value of the inference speed from the analytics event.

In this case the default is sufficient, so not custom text is needed.

<figure><img src="/files/2LlpBmTSazCHUZ8RgZgC" alt=""><figcaption></figcaption></figure>

When the analytics event containing the category detection is triggered, the overlay with the highest scoring category will be displayed on the video feed in the Nx Meta client.&#x20;

<figure><img src="/files/hCX9l3BMDlutztnNAQal" alt=""><figcaption></figcaption></figure>

***


# Training Loop with Edge Impulse

Create a loop with the Edge Impulse training platform and the Nx AI Manager.

## General preparation

This tutorial assumes you have the following things already set up:

* Nx Cloud account.
* Nx Meta system installed.
  * System connected to Nx Cloud account.
  * Client installed.
  * Device added to configuration.
  * Nx AI plugin installed.
* Install the [sclbl-integration-sdk repository](https://github.com/scailable/sclbl-integration-sdk).
  * `git clone https://github.com/scailable/sclbl-integration-sdk.git`
  * Followed the ‘Get started’ instructions.

## Edge Impulse preparation

When building a loop with Edge Impulse there are a couple of requirements.

1. Project with a model configured.
2. API key:
   1. From the main dashboard page find the tab ‘Keys’ and select it.
   2. If there are no keys press ‘Add new API key’.
   3. Enter a name and select the role ‘Admin’.
3. Project ID:
   1. The project ID is shown in a box on the project info page.

      <figure><img src="/files/qEgAMoR5A1kdnXKf1M3u" alt=""><figcaption></figcaption></figure>
   2. The project ID is also located in the URL of the page. For instance in\
      <https://studio.edgeimpulse.com/studio/1234> the project-id is 1234.<br>

## Steps

We will describe the loop in 6 steps.

1. Add model to the Nx AI Cloud
2. Update postprocessor
3. Configure model and postprocessor
4. Run the model
5. Check the data
6. Update the model in the cloud
7. Update model in the system

### Step 1: Add model to Nx AI Cloud

We will add the model of the training platform to the Nx AI Cloud.

#### For Edge Impulse

1. Log in the Nx AI Cloud and click ‘Add a model’.&#x20;
2. Select ‘Edge Impulse’, enter the API key and project ID.&#x20;
3. Click ‘Link model’.

Now the model will be downloaded from Edge Impulse and will be prepared for use.<br>

### Step 2: Update postprocessor

We will take an example postprocessor from the sclbl-integration-sdk and modify it with a specific condition to filter only specific images to send.

#### For Edge Impulse

1. Open the sclbl-integration-sdk into your favourite editor.
2. Open the following Python script: postprocessor-python-edgeimpulse-example/postprocessor-python-edgeimpulse-example.py
3. Find the location where the API is set and replace it with the API-key from your project. Look for the line: `edgeimpulse.API_KEY`
4. Find the line `upload_sample = False` and modify the code below that to suit your condition.
5. Compile and install the postprocessor using the instructions in the README.md of the project.

### Step 3: Configure model and postprocessor

We will select the model and postprocessor.

1. In the Nx client go to the device, right click and select ‘Camera settings’.
2. Go to the tab ‘Plugins’ and select the ‘Nx AI Manager’.
3. Click ‘Manage server’ and click the icon with left-right arrows called ‘Replace model’ or ‘Assign a new model’ if a model was not already assigned.
4. Choose the model from step 1 and click ‘Ok’.
5. Under the heading ‘Assigned Models’, select ‘Post Processor’ and select your post processor from step 2. If you didn’t rename it from the README it is called ‘Example-Postprocessor’.
6. Under the heading ‘Runtime Status’, click ‘Start’ and wait for the status to be ‘Runtime is running’.
7. Click ‘Ok’ at the bottom.<br>

### Step 4: Run the model

To run the model the device must be visible in the layout.

1. Double click your device to make it visible.
2. On the top right click the left icon ‘Object search’ if the model contains bounding boxes to see them.<br>

### Step 5: Check the data

Now we are going to check the incoming data, label it and then retrain.

#### Edge Impulse

See also the section on [importing models from Edge Impulse](/nx-ai-manager-v6.1.1/ai-models-support/importing-models/from-edge-impulse).

1. Go to the project page.
2. Select ‘Data acquisition’.
3. Training and Test should contain data coming from the server.
4. Label the data.
5. Select ‘Retrain model’ and then ‘Train model’.

### Step 6: Update the model in the cloud

We are going to update the model in the Nx AI Cloud.

1. Two ways to update the model
   1. Go back to the ‘Manage server’ in the Nx Client / AI plugin and click the name of the model.
   2. Log into the AI Cloud and go to the model.
2. Click the button ‘Update from \<TrainingPlatform>’

<br>

### Step 7: Update model in the system (WorkInProgress)

We are going to update the models in the system.

1. (option not available yet) In the Nx Client / AI plugin click the button ‘Update models’.
2. Manually delete the model cache. Follow these instructions:

On the commandline:

```
cd /opt/networkoptix-metavms/mediaserver/var/nx_ai_manager/cache
rm *
```

In the Nx Client / AI plugin stop and start the plugin


# Introduction

In this section of our documentation, we describe the Nx AI Cloud platform.&#x20;

The Nx AI Cloud platform effectively allows for the following:

* The Nx AI Cloud platform allows you to manage all the AI models that are available to you. Thus, you can see which AI models you can access, for which devices, and you can manage the version(s) of your user-generated models.
  * For [data scientists](/nx-ai-manager-v6.1.1/ai-models-support/introduction), the Nx AI Cloud platform allows for the conversion of your own models.
* The Nx AI Cloud platform allows you to (mass) deploy models to target edge devices. Effectively, you can "swap" the model pipelines that run on an edge device (configured using the [NX AI manager](/nx-ai-manager-v6.1.1/nx-ai-manager/getting-started)) remotely and change the device configuration.
  * The latter can be done at a large scale: you can flexibly group devices and deploy model pipelines to groups of devices.

The following diagram shows some of the functions of the Nx AI Cloud platform and the relationships between the edge device(s) and model training platforms.

{% @mermaid/diagram content="flowchart LR
I1\[TFlite]-->A
I2\[PyTorch]-->A
I4\[...]-->A
I3\[EdgeImpulse]-->A
subgraph Platform
A\[Model Conversion]-->B\[Model Library]-->C\[Model management]
end
C<-->E
subgraph Edge
D\[Pre-processing]-->E\[Model]-->F\[Post-processing]
end
H\[Input]-->D
F-->G\[Output]" %}

In the next sections, we detail each functionality.

### Advanced

Only for advanced users: direct links to the Nx AI Cloud interface. In 6.1.1, the Nx Cloud UI is officially supported only on Nx Meta.\
\
Nx Witness:\
<https://admin.sclbl.nxvms.com/c/default>\
Nx GO:\
<https://admin.sclbl.nxvms.com/c/nxgo>\
Nx Meta:\
<https://admin.sclbl.nxvms.com/>\
MyCityVision:\
<https://admin.sclbl.nxvms.com/c/mycity>


# Deployment and device management

How do we use the platform for model deployment.

The Nx AI Cloud platform allows you to (mass) deploy model pipelines to target devices. Effectively, you can "swap" the model pipelines that run on a device (configured using the [Nx AI Manager](/nx-ai-manager-v6.1.1/nx-ai-manager/getting-started)) remotely and change the device configuration. The former you can do at a large scale, you can clone model pipelines to all the devices in a site.

## An overview of your sites and devices

The Sites tab on the Nx AI Cloud platform shows all sites available to your cloud account.&#x20;

If the site is on-line the system shows up with a green icon and the "Devices" button is available.

<figure><img src="/files/6p3gRShoS2GMsleYxCVT" alt=""><figcaption><p>overview of sites with one on-line system</p></figcaption></figure>

If the site is off-line you cannot continue until the system comes on-line.

<figure><img src="/files/mF3GPTg19mK2wPZpqaKu" alt=""><figcaption><p>listing of one site that is off-line</p></figcaption></figure>

## Overview of a single site

If you select an on-line site you are directed to the site devices page.

<figure><img src="/files/fAYPa3WpRNSyVp7tVubk" alt=""><figcaption><p>overview of a single on-line system</p></figcaption></figure>

The page lists all the devices and their groups as well as the currently configured pipelines. A separate page shows all the servers.

<figure><img src="/files/jRePRmw7Xlh4BCyTLBGA" alt=""><figcaption></figcaption></figure>

The same page when a site is off-line does not show devices, details and servers. You cannot do anything on that site now.

<figure><img src="/files/Nc9Ht6ZoiYGGSGQ9SdYX" alt=""><figcaption><p>overview of a single off-line system</p></figcaption></figure>

## AI model pipeline deployment and management

You can assign or replace a model pipeline on a single device or you can select a pipeline from a device and clone it to all the selected devices.

### Assign or replace a model pipeline on a single device

To assign or replace a model on a single device you need to click on the 'Pipelines' button on the system or devices page. You will be directed to the device page.

<figure><img src="/files/roaL8iRpOTT81tDIqY4R" alt=""><figcaption><p>Overview of a single device in the system</p></figcaption></figure>

To assign an additional model pipeline to the device you can press 'Add a new pipeline' or the 'add' button. To replace a model pipeline press the button with the left-right arrow in it.

You will be directed to the 'Models listing'.

On the top you get a new notification bar that shows you are currently in assigning mode. You can use that to go back to the models listing page, back to the device or cancel the whole assignment process.

Once you have found the model you want to assign or replace use the button 'Add to \[x] pipeline'.&#x20;

<figure><img src="/files/oE3vrxBhR9ZqIxJWZOtM" alt=""><figcaption><p>models listing</p></figcaption></figure>

Now, the model pipeline will be deployed and if all is well you will see the following notice and after that you are redirected back to the device page.

<figure><img src="/files/iaCl5fdnWW6ea2qQpzcO" alt=""><figcaption></figcaption></figure>

### Clone a model pipeline to all the selected devices

To start you need to be on a devices page, which shows you all devices in the site or all devices connected to a server.

From here you can start by clicking the "Clone this pipeline" button next to the device information for a single device.

<figure><img src="/files/lHhTYuyOvuV7GcrsRE5V" alt=""><figcaption></figcaption></figure>

Once pressed, a new column with checkboxes will be visible for the available devices and you can use them to select the devices you want to assign a new model pipeline to. Devices that are not available will not get a checkbox to select.

<figure><img src="/files/yidY1nCzRYkzruWNORKk" alt=""><figcaption><p>multiple server selection activated</p></figcaption></figure>

If you select one or more servers the 'Apply this pipeline' button will activate. Pressing this button will start the model assignment just like updating a model for a single device.

Note: assigning a model pipeline to multiple devices will always **remove all other** pipelines and replace them with the new pipeline you selected.


# Upload your model

After you have [created your model](/nx-ai-manager-v6.1.1/ai-models-support/custom-models), you can easily upload it to make it available in Nx Cloud and, thereby, to all your Nx Servers.&#x20;

First, click on the "Add a custom model" button <img src="/files/3G98VfWLzzp8uQiCCSCL" alt="" data-size="line">  at the top left of the sidebar:

<figure><img src="/files/aOfdHaOeFJ1JHeIUBeUI" alt=""><figcaption></figcaption></figure>

If more organisations are available to your account, you may need to choose an organisation before continuing:

<figure><img src="/files/Dnmuhe7Cypu51kTBSQ7u" alt=""><figcaption></figcaption></figure>

Next, choose a type of model that matches the model file you have. In the case of an ONNX model it will be the "ONNX" upload button:&#x20;

<figure><img src="/files/LI9ZL9YLOAQHXmF3Ph28" alt=""><figcaption></figcaption></figure>

Drag and drop your ONNX model into the area or click the area and choose a model from your file system. Then choose a name for your model, add some documentation, and if needed set its [normalization values](/nx-ai-manager-v6.1.1/nx-ai-cloud/upload-your-model/normalization):

<figure><img src="/files/WDtRTnpxIvWdMgEgz4Gv" alt=""><figcaption></figcaption></figure>

When you drop a model on the upload area, some details will be pre-filled based on the filename, please add the documentation with more relevant information about your model.

<figure><img src="/files/p36mPOqpfoDvuEY4ndnE" alt=""><figcaption></figcaption></figure>

In the next field you may select extra conversions that you can enable for the AI accelerator architecture that you need for your implementation.&#x20;

<figure><img src="/files/83y9dqimf2sdaNiCZgUb" alt=""><figcaption></figcaption></figure>

The [normalization](/nx-ai-manager-v6.1.1/nx-ai-cloud/upload-your-model/normalization) will be pre-filled with some common defaults. If your model has different settings they can be set here, or edited later.

After the model is uploaded, the selected conversions will be run to generate optimized model files for each selected target [AI accelerator](/nx-ai-manager-v6.1.1/ai-accelerators-support/supported-ai-accelerators).

When this is completed you will get an email and the model is [ready to be used](/nx-ai-manager-v6.1.1/nx-ai-cloud/use-your-model) on your devices.


# Normalization

Think of a digital image as a big grid filled with tiny colored dots, which we call "pixels." Each pixel contains colors—usually a mix of red, green, and blue. These colors have values that range from 0 to 255. A value of 0 means there is none of that color in the pixel (it's totally off), and a value of 255 means that color is shining as brightly as possible.

Now, suppose we want to make it easier for a computer to analyze and compare different images. One way to do this is by "normalizing" the color values in the image. Normalization is just a fancy term for adjusting these values so they fit within a new, consistent range, which helps in comparing images more fairly.

Here's how the normalization formula works:&#x20;

* **normalized\_color\_value = (original\_color\_value - mean) / scale;**

In this formula:

* **original\_color\_value** is the initial value of the color (anywhere from 0 to 255).
* **mean** is the average of all the color values. Subtracting this mean helps center our color values around zero.
* **scale** is a number we divide by to keep the values within a new, smaller range. This could be something like the largest color difference or another predefined number.

For example:

* If the average (mean) color value is 100, and our scale is 50:
  * For a pixel with a red color value of 150:
    * We subtract the mean: $$150−100=50$$
    * Then we divide by the scale: $$50 / 50​=1$$
  * So, the normalized red value would be 1.

This process transforms the original color values to a new scale that's easier for the computer to work with, typically ranging between -1 and 1 or 0 and 1. It's like changing the measurements of something from a variety of units (inches, centimeters, yards) all into meters so that they are easier to compare.

In the NX AI Cloud, you can set the normalization values as an integer array. For instance, for an RGB image, you might use \[123,234,242] for means and \[100,232,33] for scales. If you do not want to transform the **original\_color\_value**, just use 0 for mean, and 1 for scale— that is, \[0,0,0] and \[1,1,1] for an RGB input.


# Use your model

After the model is uploaded the model is ready to be used on your devices. To use a model on your device follow the steps below.

* Open the device settings in the NX Meta Client by right clicking on a device label and selecting the last option.

<figure><img src="/files/JetAw5bv3BzdlYw6LW6c" alt=""><figcaption></figcaption></figure>

* Navigate to the plugin tab with the NX AI Manager plugin.
* Activate the plugin and then the device if necessary.
* You may need to click apply and refresh the tab.
* By default a model will be active.

<figure><img src="/files/SFsfkmuMGVXz268L1e5q" alt=""><figcaption></figcaption></figure>

* A popup window with the NX AI Manager Client will open on the device details page.
* On this page you can switch the model by clicking the switch model button <img src="/files/Wyfmd9H35XnLArtAEI41" alt="" data-size="line">.

<figure><img src="/files/dBIE3LshWP7VdhzVfFcw" alt=""><figcaption></figcaption></figure>

* You can then browse through the model library and select the uploaded model. (In this example a face locator model is used).

<figure><img src="/files/cSPEqe4rKnYJB3AeGISf" alt="" width="375"><figcaption></figcaption></figure>

* The model will then be assigned and automatically downloaded to the server with the device.

<div><figure><img src="/files/5TSKJSfYKXCFzx85yo6D" alt="" width="375"><figcaption></figcaption></figure> <figure><img src="/files/6Tehngc6gvrMPIePNHsf" alt="" width="375"><figcaption></figcaption></figure></div>

* After which the model is also visible on the plugin tab in the NX Meta Application (you might need to click refresh again for the updates to become visible).

<figure><img src="/files/qvUSKvHZ2Csak4Oxzjcr" alt=""><figcaption></figcaption></figure>


# How to get support

To get support for the Nx AI Manager please use your Nx support contact.

You can also check to the [troubleshooting](/nx-ai-manager-v6.1.1/support-and-troubleshooting/troubleshooting) steps to help solve the problem.

More support is available in the support pages and community forums

{% embed url="<https://support.networkoptix.com/>" %}

{% embed url="<https://support.networkoptix.com/hc/en-us/community/topics>" %}

### Other support pages

{% embed url="<https://www.networkoptix.com/developers/nx-toolkit>" %}

{% embed url="<https://meta.nxvms.com/>" %}


# Troubleshooting

Troubleshooting the Nx AI Manager

## Is it a problem in the AI manager

This troubleshooting section will only help with the Nx AI Manager and does not address other problems in the Nx Meta or Nx EVOS system.

When you are troubleshooting you need to make sure that you are trying to use AI with the AI Manager and not another function of Nx EVOS, the Nx AI Manager is different than the built in motion detection for example.


# OS checks

## Check Internet and DNS Connectivity

To get started with the AI Manager, ensure you have internet access and a functioning DNS. To troubleshoot and verify internet connectivity and DNS functionality on a Linux system, follow these steps:

#### 1. Test Internet Connectivity

To test if you have internet connectivity, you can try pinging an external server like Google's DNS server.

* **Ping an external server:** Run the following command:

  ```bash
  ping -c 4 8.8.8.8
  ```

  This command sends four ICMP echo requests to Google's DNS server. If you receive replies, your internet connection is working.

#### 2. Verify DNS Functionality

If your network connection is active but you suspect DNS issues, you should verify that DNS resolution functions correctly.

* **Ping a domain name:** To check if DNS is working, try pinging a domain name:

  ```bash
  ping -c 4 google.com
  ```

  If the domain name resolves to an IP address and you receive replies, your DNS works. If not, you might see an error like "unknown host," indicating a DNS resolution issue.

## **Failed to create SHM:: Function not implemented**

The issue is that the image on the device has not been compiled with the SHM flag. We work with shared memory. (By default, Ubuntu, and Debian, have SHM enabled.) In other words, `CONFIG_SYSVIPC=y` needs to be enabled.

Explanation and Clarification:

1. **The Issue**:

   The problem arises because the software image (likely an operating system or kernel) on a particular device was not compiled with the SHM (Shared Memory) flag enabled. This flag is necessary for certain features related to shared memory to work properly.
2. **Shared Memory**:

   Shared memory is a method of inter-process communication (IPC) that allows multiple processes to access the same segment of memory. This is essential for certain applications that need to exchange data quickly without going through the slower process of sending data through sockets or files.
3. **Ubuntu Default**:

   Ubuntu (which is likely the base operating system being used) has shared memory support enabled by default. This means that the necessary settings for shared memory are turned on in the standard Ubuntu configuration.
4. **CONFIG\_SYSVIPC=y**:

   This is a configuration option in the Linux kernel. `CONFIG_SYSVIPC` controls whether System V IPC (which includes shared memory, semaphores, and message queues) is enabled in the kernel. The `y` indicates that this option should be enabled. Without this setting, shared memory and other IPC mechanisms would not be available.

Summary: The current device's software image doesn't support shared memory because the SHM flag wasn't enabled during compilation. To fix this, the `CONFIG_SYSVIPC=y` option needs to be enabled in the kernel configuration.


# System checks

Things to check on the system if everything is running correctly, and how to check it.

### Is Nx Meta version 6.1 or later installed <a href="#is-nx-meta-version-6.0-or-later-installed" id="is-nx-meta-version-6.0-or-later-installed"></a>

You need Nx Meta 6.1 or later for the Nx AI Manager plugin. Follow the instructions to [Install Network Optix](/nx-ai-manager-v6.1.1/nx-ai-manager/install-network-optix). You need both the client and server programs, but the server can be installed on another machine with even another OS than the client. Typically the **server** is a computer connected to some **cameras** over the network, and the **client** can be installed on your **local workstation** or **laptop**.

### Is the storage full <a href="#is-the-storage-full" id="is-the-storage-full"></a>

Can you store data or is the system low on resources. If the system has no space left the Nx AI Manager will not work correctly.

### Is the camera working <a href="#is-the-camera-working" id="is-the-camera-working"></a>

Do you see images in the camera preview window? If not, check the camera control app that came with the camera if that does show images.

* If the camera is not working there, you need to fix the camera input first before trying any next steps.
* If the camera is working but not visible in Nx Meta, please try to fix the camera display in Nx Meta first before trying any next steps.

### Are the necessary drivers installed <a href="#are-the-needed-drivers-installed" id="are-the-needed-drivers-installed"></a>

#### NVIDIA Orin accelerated <a href="#nvidia-orin-accelerated" id="nvidia-orin-accelerated"></a>

If you're running on NVIDIA Orin - is a current version of NVIDIA Jetpack installed?

#### Hailo Accelerated Devices <a href="#hailo-accelerated-devices" id="hailo-accelerated-devices"></a>

In order for the runtime using Hailo accelerators to work, the correct Hailo Runtime (**hailort)** needs to be installed. Currently, the Nx AI Runtime supports Hailo driver version **4.17.0**. Ensure that the correct runtime is installed.

### Is the system registered to a cloud user <a href="#is-the-system-registered-to-a-cloud-user" id="is-the-system-registered-to-a-cloud-user"></a>

If the plugin is detected and you are greeted with this message:

<figure><img src="https://files.gitbook.com/v0/b/gitbook-x-prod.appspot.com/o/spaces%2F4Ho7de78I0gSMd4YY72l%2Fuploads%2Ff8RbtUAIVoB88Knm5UnH%2Fnocloud.png?alt=media&#x26;token=d281363e-7b9f-41d6-93a0-e229306c80ff" alt=""><figcaption></figcaption></figure>

It is most likely that your system is not connected to a cloud account. If you do not have an Nx Cloud account yet, follow the steps at [Install Network Optix](/nx-ai-manager-v6.1.1/nx-ai-manager/install-network-optix) . The plugin requires a system to be connected to the cloud account to work.To add your system to your cloud account, right click on your system in the left-hand pane and select the Cloud tab:​​​

<figure><img src="https://files.gitbook.com/v0/b/gitbook-x-prod.appspot.com/o/spaces%2F4Ho7de78I0gSMd4YY72l%2Fuploads%2F3C4k7HioYwwHZKNh3KUo%2Fcloud_management.png?alt=media&#x26;token=2c02991d-cb36-42c5-8b60-514b213be44a" alt=""><figcaption></figcaption></figure>


# Plugin checks

Things to check if the plugin is running correctly, and how to check it.

First make sure the [System checks](/nx-ai-manager-v6.1.1/support-and-troubleshooting/troubleshooting/system-checks) are all correct.

### Check the plugin installation <a href="#check-the-plugin-installation" id="check-the-plugin-installation"></a>

You can check on the device settings page if the "Nx AI Manager" plugin is present in the plugins tab. If the plugin tab is not present or if the "Nx AI Manager" is not there you need to download the plugin.

{% hint style="warning" %}
Ensure you download Nx Meta version 6.0 or later to be able to use the Nx AI Plugin.
{% endhint %}

#### Is the plugin available <a href="#is-the-plugin-available" id="is-the-plugin-available"></a>

When opening the camera settings the Integrations tab is available, and on the Integrations tab the Nx AI Manager is present

<figure><img src="/files/ZIxIQiOjSHyupJnXoxB9" alt=""><figcaption></figcaption></figure>

#### Is the plugin installed <a href="#is-the-plugin-installed" id="is-the-plugin-installed"></a>

If the plugin is not available, check if the plugin is present (and what version it is)

* You need Nx Meta version 6.0 or newer.
* The plugin version needs to be version 4.0 or higher. This document uses the plugin version 4.6 or higher.
  * It could be the case that the plugin is not properly installed. Follow the instructions at [Starting the Nx AI Manager Plugin](/nx-ai-manager-v6.1.1/nx-ai-manager/install-plugin), and check that the plugin file is installed at:`/opt/networkoptix-metavms/mediaserver/bin/plugins/nxai_plugin/libnxai_plugin.so`
  * If the plugin file is not there, or it exists but the server still cannot detect it, follow the instructions at [Manual Plugin Installation](/nx-ai-manager-v6.1.1/nx-ai-manager/advanced-configuration/manual-plugin-installation)​

### Are the needed drivers installed <a href="#are-the-needed-drivers-installed" id="are-the-needed-drivers-installed"></a>

#### NVIDIA Orin accelerated <a href="#nvidia-orin-accelerated" id="nvidia-orin-accelerated"></a>

If you're running on NVIDIA Orin - is a supported version of [NVIDIA Jetpack](/nx-ai-manager-v6.1.1/ai-accelerators-support/supported-ai-accelerators) installed?

#### Hailo Accelerated Devices <a href="#hailo-accelerated-devices" id="hailo-accelerated-devices"></a>

In order for the runtime using Hailo accelerators to work, the correct Hailo Runtime (**hailort)** needs to be installed. Currently, the Nx AI Runtime supports several [Hailo driver](/nx-ai-manager-v6.1.1/ai-accelerators-support/supported-ai-accelerators) versions. Ensure that the correct runtime is installed.

### Is the Nx AI Runtime running <a href="#is-the-nx-ai-runtime-running" id="is-the-nx-ai-runtime-running"></a>

#### Check the Nx EVOS plugin interface <a href="#check-the-nx-evos-plugin-interface" id="check-the-nx-evos-plugin-interface"></a>

If the plugin is not running the Plugin tab will show a deactivated toggle for the device.

<figure><img src="/files/qy3KWFHcfsPWRCS4m5ot" alt=""><figcaption></figcaption></figure>

You can enable the NX AI Runtime by clicking the Device active switch.

<figure><img src="/files/2wATdJxfVA0VYVz3YZnx" alt=""><figcaption></figcaption></figure>

### Check the command line

Check the console if it is running with the following command:

```shell
ps axu | grep -E -i -w "sclbld|sclblmod"
```

The return should be something similar to if the plugin is running:

```shell
ps axu | grep -E -i -w "sclbld|sclblmod"
network+  385021  0.0  0.3  92392 24304 ?        Sl   12:01   0:06 /opt/networkoptix-metavms/mediaserver/var/nx_ai_manager/nxai_manager/bin/sclblmod -i /tmp/nxai_manager.sock -o /tmp/nxai_plugin.sock -l 1 -v 1
network+  385039  1.2  1.5 723136 126216 ?       Sl   12:01   3:19 /opt/networkoptix-metavms/mediaserver/var/nx_ai_manager/nxai_manager/bin/sclbld /opt/networkoptix-metavms/mediaserver/var/nx_ai_manager/nxai_manager/bin/../cache/chain_0.json 5 12 15 19 21 24 27 28 1287469062 103984861 1 1 0
```

If none of these lines are present, the AI Manager is not running.

## Is it a model problem?

First make sure that the model actually has something to detect. For example if you're using a model that is expecting vehicles, that will not be detected on a camera that is viewing an empty warehouse.

### Is the model working

Check if the module is started by looking into the logfile at `/opt/networkoptix-metavms/mediaserver/bin/plugins/nxai_plugin/nxai_manager/etc/sclblmod_log.log`.

```bash
tail -f /opt/networkoptix-metavms/mediaserver/var/nx_ai_manager/nxai_manager/etc/sclblmod_log.log
```

It should show updates like the following:

```
MODULE: 1720434595502 000000070: Notice: Model run  3727 
MODULE: 1720434595502 000000064: Notice: Postprocesssing [1]
MODULE: 1720434595502 000000104: Notice: Converting bboxes to image space 
MODULE: 1720434595503 000000193: Notice: Could not find bboxes array in inference results.
MODULE: 1720434595503 000000077: Notice: Could not find scores output in inference results.
MODULE: 1720434595503 000000070: Inference completed with BBoxes: 3, Scores: 0, Counts: 0
```

If there is no output, or the only output is an error message the plugin is not running.

### Is the model downloaded

Check if the model file exists and has the correct size

See if the model with the ID from the cloud is downloaded and has the correct size.&#x20;

For example the **80-Classes Object Detector \[640x640]** model has the following model ID: `7b65bdda-39da-4259-b1bf-b0d1dbb7b162` on the model detail page:

<figure><img src="/files/0Jzryw3P7nkUAMEhNYbR" alt=""><figcaption></figcaption></figure>

Models are downloaded into the local filesystem at:

```
/opt/networkoptix-metavms/mediaserver/bin/plugins/nxai_plugin/nxai_manager/cache/ 
```

Open a SSH session to the server and use the `ls` command to list the model file and verify if it matches the expected size - because the file usually is encrypted&#x20;

```bash
sudo ls --full-time -h /opt/networkoptix-metavms/mediaserver/bin/plugins/nxai_plugin/nxai_manager/cache/encrypted/459d2273-1514-431c-9d34-f5b72f3bfe20.onnx
-rw-r--r-- 1 networkoptix-metavms networkoptix-metavms 24M 2025-10-21 10:12:52.853826476 +0200 /opt/networkoptix-metavms/mediaserver/bin/plugins/nxai_plugin/nxai_manager/cache/encrypted/459d2273-1514-431c-9d34-f5b72f3bfe20.onnx

```


# Things to try

Things you can try to narrow down where the problem might be.

### Have you tried turning it off and on again <a href="#have-you-tried-turning-it-off-and-on-again" id="have-you-tried-turning-it-off-and-on-again"></a>

Always try to restart the system to see if it fixes the problem.&#x20;

Also check all cables (by unplugging them and plugging them back in)

#### Restart the Nx Meta Mediaserver <a href="#restart-the-nx-meta-mediaserver" id="restart-the-nx-meta-mediaserver"></a>

For the plugin to be detected after install, make sure to restart the Nx Meta mediaserver. This can be done through the Nx Meta mediaserver web interface.Navigate to "\<Server IP Address>:7001" in your web browser. Go to the **Servers** tab, and click the restart button.

### Reinstall the Nx Meta Mediaserver <a href="#reinstall-the-plugin" id="reinstall-the-plugin"></a>

Firstly completely remove the existing version of the plugin by following the [uninstall instructions](/nx-ai-manager-v6.1.1/nx-ai-manager/advanced-configuration/removing-the-plugin). And then follow the [install instructions](/nx-ai-manager-v6.1.1/nx-ai-manager/install-plugin) for a clean installation with the plugin.

### Try another version <a href="#try-another-version" id="try-another-version"></a>

There might be a newer version of Nx Meta or Nx EVOS available. The new version might have improved functionality. Download the [new version](https://meta.nxvms.com/download/releases) and install it to see if your problems are solved.Check if the latest beta fixes your problem, or if it worked in a previous release.

* Nx AI Manager plugin - see the [install instructions](/nx-ai-manager-v6.1.1/nx-ai-manager/install-plugin).
* Nx Meta Mediaserver - check if there is a [newer version or a beta](https://meta.nxvms.com/download/releases) available.
* Nx Meta client - check if there is a [newer version or a beta](https://meta.nxvms.com/download/releases) available.

### Try another model <a href="#try-another-model" id="try-another-model"></a>

See if you can install another model and see if it gives correct results. Verify that the model is [downloaded](/nx-ai-manager-v6.1.1/support-and-troubleshooting/troubleshooting/plugin-checks) and running.

### Try another camera <a href="#try-another-camera" id="try-another-camera"></a>

Check if the model works on another camera. If no other camera is available, you can point the camera at a different scene.

### Try to reset an unresponsive USB camera

When you are using a USB webcam on a linux system, those cameras can get lost in sleep mode and become unresponsive.

You can unplug it and reconnect it to get the camera back, but that's kind of hard to do when you're remote.

To remotely reset a USB camera you can login to the console of the machine where the camera is connected and use the command `usbreset` to get a list of the USB devices. Resetting a specific device can then be done with `usbreset 001/001` for example to reset a device that is located on that bus number.

```bash
user@system: usbreset 00n/00m
```

### Try a test camera stream <a href="#try-a-test-camera-stream" id="try-a-test-camera-stream"></a>

If no camera change is possible, try a video feed instead of a live camera. You can then try a [test camera](https://support.networkoptix.com/hc/en-us/articles/32766623336087-The-Testcamera-IP-Camera-Emulator) with a video which is especially suited for your model.

### Try another computer <a href="#try-another-computer" id="try-another-computer"></a>

If you have another computer available, install the Nx Meta Mediaserver or Nx EVOS and check if it works on that system.The Nx AI Manager in Nx Meta and Nx EVOS can run on systems like the Raspberry Pi or the NVIDIA Orin Nano and on many standard PCs and laptops.


# Collecting system information

## Collect Logs when you contact us

If our troubleshooting guide and our support pages do not resolve your issue, and you need to contact Network Optix Support, please send us a log package from your server.&#x20;

Don’t worry, you don’t need advanced command line knowledge. Just follow the following steps exactly.

{% tabs %}
{% tab title="Linux" %}

### Step 1. Log in to your server

* Open a terminal (Mac/Linux) or PuTTY (Windows).
* Connect using the login details we gave you. For example:

```bash
ssh user@SERVER_IP
```

***

### Step 2. Put the logger.sh script on your server

{% file src="/files/HxjSKASWmEHBZsAxU47W" %}

* Save the above  **`logger-4.7.1.sh`** file to your computer and rename it to **`logger.sh`**.
* Upload it to your server’s home folder:
  * On **Mac/Linux**:

    ```bash
    scp logger.sh user@SERVER_IP:~
    ```
  * On **Windows**: use **WinSCP** (drag and drop) or **pscp**.

***

### Step 3. Allow the script to run

On the server, type:

```bash
chmod +x logger.sh
```

***

### Step 4. Run the script

Start the logger:

```bash
./logger.sh
```

The script will run for a minute or two.\
When finished, it will create this file on your server:

```
nxai_troubleshooting.tgz
```

***

### Step 5. Copy the log file back to your computer

* On **Mac/Linux**:

  ```bash
  scp user@SERVER_IP:~/nxai_troubleshooting.tgz .
  ```
* On **Windows**: download the file with **WinSCP** or **pscp**.

***

### Step 6. Send it to Support

Attach the file **`nxai_troubleshooting.tgz`** to a support ticket at [https://support.networkoptix.com](https://support.networkoptix.com/)&#x20;

***

Done! You’ve now collected all the logs we need to help you quickly.
{% endtab %}

{% tab title="Windows" %}

### Step 1: Download the script

Download the "**logger\_windows.ps1**" script (In this example the path `C:\Users\virtual\Downloads` is used, where the username is `virtual`. Please adjust these in the following code fragments for your own situation.

{% file src="/files/Gm6hJQKxRFi8nvnSH6Ec" %}

### Step 2: Run PowerShell

Open PowerShell or PowerShell ISE **as administrator**.&#x20;

<figure><img src="/files/yh29sDFQybRMcXuv2CKP" alt="" width="375"><figcaption></figcaption></figure>

And go to the directory where you downloaded the system information script.

### Step 3: Run the logger script in PowerShell

Run the logger script in the same PowerShell window.

```powershell
PowerShell -ExecutionPolicy Bypass -File .\logger_windows.ps1 
```

The script will run for a minute or two.

{% hint style="warning" %}

#### Permission errors

The script might fail with a message about missing permissions, use the [troubleshooting](#troubleshooting) steps below steps to check and fix these.
{% endhint %}

When finished, it will create a zip file with all the collected information in the user home directory on your server:

```ps1
C:\Users\virtual\nxai_troubleshooting.zip
```

### Step 4: Send the collected files to support

Attach the file **`nxai_troubleshooting.zip`** to a support ticket at [https://support.networkoptix.com](https://support.networkoptix.com/)&#x20;

Done! You’ve now collected all the logs we need to help you quickly.

***

### Troubleshooting

#### Check if the script may run with execution policy

Check with `Get-ExecutionPolicy` if the Execution Policy allows scripts - it may show "*Restricted*" Which will mean no scripts are allowed.

```ps1
PS C:\Users\virtual\Downloads> Get-ExecutionPolicy
Restricted
```

#### Set an execution policy so the script may run

If the unblocking the script does not work you can try to set a new execution policy with `Set-ExecutionPolicy -Scope CurrentUser Bypass` and confirm that you want to change when prompted.&#x20;

```ps1
PS C:\Users\virtual\Downloads> Set-ExecutionPolicy -Scope CurrentUser Bypass
```

If you check the Execution Policy after setting it, the new value should be "*Bypass*"

```ps1
PS C:\Users\virtual\Downloads> Get-ExecutionPolicy
Bypass
```

If setting a new policy does not work, contact your IT administrator to unblock the script for you.

This execution policy will not be reset when you close PowerShell so it it available the next time.
{% endtab %}
{% endtabs %}


# Controlling the server and the plugin

How to start and stop the server an the plugin.

## Start the server

The Mediaserver will usually be started automatically when the computer it is installed on is started.

However it also can be started manually from the command line with either of the following commands:

{% tabs %}
{% tab title="Nx Meta" %}

```sh
sudo service networkoptix-metavms-mediaserver start
```

```sh
sudo systemctl start networkoptix-metavms-mediaserver.service
```

{% endtab %}

{% tab title="Nx Witness" %}

```sh
sudo service networkoptix-mediaserver start
```

```sh
sudo systemctl start networkoptix-mediaserver.service
```

{% endtab %}

{% tab title="Nx Go" %}

```sh
sudo service networkoptix-mediaserver start
```

```sh
sudo systemctl start networkoptix-mediaserver.service
```

{% endtab %}

{% tab title="Windows" %}
Open the services application and select the Network Optix Server service that matches your customization.\
The server can then be controlled by the context menu or the start, restart and stop links.
{% endtab %}
{% endtabs %}

## Restarting the server

Restarting the server can be done on the command line too.

{% tabs %}
{% tab title="Nx Meta" %}

```sh
sudo service networkoptix-metavms-mediaserver restart
```

```sh
sudo systemctl restart networkoptix-metavms-mediaserver.service
```

{% endtab %}

{% tab title="Nx Witness" %}

```sh
sudo service networkoptix-mediaserver restart
```

```sh
sudo systemctl restart networkoptix-mediaserver.service
```

{% endtab %}

{% tab title="Nx Go" %}

```sh
sudo service networkoptix-mediaserver restart
```

```sh
sudo systemctl restart networkoptix-mediaserver.service
```

{% endtab %}

{% tab title="Windows" %}
Open the services application and select the Network Optix Server service that matches your customization.\
The server can then be controlled by the context menu or the start, restart and stop links.
{% endtab %}
{% endtabs %}

But it can also be done on the built-in Nx Meta Server web interface by accessing the webpage at port `:7001` for instance, at `https://localhost:7001/` or use the IP address for localhost `https://127.0.0.1:7001/`  or use your external IP address with the same port.&#x20;

<figure><img src="/files/whyJumtgmBdrT0MYvBVa" alt=""><figcaption></figcaption></figure>

## Stopping the server

Stopping the server on the command line is similar to starting and restarting.

{% tabs %}
{% tab title="Nx Meta" %}

```sh
sudo service networkoptix-metavms-mediaserver stop
```

```sh
sudo systemctl stop networkoptix-metavms-mediaserver.service
```

{% endtab %}

{% tab title="Nx Witness" %}

```sh
sudo service networkoptix-mediaserver stop
```

```sh
sudo systemctl stop networkoptix-mediaserver.service
```

{% endtab %}

{% tab title="Nx Go" %}

```sh
sudo service networkoptix-mediaserver stop
```

```sh
sudo systemctl stop networkoptix-mediaserver.service
```

{% endtab %}

{% tab title="Windows" %}
Open the services application and select the Network Optix Server service that matches your customization.\
The server can then be controlled by the context menu or the start, restart and stop links.
{% endtab %}
{% endtabs %}

## Starting the plugin

To start the plugin the plugin needs to be enabled by toggling the switch next to the title and then also enabling the 'Device Active' toggle that will then appear.

<figure><img src="/files/qy3KWFHcfsPWRCS4m5ot" alt=""><figcaption><p>The popup window showing that the plugin is disabled for this device</p></figcaption></figure>

<figure><img src="/files/vucyTGRHDzEAYOuBa6wA" alt=""><figcaption><p>The popup window showing that the plugin is enabled for this device, but the device is not active.</p></figcaption></figure>

## Stopping the plugin

Stopping the plugin when it is running can be done from within the Nx Client.

To stop the plugin all devices on a server need to be disabled by switching the 'Device Active' toggle to off.

<figure><img src="/files/2wATdJxfVA0VYVz3YZnx" alt=""><figcaption><p>The popup window showing that the plugin is enabled and the device is active.</p></figcaption></figure>


# Q\&A

## I don't see any bounding boxes in the Nx Client <a href="#i-dont-see-any-bounding-boxes-in-the-nx-client" id="i-dont-see-any-bounding-boxes-in-the-nx-client"></a>

First make sure that the model actually has something to detect. For example if you're using a model that is expecting vehicles, that will not be detected on a camera that is viewing an empty warehouse.If the camera actually sees something that should be detected you can check if the objects view is active. If the notifications or another tab is active the bounding boxes will not be displayed. When you switch to the objects tab the bounding boxes should show up. If there are still no bounding boxes, please go through the [plugin checks](/nx-ai-manager-v6.1.1/support-and-troubleshooting/troubleshooting/plugin-checks), [system checks](/nx-ai-manager-v6.1.1/support-and-troubleshooting/troubleshooting/system-checks) and [things to try](/nx-ai-manager-v6.1.1/support-and-troubleshooting/troubleshooting/things-to-try) sections to solve the problem.

<figure><img src="https://files.gitbook.com/v0/b/gitbook-x-prod.appspot.com/o/spaces%2F4Ho7de78I0gSMd4YY72l%2Fuploads%2FUxDv5NA4DaORwcb9tGgP%2Fimage.png?alt=media&#x26;token=6c34c3d4-f646-4dda-a9f2-d3ce2b949e41" alt=""><figcaption></figcaption></figure>

<figure><img src="https://files.gitbook.com/v0/b/gitbook-x-prod.appspot.com/o/spaces%2F4Ho7de78I0gSMd4YY72l%2Fuploads%2FtfickTa2IFac8PNGeXPY%2Fimage.png?alt=media&#x26;token=4985cf72-ed7f-4b48-9612-2d565e3f873e" alt=""><figcaption></figcaption></figure>

If the Objects tab is not available after freshly enabling the plugin, you might need to restart your client first.

## The Nx AI Runtime is having trouble starting <a href="#the-nx-ai-manager-cannot-be-started" id="the-nx-ai-manager-cannot-be-started"></a>

### No matching architecture found for model

This message might appear if you have a model assigned that is not compatible with your current hardware or runtime. The Nx AI Manager should prevent you from assigning incompatible models, but it might still happen if devices were moved to different servers, or if the runtime on the server was changed.&#x20;

This problem could be solved by assigning a different compatible model or reselecting the runtime.

### AI Manager failed to create listening socket

The AI Manager tries to create a socket file on the filesystem to communicate with the Network Optix Mediaserver. It will try to create this file at the default location.

If a file exists, or for whatever reason the AI Manager does not have permissions to write to the default location, this will fail.&#x20;

Making this path available should solve the issue. On devices where this is not an option, the file location can be controlled through .ini settings. See [Enable .ini settings](/nx-ai-manager-v6.1.1/nx-ai-manager/advanced-configuration/enable-.ini-settings)

### If all else fails

If the message still appears, there could be a problem with your installation. Try manually installing the Nx AI Manager [manual Installation](/nx-ai-manager-v6.1.1/nx-ai-manager/advanced-configuration/manual-plugin-installation).

<figure><img src="https://files.gitbook.com/v0/b/gitbook-x-prod.appspot.com/o/spaces%2F4Ho7de78I0gSMd4YY72l%2Fuploads%2F2aceU4cO160rtVwxloDa%2Fruntime_status_nostart.png?alt=media&#x26;token=5db6d9e4-c393-40a6-92d2-102705e1aca0" alt=""><figcaption></figcaption></figure>

## How can I check if the Metadata is generated <a href="#how-can-i-check-if-the-metadata-is-generated" id="how-can-i-check-if-the-metadata-is-generated"></a>

> I noticed that plugin stops generating metadata for some reason Is there any log or additional information I can collect for you so it would be useful in this case?

For advanced users, it might be advisable to check the output log of the Nx Mediaserver to see if any errors are logged. The log can be gathered by executing:

{% tabs %}
{% tab title="Linux" %}

```sh
sudo journalctl -u networkoptix-metavms-mediaserver.service
```

Please note that depending on your installed version this may be different.
{% endtab %}

{% tab title="Windows" %}
Please contact support for detailed instructions.
{% endtab %}
{% endtabs %}

## Is it possible to send output to a different endpoint? <a href="#is-it-possible-to-send-output-to-a-different-endpoint" id="is-it-possible-to-send-output-to-a-different-endpoint"></a>

No this is not possible. It is possible to access the data and pass it through. See [External Postprocessing](/nx-ai-manager-v6.1.1/nx-ai-manager/advanced-configuration/external-postprocessing)

## The bounding boxes appear to be out of sync with the stream

This issue occurs when the visualized stream differs from the one used for AI inference. It typically happens when using a [test camera](https://support.networkoptix.com/hc/en-us/articles/32766623336087-The-Testcamera-IP-Camera-Emulator). The problem usually arises from a mismatch between the primary and secondary streams, leading to the visualization of a different stream than the one used for AI processing. For instance, if the plugin operates on the secondary stream while you are viewing the primary stream, it can appear as though the bounding boxes are out of sync in the video:

In this case, to fix the issue where the plugin operates on the secondary stream while you are viewing the primary stream, either set the plugin to use the Primary stream or view the ‘Low’ resolution stream in the Client:

<figure><img src="https://mail.google.com/mail/u/1?ui=2&#x26;ik=c0def2cba3&#x26;attid=0.2&#x26;permmsgid=msg-a:r-2168785569618819936&#x26;th=191792f7d5bbb8d8&#x26;view=fimg&#x26;fur=ip&#x26;sz=s0-l75-ft&#x26;attbid=ANGjdJ8lXNyzRSaNphCAACkVJjOUOVYmKzkcZC0DllLD045hD7Rn4RWByF8RtqAItqGTr1SzvXWU6FG6SUV4PMonq30IZ84HktwnnYqyEGIKIUgMbbAn_y0nHyT931s&#x26;disp=emb&#x26;realattid=ii_m050ir0f2" alt=""><figcaption></figcaption></figure>

<figure><img src="/files/NiFRMqBGAje6GqreR9nR" alt=""><figcaption></figcaption></figure>

## How to install the nightly version?

{% hint style="warning" %}
Only if our support team has requested you install the nightly version of the AI manager. The support team will provide the installation instructions.
{% endhint %}

## Is it safe to update?

If you want to update or re-install the Nx AI Plugin you can safely re-run the install command.&#x20;

The old version of the plugin will be removed by the install script before the new version is installed.

Your settings will be stored as far as possible. You still need to check the settings, because in some cases new options are available that require some changes. An example might be a new runtime that is available for your hardware.

## Why are some models not visible when assigning to a device

**Models** or **Model Catalogues** must be connected to the **Organization** that your site is in.

If you have chosen an **Organization** during upload, and the device you are coming from to select a model is not in any **Organization**, then only the generally available models will be visible.

If you have chosen an **Organization** and the **Site** is not the same **Organization** you have selected for the model, then the model may not be visible either.

In the upload process you can directly select a **Site** for the model instead of an **Organization** - but this is not advised, because the models will then not be available for the other **Sites** in your **Organization**.

The best way to solve this is to add your **Site** to an **Organization** and to add the uploaded models to a **Catalogue** that also is connected to that **Organization**.


# Introduction

This section of our documentation describes how to create vision models that can be easily deployed to your edge devices running the Nx AI Manager.&#x20;

The main model categories with seamless integration are image classification models (for instance trained on [Google's Teachable Machine](/nx-ai-manager-v6.1.1/ai-models-support/importing-models/from-teachable-machine)) and object detection (for example trained using [Ultralytics](/nx-ai-manager-v6.1.1/ai-models-support/importing-models/from-ultralytics)). However, integrating any vision model is possible with a few tweaks.

## High-level process

Our standard process for creating and uploading your models to the Nx AI Cloud is to:

1. Create a model using your favorite training tools. You can create an ONNX model from scratch or import a model using one of the training tools we integrate with.
2. Once you have your model ready, you can upload it to the Nx AI Cloud platform; it will automatically be converted it to several different device-type (see the [AI Accelerators section](/nx-ai-manager-v6.1.1/ai-accelerators-support/introduction-to-oaxs)) optimized versions and ensure that it can be deployed to any edge device running the Nx AI manager efficiently.


# Supported models

Next to creating your own models, it is very common to train AI or ML models using some training platform or tool which are subsequently imported to the Nx AI cloud. In this section of our docs we provide information on how to export models using various model training tools, and we give tips on how to make sure your model can be uploaded to the Nx AI cloud and deployed using the Nx AI manager.

Below we discuss training models using:

* [Edge Impulse](/nx-ai-manager-v6.1.1/ai-models-support/importing-models/from-edge-impulse).
* [Tensorflow / tensorflow lite](/nx-ai-manager-v6.1.1/ai-models-support/importing-models/from-tensorflow-tflite).&#x20;
* [Teachable machine](/nx-ai-manager-v6.1.1/ai-models-support/importing-models/from-teachable-machine).
* Other platforms that allows you to export to ONNX.


# From Edge Impulse

## About Edge Impulse

![](/files/7A092vXSa6x7atLVUwHD)

*"Edge Impulse is the leading development platform for machine learning on edge devices, free for developers and trusted by enterprises."* You can find the Edge Impulse training platform [here](https://www.edgeimpulse.com).

## Preliminaries

In this section of our documentation we describe how to use the [Edge Impulse model training platform](https://edgeimpulse.com) to train advanced machine learning models for vision tasks and deploy them seamlessly using the [Nx AI cloud](/nx-ai-manager-v6.1.1/nx-ai-cloud/introduction). To follow the documentation at this point we assume that you have access to the following:

* An edge device with the [Nx AI manager installed](/nx-ai-manager-v6.1.1/nx-ai-manager/install-network-optix).
* A camera that can be used as an input source in Nx Meta as well as in stand-alone mode.
* An Edge Impulse account. Sign up for a free Edge Impulse account at <https://studio.edgeimpulse.com/>.

{% hint style="success" %}
Due to policy changes, Edge Impulse has removed the built-in YOLOv5 block. Your model will still work, but to train a new model, you'll need to re-upload the YOLOv5 block on Edge Impulse platform. This takes just 5-10 minutes, and you can follow the instructions [here](https://github.com/edgeimpulse/yolov5).

Let us know if you need any assistance!&#x20;
{% endhint %}

Once you have all of the above setup, you should be able to proceed to train your own model using edge impulse and deploy it using Nx AI Manager.&#x20;

## Quick overview

We will demonstrate how to train and deploy your own model step-by-step. And, we will show you how to re-train your model once it has been deployed in-the-field. We will cover the following steps:

1. **Model training using the Edge Impulse platform**. Note that we will not provide an elaborate walk through of the amazing capabilities of the Edge Impulse platform; these can be found in the Edge Impulse docs: <https://docs.edgeimpulse.com/docs/>.
2. **Coupling your Edge Impulse model with Nx AI cloud**. We will show how to sync your Edge Impulse model with your model catalog.
3. **Deploying (and testing) your model on your edge device**. This section will detail how to deploy your Edge Impulse model effortlessly to your edge device using the [Nx AI cloud](/nx-ai-manager-v6.1.1/nx-ai-cloud/introduction).&#x20;
4. **Retraining your model**. This step is optional, but cool. Once you have a model setup you can collect new training examples in the field and use these to retrain a model. Once done you can iterate (go back to step 1) and get better!

## 1. Model training using the Edge Impulse platform

We start the development of a novel edge AI solution by creating a new project on the Edge Impulse platform:

<img src="/files/PZ0cEb4bS55eyGTY0YIz" alt="" data-size="original">

The Edge Impulse platform is very intuitive, and allows you to upload and annotate training examples and to train object detection models. We will focus on the Edge Impulse's Yolov5 model; find a quick getting started guide here: <https://docs.edgeimpulse.com/docs/tutorials/detect-objects-using-fomo>.

The important bit for this tutorial is to train an object detection model and to select the correct Yolo models. Work through the data acquisition and impulse creation steps in the Edge Impulse platform to get to the object detection model:

![](/files/PzYJ5RtQ9GTBWPH58yQm)

<img src="/files/0kMBIbh9N2Kr79xif18K" alt="" data-size="original">

Do make sure to select the **FOMO MobileNetV2 (both 0.1 and 0.35), or Yolov5 option**. Next, after you have clicked "Start training" and the model training has finished, you are done (for now) on the Edge Impulse platform.

{% hint style="warning" %}
At this point we **only** support imports of the **FOMO MobileNetV2 and Yolov5** from Edge Impulse. We will be adding support for more Edge Impulse models shortly.
{% endhint %}

## 2. Coupling your Edge Impulse model with Nx

After training your model, you can leave the Edge Impulse platform (but do leave it open in a tab) and move to <https://admin.sclbl.nxvms.com/>. After logging in at the Nx AI cloud you will arrive at your dashboard showing your current models and devices (which might both be 0 when you are just getting started). On that page, click the click the  "Add a model" button:

<figure><img src="/files/aOfdHaOeFJ1JHeIUBeUI" alt="" width="375"><figcaption></figcaption></figure>

You may need to select an organisation first, and then you will arrive at the model upload page from where you can select the "Edge Impulse" type:

<figure><img src="/files/LI9ZL9YLOAQHXmF3Ph28" alt="" width="375"><figcaption></figcaption></figure>

At this point you can use your Edge Impulse API key and project ID to import your trained model directly from Edge Impulse.

* Your Project ID is located on the project info page in a separate box, or as the last item in the URL:

<figure><img src="/files/uW32E8FrkY5VCbDE7bst" alt="" width="375"><figcaption></figcaption></figure>

* Your API key can be found at your dashboard:

<figure><img src="/files/BAkyTntsUQ676ZPNKpYh" alt="" width="375"><figcaption></figcaption></figure>

After filling out the API- and project- keys you can click the "Link model" button, and your Edge Impulse model will be imported into your Nx AI library:

<figure><img src="/files/huGF1yzDjRgPwgNvL8XH" alt="" width="375"><figcaption></figcaption></figure>

You can obviously change the model name and documentation (as usual), but effectively, after the import, the model is directly available for deployment. Once you click "Return to models" you will see the model on the top of you model list:

<figure><img src="/files/kng09VCbljE0B4xTYc1H" alt="" width="375"><figcaption></figcaption></figure>

You are now ready to deploy your model to your selected edge device.

## 3. **Deploying (and testing) your model on your edge device**

In Nx Meta, connect to your system and open the plugin page.

<div align="left"><figure><img src="/files/50fnFvrSXr2xvSC8CgO7" alt="" width="375"><figcaption></figcaption></figure></div>

Click "Manage device" and select the model you created.

<div align="left"><figure><img src="/files/Bsuflmp8IK06zeFZuIos" alt="" width="375"><figcaption></figcaption></figure></div>

And click on "Add to pipeline" then the model will be selected and you will return to the plugin.

The video feed should then show some detection boxes when you activate the object tab.

<div align="left"><figure><img src="/files/dgrtQMMNTw0xpyqnnG3r" alt="" width="375"><figcaption></figcaption></figure></div>

That's it really; you have just trained and deployed a pretty nifty AI model to your edge device.

## 4. **Retraining your model**

Although steps 1 to 3 basically got you started, there are a few nice tricks you can use to improve your solution over time. Particularly, you can set the on-device AI manager to capture new training images when needed.&#x20;

Set up a [postprocessor](https://github.com/scailable/sclbl-integration-sdk/tree/main/postprocessor-python-edgeimpulse-example) from the integration SDK for image uploads. You can set the postprocessor up to send images every `N` seconds or when the result is below a certain `P` value.

Let the system run with the postprocessor for a while.

At this point you can navigate back to your Edge Impulse project, label the uploaded images, retrain the model, and then [re-deploy your model](#3.-deploying-and-testing-you-model-on-your-edge-device).

## Wrap up

The above covers the basics of "training-using-Edge-Impulse-deploying-using-Nx". Very cool stuff, and in this article we really only scratched the surface of the potential applications.


# From Nota AI

## About Nota AI

Nota AI provides a software optimization platform, focusing on reducing the time and resources required to develop an artificial intelligence (AI) model and **optimizing** it for the target device.

Nota AI developed [NetsPresso](https://www.nota.ai/netspresso), which is a hardware-aware AI model optimization platform. The platform focuses on optimizing AI models to run efficiently on various hardware devices. They provide a set of [free optimized models](https://launchx.netspresso.ai/models) for various tasks.

## Deploying models

To upload NetsPresso models to Nx AI Platform, you need to export your AI model from [LaunchX](https://launchx.netspresso.ai/main) to **TFlite**. Then, upload the **TFLite** (`.tflite`) in the [platform](/nx-ai-manager-v6.1.1/nx-ai-cloud/upload-your-model) on the NetsPresso section. \
In addition to the model, there a couple of descriptive fields: model name and documentation, where meta-data about the model can be saved.

<figure><img src="/files/LI9ZL9YLOAQHXmF3Ph28" alt=""><figcaption><p>Where to upload a NetsPresso model in the Nx AI Cloud.</p></figcaption></figure>

After the model is converted on the Nx AI Platform, the next step is to set the right mean and std (standard deviation) values that were used during the training phase of the model. \
To do so, go to the model page, then click on the *Edit* button to access the interface for setting the normalization values and other model parameters such as the model input width & height.\
When done editing, make sure to click on the *Save* button at the bottom of the page.

<figure><img src="/files/83y9dqimf2sdaNiCZgUb" alt=""><figcaption><p>Interface for editing the model normalization values.</p></figcaption></figure>


# From Teachable Machine

## About Teachable Machine

![](/files/XqGrvqAUhmYJqiM4nskm)

[Teachable Machine](https://teachablemachine.withgoogle.com) is a web-based tool that makes creating machine learning models fast, easy, and accessible to everyone.

## Model deployment from Teachable Machine

We currently support super easy exports from image classification models trained using Teachable Machine to Nx AI Platform. The steps are:

1. First, start a [new standard image project in Teachable Machine](https://teachablemachine.withgoogle.com/train/image).
2. Next, follow the Teachable machine instructions to train your image classification model. You can find useful instruction video's [here](https://www.youtube.com/watch?v=DFBbSTvtpy4).
3. After the model has been trained Click the "Export Model" button (see image).\
   ![](/files/JduB2JOYZcghGwDZIZ13)
4. Select the TensorFlow lite tab, and click Download my model.\
   \
   ![](/files/OWYSk55XuOizIFYLjE4z)
5. After few seconds "Converting model", you will be able to download a `.zip` archive&#x20;
6. Upload the zip archive directly through the admin platform.\
   \
   ![](/files/4icJ6Qi7Hp0R71TmecF1)\ <br>


---

[Next Page](/llms-full.txt/1)