Hailo Support
Deploying to Hailo chips requires the compilation of ONNX models to Hailo-ONNX format. And due to the nature and involvement in the compilation process, it's prohibitively complicated to automate this process on the cloud. Hence, we provide a workaround where the user compiles the model locally, then uploads the compiled Hailo-ONNX file to the Nx AI Cloud.
Compiling an ONNX model
Requirements
Python 3.8
Python environment
Hailo Dataflow compiler and HailoRT Python API installed in that environment
A set of calibration images (similar to images used to train the model)
Example
In this example, we'll go over the compilation steps of a Yolov4-tiny model trained on the COCO dataset. Albeit, most of the instructions mentioned here apply to all kinds of ONNX models, with some requiring changes based on the model.
To compile the model, you can run the Python script below after changing the ONNX path.
The code performs the following tasks:
it transpiles the ONNX model to another format optimized for Hailo,
it quantizes and optimizes the model using the supplied set of calibration images,
it compiles the model to a HEF and embedds it inside an ONNX file as an operator, while the keeping the pre-processing and post-processing intact. Please note that this step returns an ONNX file that can have different input & output names and shapes.
Finally, a new metadata field, named
chipis injected in the ONNX to save which Hailo chip the model was optimized for. This needed by the Nx AI Cloud to determine the target chip of the model.
The value of chip can be either hailo for Hailo-8 chips or hailo-8l for Hailo-8L chips.
After all the aforementioned steps are executed, a new ONNX file is generated. The latter needs to have his IOs metadata (names & shapes) adjusted. The Python script below is used for that purpose, it creates a new ONNX model with the adjusted inputs and outputs. The idea of the script is to make sure the generated ONNX is conforming to Nx's ONNX requirements.
To adapt these two scripts for any other ONNX model, make sure to check out the TODO comments and adjust them accordingly.
Deploying on a machine with Hailo-8 or Hailo-8L chips
The first step is to verify that you have a compatible HailoRT driver installed. Please check out this table to determine if your driver version is supported. For general Hailo driver install see here (you will need to register for the Hailo Dev Zone). For the Raspberry Pi AI HAT+ see here for install instructions. For the Raspberry pi AI Kit see here.
Next, install the Nx AI plugin by following these instructions.
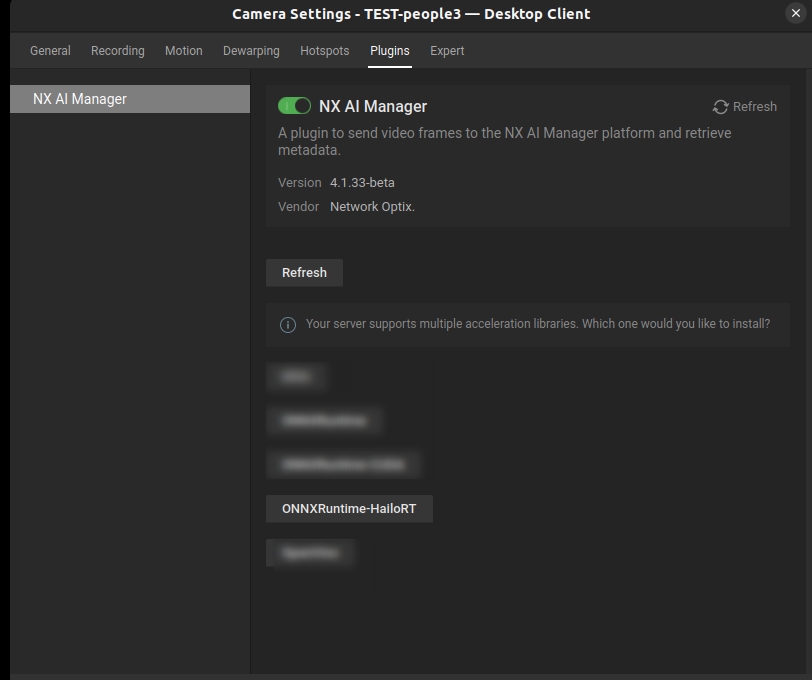
If all is well, you should be able to select the Hailo runtime when enabling the Nx plugin as shown below:

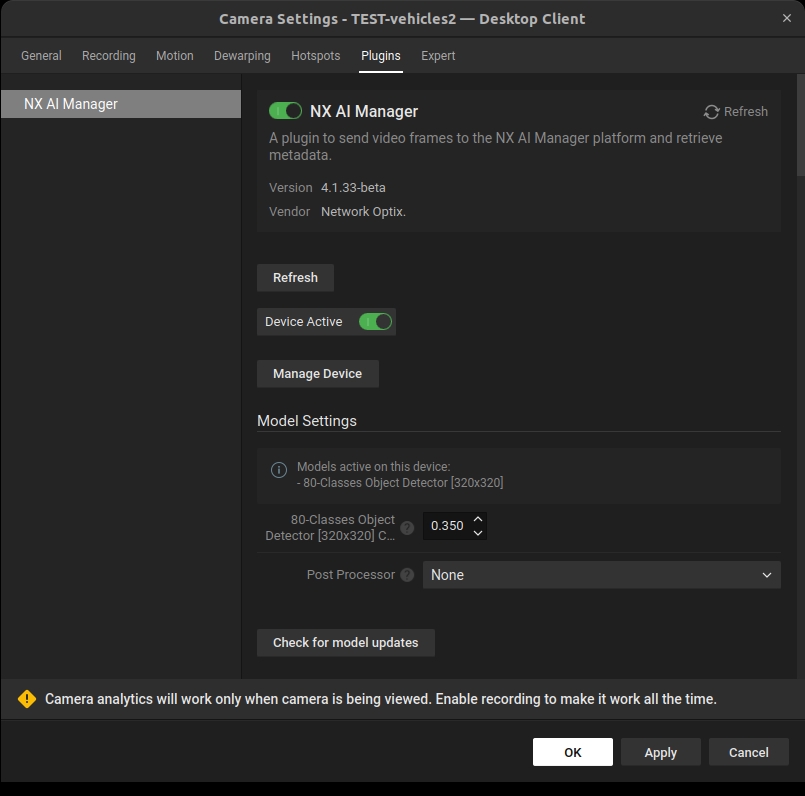
After the installation is finished, the plugin interface will look something like this:

To manually verify that the Hailo runtime is downloaded and set up, feel free to check out the content of the
binfolder of the AI Manager and make sure it contains these files: - libhailort.so.4.xx.0 (xx is the minor version of the library) - libonnxruntime_providers_hailo.so -libonnxruntime_providers_shared.so - libRuntimeLibrary.so
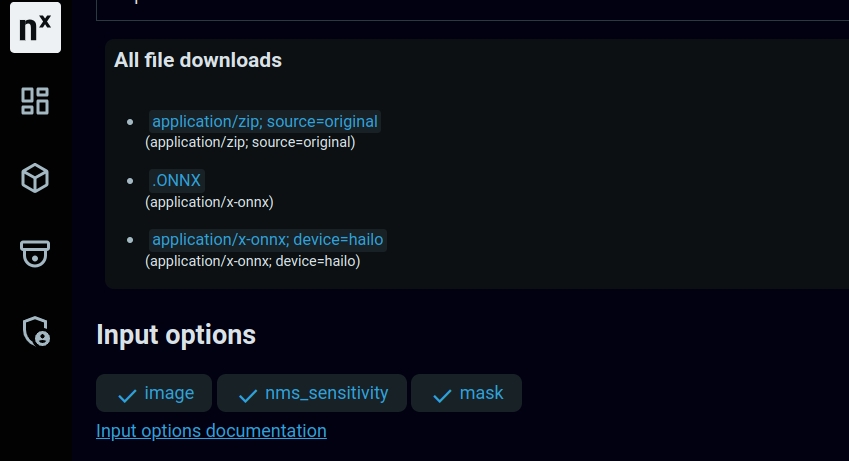
Finally, to deploy a model that can be accelerated on the Hailo chip, make sure that it has a
application/x-onnx; device=hailoorapplication/x-onnx; device=hailo-8lbased on the Hailo chip (Hailo-8 or Hailo-8L) model file in the Nx AI Cloud:

If that is not the case, you'll need to manually compile the ONNX model and upload the generated model to the cloud as illustrated in the example above.
Limitations
Number of parallel models
The Nx AI Manager offers the ability to operate multiple AI models at the same time. This flexibility allows you to efficiently manage resources and optimize the performance of your AI applications. However, it's important to consider the limitations of the hardware you're using. Specifically, each Hailo chip, whether it's the Hailo-8 or the Hailo-8L, is capable of running only one model at a given time. Therefore, the number of models you can run concurrently on a single machine directly corresponds to the number of Hailo chips installed in that machine. Failing to account for this limitation may lead to the AI Manager's failure.
Monitoring
How to Enable Hailo Monitoring with hailortcli monitor
To monitor Hailo usage with the hailortcli monitor command, you need to set a specific environment variable. Follow these steps:
Edit the Media Server Service Configuration:
Add the following line to the
/etc/systemd/system/networkoptix-metavms-mediaserver.servicefile to set the necessary environment variable:The updated configuration file should look like this:
Restart the NX Media Server:
After updating the configuration file, restart the Network Optix Media Server for the changes to take effect. You can do this by running one of the following commands:
or
Run hailortcli
HAILO_MONITOR=1 hailortcli monitor

PCIe descriptor page size error
If you encounter the following error (actual page size may vary), it indicates that your host does not support the specified PCIe descriptor page size:
This issue is common on ARM64 devices like the Raspberry Pi AI Kit. To resolve it, add the following configuration to /etc/modprobe.d/hailo_pci.conf. If the file does not exist, create it and set the max_desc_page_size to the value mentioned in the error (e.g., 4096):
You can add this configuration by running the following command:
Reboot the machine for the changes to take effect. Alternatively, you can reload the driver without rebooting by executing these commands:
Experimental .ini setting
.ini settingExplicitly setting multiple Nx AI runtime engines is controlled by an .ini file. This .ini file does not exist by default and must be created by the user.
Create an empty file by running:
Then restart the mediaserver:
Once the mediaserver is restarted, the .ini file should be filled with defaults. Each setting should have a description in the .ini file.
Now, you can set multiple runtimes through:
Last updated